
Creality Spider Hot End Review and Assembly Guide

In this article, we take a look at Creality’s Spider hot end upgrade, which offers an improved filament flow rate and higher temperature capability, and can be installed on any Creality printer with a standard Bowden hot end. But is the Spider hot end upgrade worth the price?
In this article, we will walk through the installation process for the Creality Spider hot end step by step, and then provide the results of our testing to help you decide if this is an upgrade you should purchase.
We purchased and installed this upgrade on a Creality Ender 3 V2, but you can also use it with other printers in the Ender 3 series, the Ender 5 series, or the CR-10 series. Note that the S1 series, which uses a direct drive extruder, is not compatible with the Spider hot end upgrade.
Note: Creality Experts receives a commission for items you purchase from this page, at no additional cost to you. For more information, please see our affiliate link policy.
First Impressions

Click here to view the Spider hot end upgrade on Amazon.
The kit includes everything you need, including the required tools and a few extra parts. We did notice that it does not include a heater cartridge—since the standard cartridge in the existing hot end is the same size, you will use it with the new hot end.
The kit does include a new rod-style temperature probe, but also includes an adapter to allow you to use the probe from your existing hot end. We opted to use the new probe, since the rod style promises to be more secure.
Overall, the hot end has a high quality feel. It uses mostly all metal parts with the exception of the small clips which hold the PTFE tube.
The Spider hot end is simple to install. Follow these steps to install the hot end:
Spider Hot End Installation Guide
Tools Required: Allen wrenches included with the kit (1.5, 2, and 2.5 sizes), wire strippers, solder/soldering iron or wire nuts.
Part 1: Installing the Thermistor into the New Hot End
1.. Remove the black hot end sock from the new hot end.
2.. Open the included packet of thermal grease and apply it to the thermistor probe, as shown in the picture.

3.. Loosen the small set screws on the underside of the heater block (the ones positioned above the smaller hole).
4. Insert the thermistor and tighten the set screws. Stop once you feel resistance to avoid damaging the thermistor. Wipe away any excess thermal paste from the outside of the heat block.

Part 2: Removing the existing hot end
1. Make sure you have unloaded any filament from the extruder, and turn the printer off.
2. Remove the enclosure from the hot end. This may differ based on the printer model you have, but once the enclosure is removed, the remaining steps will be the same.

Creality CR-10 (left) and Ender 3 V2 (right) enclosure removal.
3. Now that the hot end is accessible, unscrew the single set screw holding the heater cartridge in place. If it is stuck, you can heat the printer to 100C to help loosen it.
4. Gently push the heat cartridge out of the heat block. If you heated the printer up, be sure to turn the heat off before doing this, and use a tool such as the end of an Allen wrench to push the heat cartridge out.

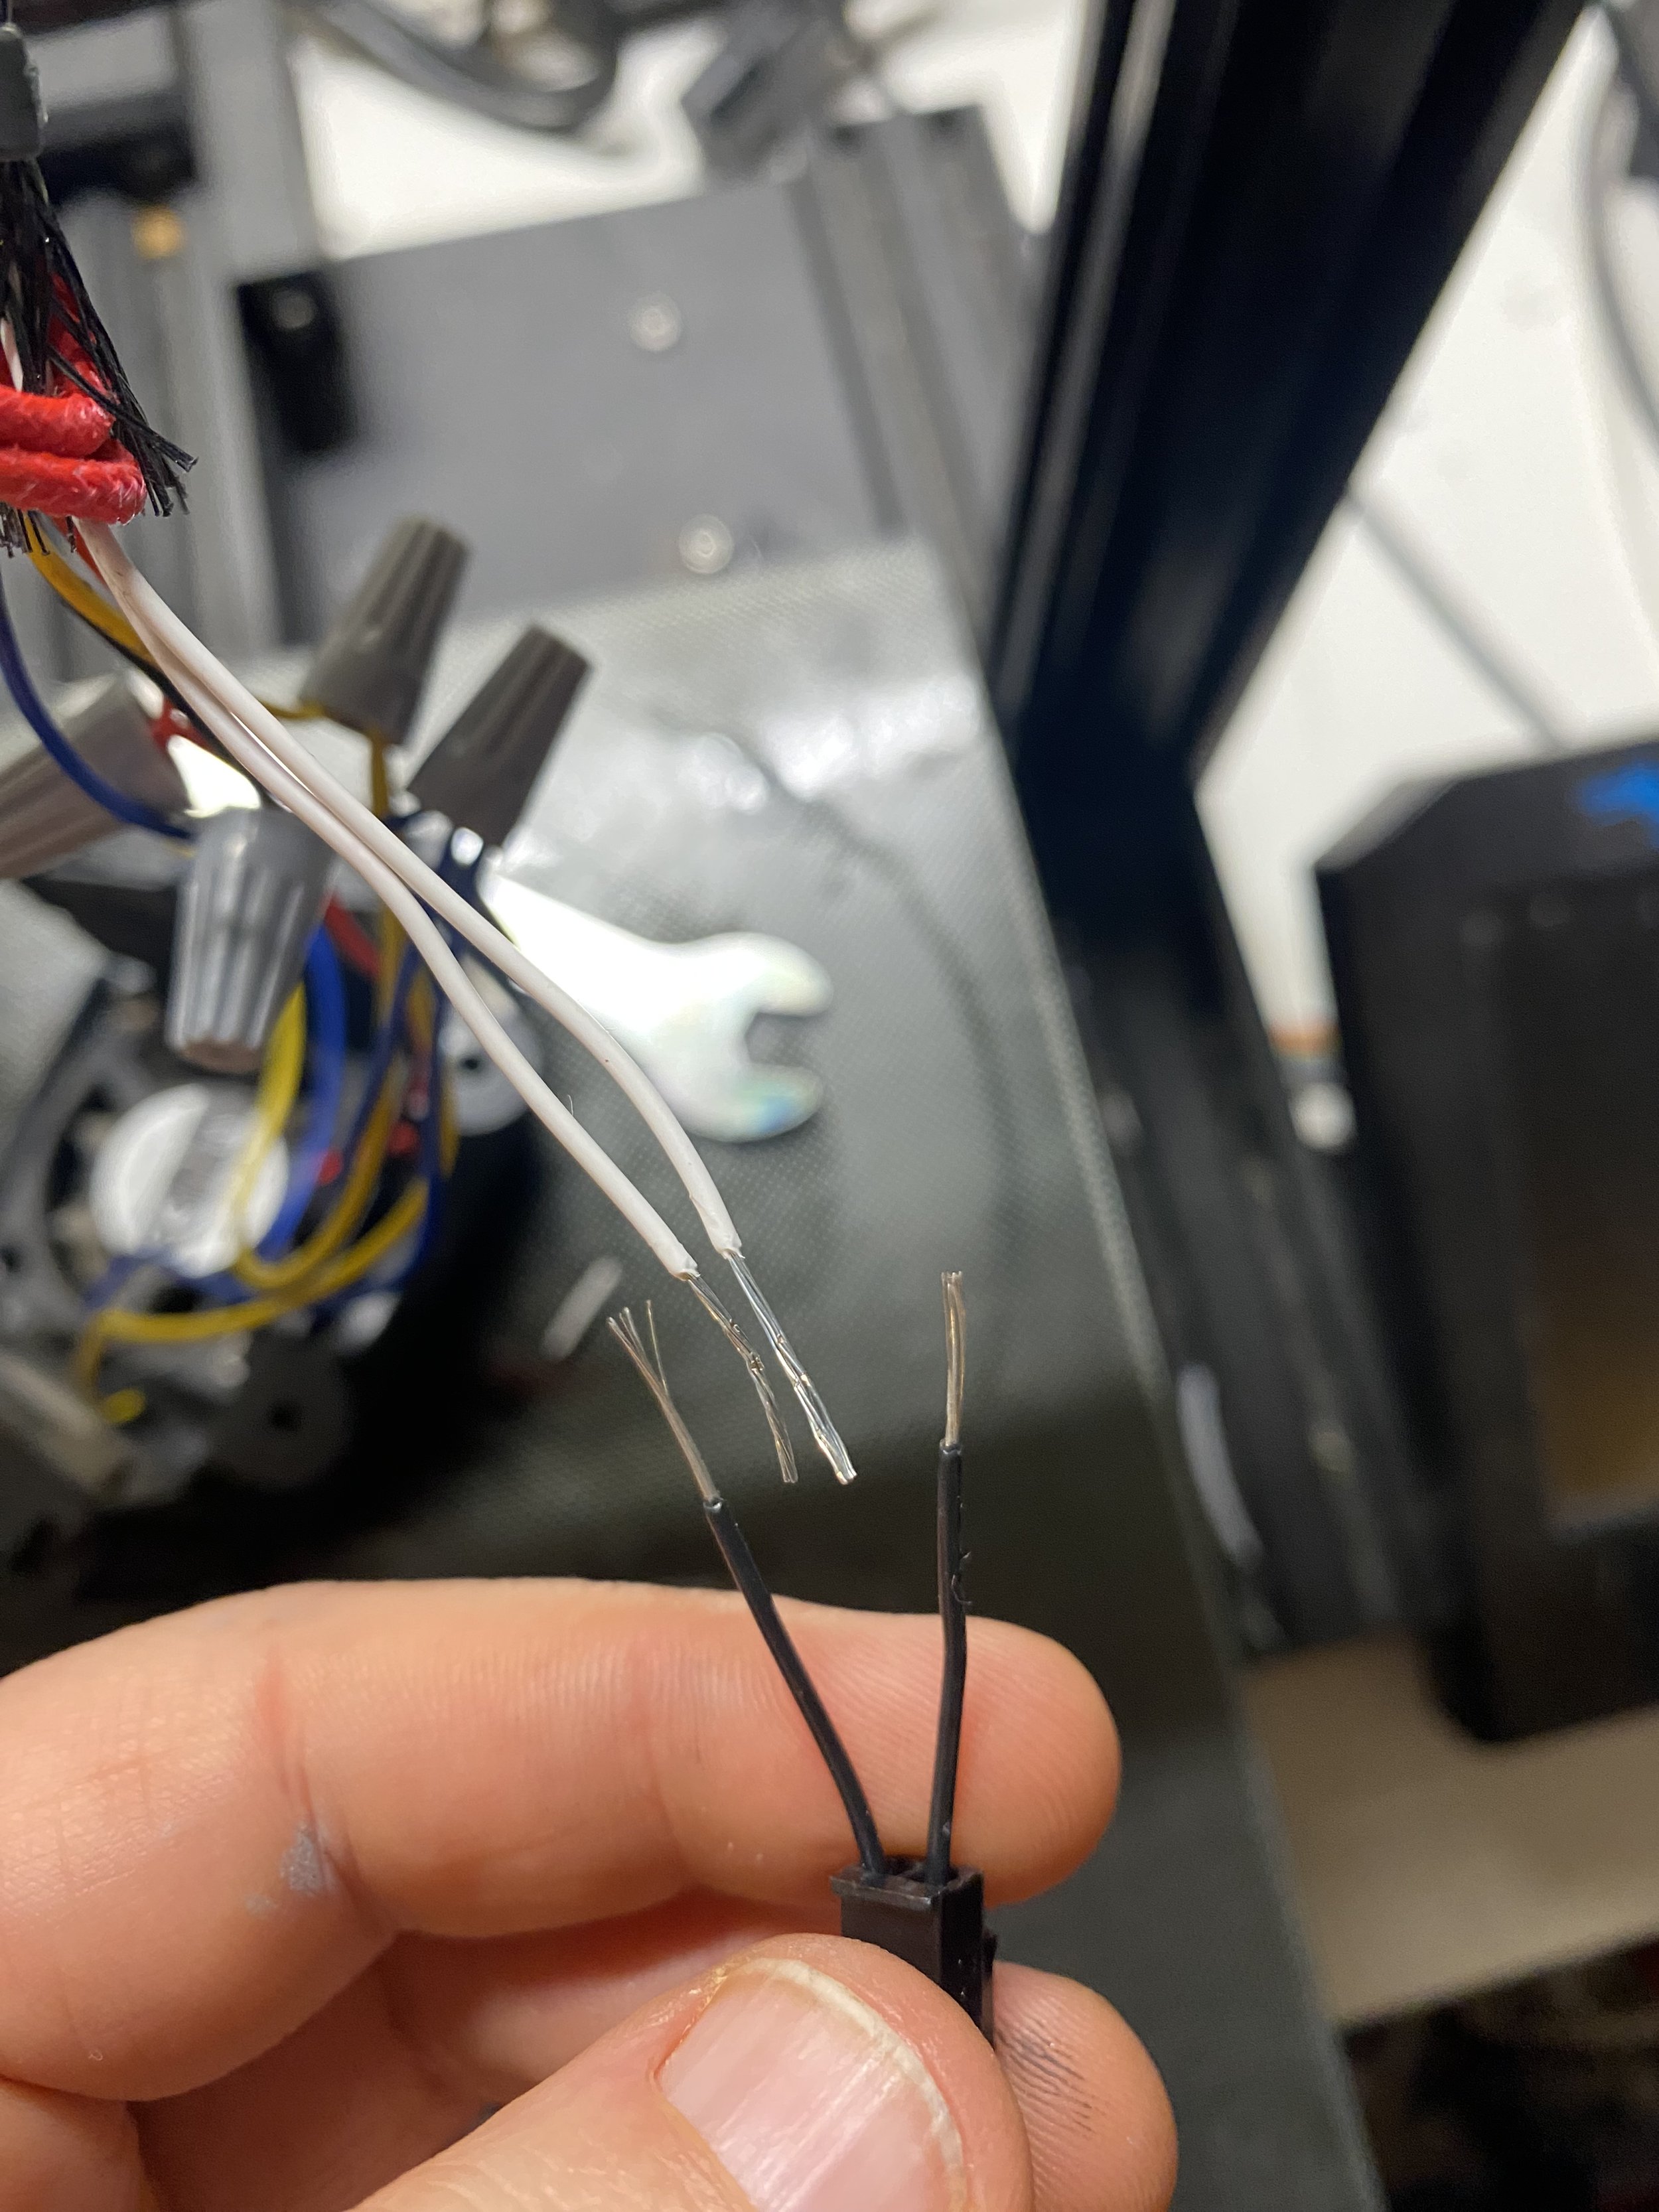
5.Find the cabling for the thermistor on the current hot end (usually two smaller white wires) and cut it using wire strippers. We will be connecting these wires to the new thermistor. You don’t need to remember which wire is which since the thermistor can be attached either way.

6. Remove the two M3 screws holding the hot end in place. Remember, if you heated the hot end previously to remove the heater, the hot end may still be quite hot — be careful!

7. Remove the PTFE tube from the top of the hot end. You can push downward on the plastic ring on the coupler to remove it. You may need to unscrew the coupler if the tube is not coming out. Use the larger wrench that is included with the printer if this is needed.

8. Set the old hot end aside.
Part 3: Installing the Spider Hot End
1.. Use the two long M3 screws included with the kit to attach the Spider hot end to the X carriage. Make sure these are very tight using the long side of the Allen wrench for leverage—if these are loose, it will have a major impact on print quality.

2. Insert the heater cartridge into the new heat block. You may need to loosen the set screw on the bottom of the heat block to slide the cartridge in. Tighten the screw once the cartridge is inserted, and ensure that it is firmly in place.


8. The thermistor uses a small connector to make it easy to replace in the future. Cut the new thermistor wire about an inch above the connector. Use the wire strippers to strip the incoming white wire and the new black wires. Connect the wires using either solder or with screw connectors

9. Push the PTFE tube into the top of the hot end, then add the small orange clip to ensure it stays in place. Since the Spider is a bimetallic hot end, the PTFE is entirely in the cold side, so any small gaps will not cause jamming problems like they do on standard hot ends.

10. Replace the black silicone hot end sock on the new hot end.
11. Re-attach the hot end enclosure to the printer.
The hot end is now fully installed and ready to use! The Spider hot end is the same size as the standard hot end, so the bed leveling should not be significantly changed, but it’s still a good idea to re-level the bed before using the new hot end. If you need help with this process, refer to our bed leveling guide.
Testing the Creality Spider Hot End
Before we started printing, we were curious to see how much more filament flow the Spider hot end could handle above the flow rate of the stock hot end. To do this, we extruded 100mm of filament at varying speeds until the extruder couldn’t keep up, resulting is a grinding sound rather than smooth extrusion. We saw that the Spider is capable of about 1.5x the flow rate of the standard Creality hot end, which is a significant improvement:
| Nozzle Size | Temperature | Resulting Flow Rate (mm³/s) | |
|---|---|---|---|
| Standard Hot-End | 0.4 | 210 | 18 |
| Spider Hot-End | 0.4 | 210 | 29 |
We weren’t too surprised by these results, since the Spider uses a larger melt zone to allow more time for the filament to melt before coming out of the nozzle.
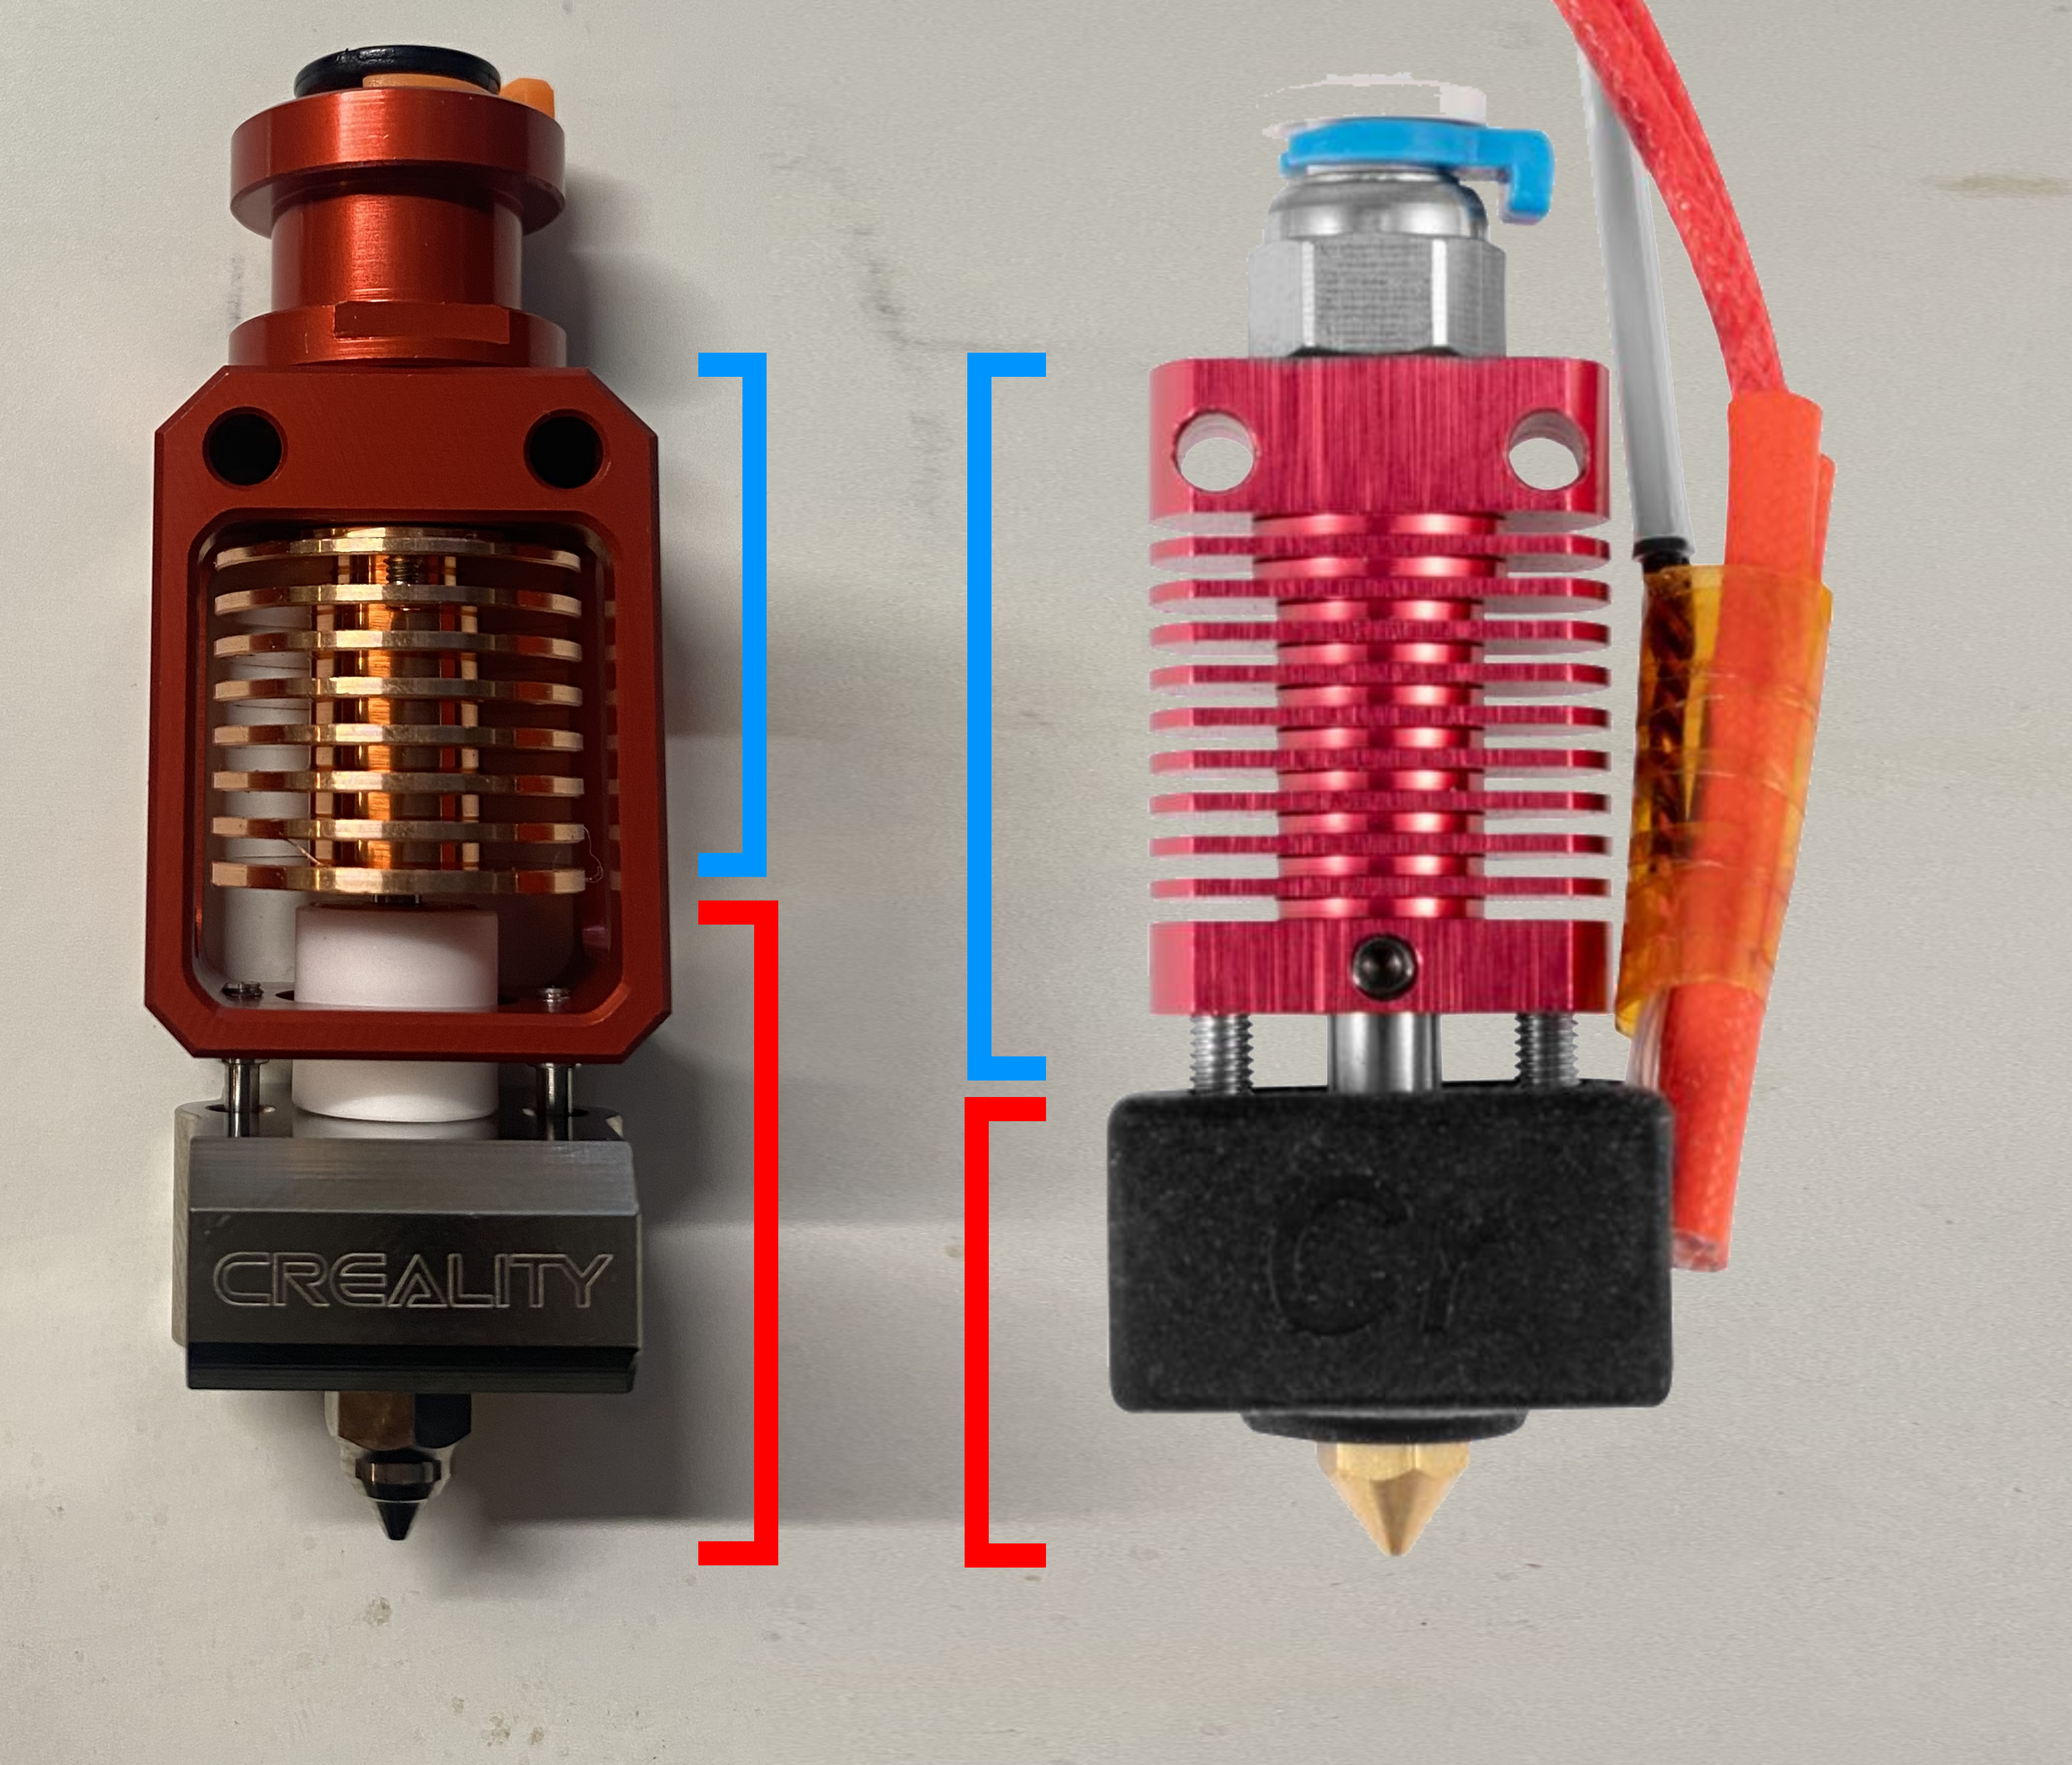
The Creality Spider hot end has an extended melt zone, which improves its maximum flow rate compared to the standard Creality hot end.
This increased flow rate will allow you to print parts faster, especially large functional parts where detailing is less important. For smaller, more detailed parts, the intricate movements required by the stepper motors will most likely be the limiting factor, so a higher flow hot end won’t increase printing speed. However, if you are printing functional parts with large layer heights and line widths for increased strength, you will be able to print substantially faster.
Since the Spider hot end uses a bimetallic heat break, it also enables you to print higher temperature filaments, but this will require you to update the firmware of your 3D printer to enable setting the temperature beyond the stock maximum of 260 C. If you are just looking for more material options but do not need higher flow rate, you can upgrade an existing hot end to use a bimetallic heat break, which will not cost as much as the Spider and still provides the ability to print at higher temperatures.
Should You Buy the Creality Spider Hot End?
We were happy with the performance of the Spider, but it is one of the more expensive hot end upgrades on the market. We feel that it is worth it if you are printing a lot of larger, less detailed parts, and are looking to be able to increase your speed or throughput. Otherwise, this upgrade will probably not give you too much benefit above the stock hot-end or upgrading only the heat break.