
Bed Leveling For Your Creality Printer
Leveling a 3D printer is the process of calibrating the height of the print bed to ensure it is the correct distance from the print nozzle across its entire surface. Having a level bed will result in fewer print failures, higher quality prints, and is the key to getting a great first layer on all of your prints.
In this guide, we will show you how to level the print bed on your Creality CR-10, Ender 3, CR10 S5, or other Creality 3D printer.
When do you need to level the bed?
If you’ve just assembled the 3D printer
When prints are not sticking (e.g. dislodging mid-print, or curling up at edges)
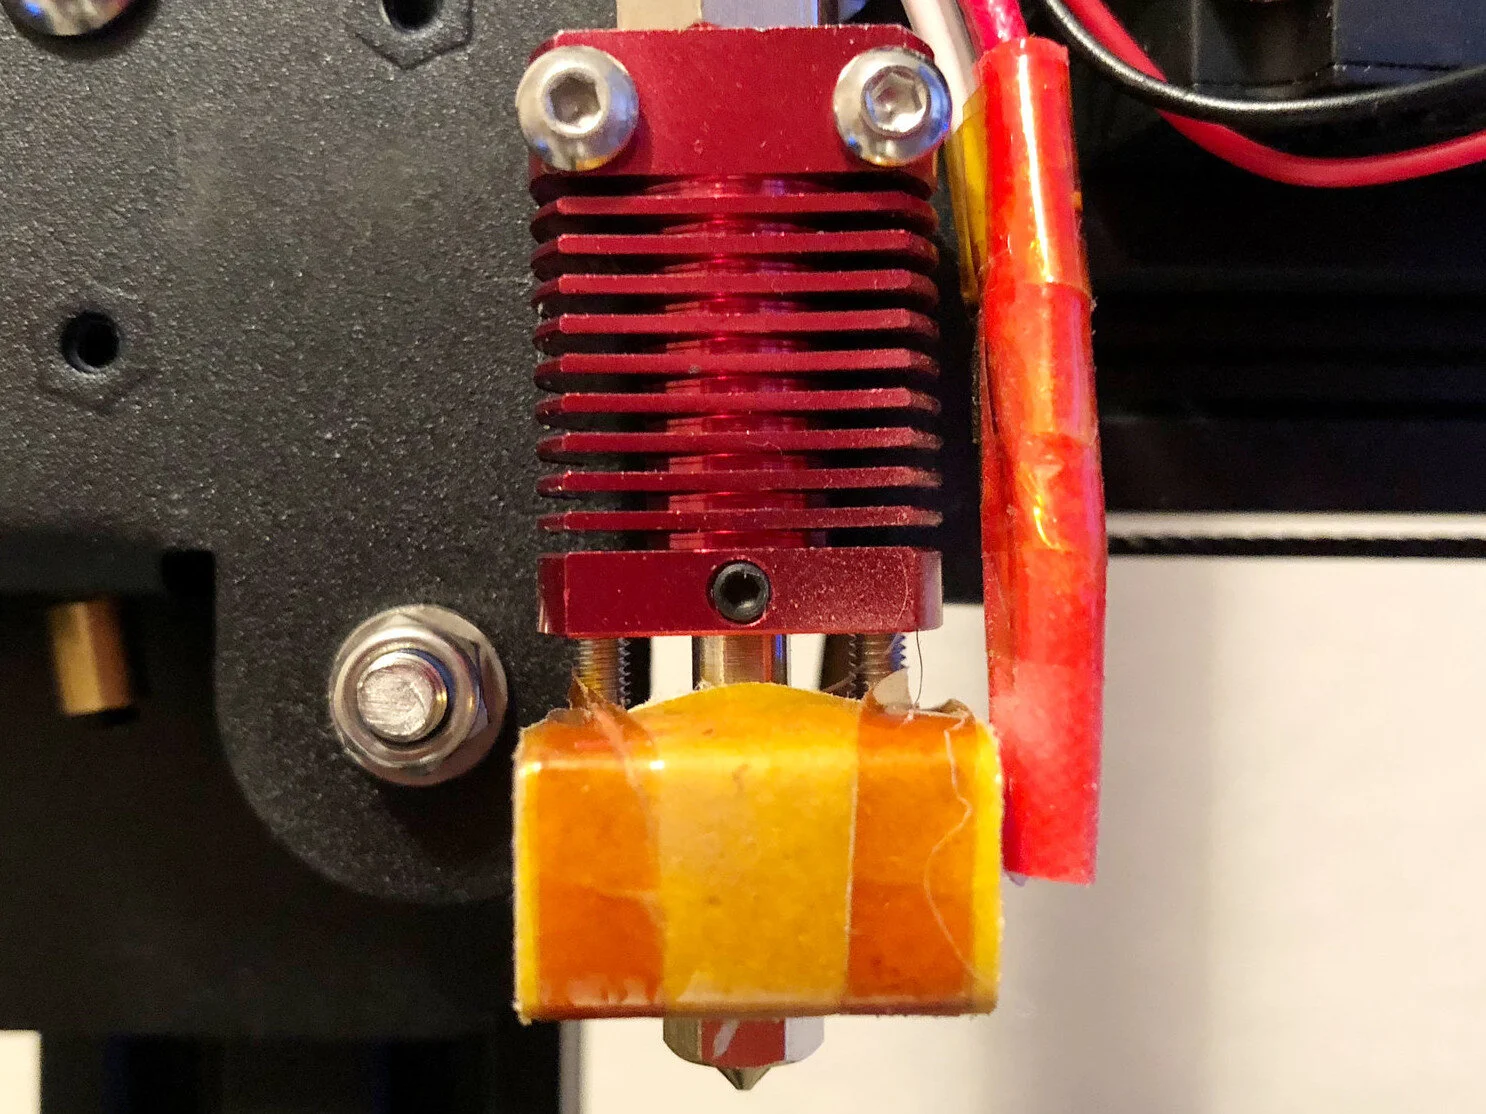
After changing the nozzle or hot end
After moving the 3D printer between locations
Fortunately, leveling the bed on Creality 3D printers is a straightforward process and will only take you a few minutes. Once the bed has been leveled, you shouldn’t need to re-level it unless you make a change to your printer’s hardware or notice issues with prints not sticking to the bed.
This process applies to the Ender 3 series, Ender 5 Series the CR-10 S4 and CR-10 S5 printers, and all other Creality FDM 3D printers.
Note: Creality Experts receives a commission for items you purchase from this page, at no additional cost to you. For more information, please see our affiliate link policy.
Recommended Upgrades
The only thing you really need to level the bed is something you probably already have: a sheet of paper. Since the width of a sheet of paper is the correct distance between the nozzle and print bed, you’ll be using the paper as a feeler gauge, which we will describe in detail later. However, there are a couple upgrades we’ve found are nice to have both for adjusting the leveling, and to make sure your print bed stays level for longer.
We really like adding these large bed leveling knobs on our standard CR-10s since they provide much finer control of the bed height, and are easier to access. Note that Similar Plastic knobs already come standard on the Ender 3, and they won’t fit the S4 or S5. (For the S4 and S5, you can 3D print these knob covers which are as large as will fit on these printers)
We also suggest upgrading your bed springs to more rigid flat springs. These are included with CR-10 series printers, but not the Ender series which uses standard springs. These less rigid springs do not provide as much tension, which can cause the leveling knobs to move slightly during operation .

These larger metal leveling knobs are much easier to access and allow for finer leveling adjustment than the ones included with the CR-10

The Ender 3 series 3D printers include large plastic knobs, but use less rigid springs that we recommend replacing

The 3D printer uses an endstop, or a small switch,to know when it is at home or ‘0’ for the Z axis. We will be adjusting the bed to be just below the nozzle when it is at the home position.
Preparation
heat the nozzle to 210C and the bed to 60C (or the temperatures you most commonly print with)
It’s important to pre-heat the printer bed while leveling since the bed will slightly expand when heated, and we want the bed to be level at printing temperatures.
Auto Home the 3D printer.
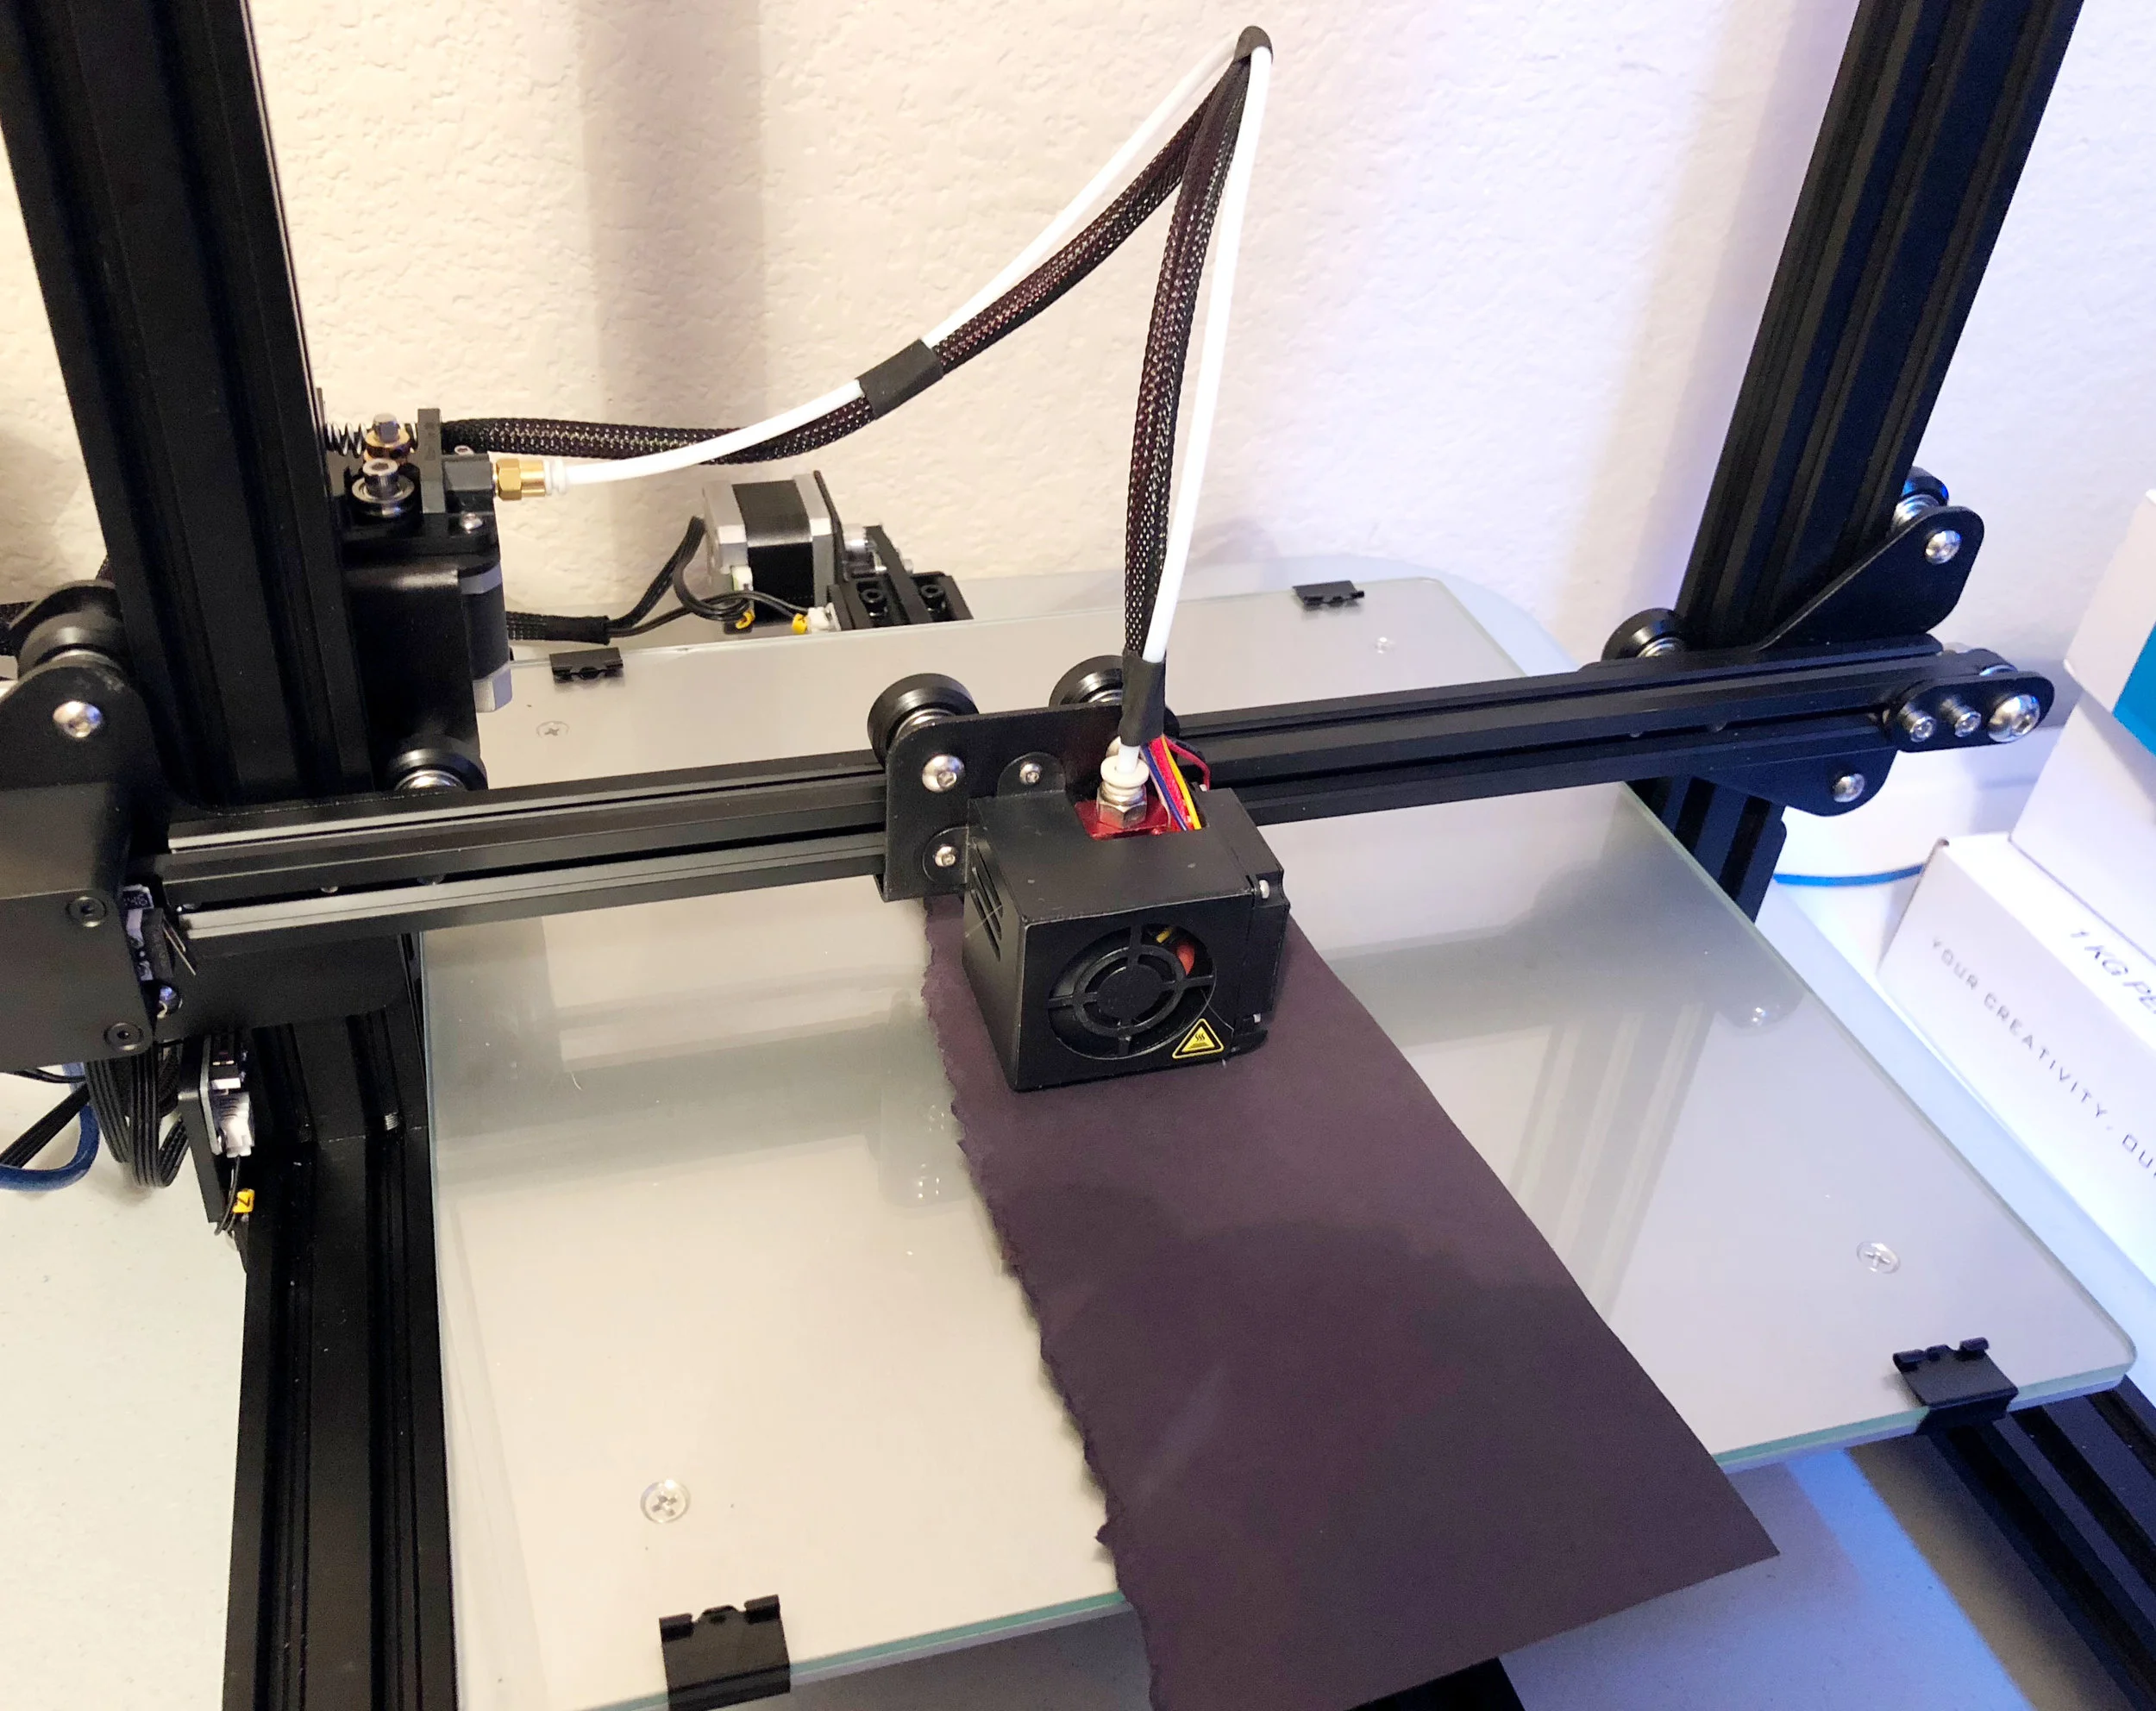
Observe that the Z position is determined by an end-stop on the side of the bed, as shown. We need to manually adjust the height of the bed since this does not consider the bed position.
Disable the Stepper Motors, which will allow you to adjust the X and Y position by manually moving the hotend
Move the the hotend so that the nozzle is nearly above the front left leveling nut
Adjusting The Bed Height
This is where you will actually adjust the bed to make sure it is the correct distance from the nozzle. You will repeat this process in many positions to ensure the entire bed is the correct distance from the nozzle
Slide the piece of paper between the nozzle and the bed
Turn the knob to adjust the bed height, while continuing to move the piece of paper back and forth between the nozzle and bed.
Looking down from above, turn the knob clockwise to move the bed upward, counterclockwise to move downward
At the desired position, you should still be able to move the paper back and forth, but with some resistance. If the paper slides easily under the nozzle, the nozzle is probably not close enough to the bed. If it doesn’t fit, rips, or is very hard to slide under the nozzle, the nozzle is too close to the bed.
Tip: We really like this set of upgraded bed leveling knobs for the CR-10. They’re much larger and easier to adjust than the small knobs that come on the printer. Note that these won’t work on the CR-10 S4 or S5, though.
Move the hotend above each of the other bed screws, and repeat this process.
If you feel the nozzle grinding against the bed at any point, stop moving it, and first lower the corner before moving the nozzle further

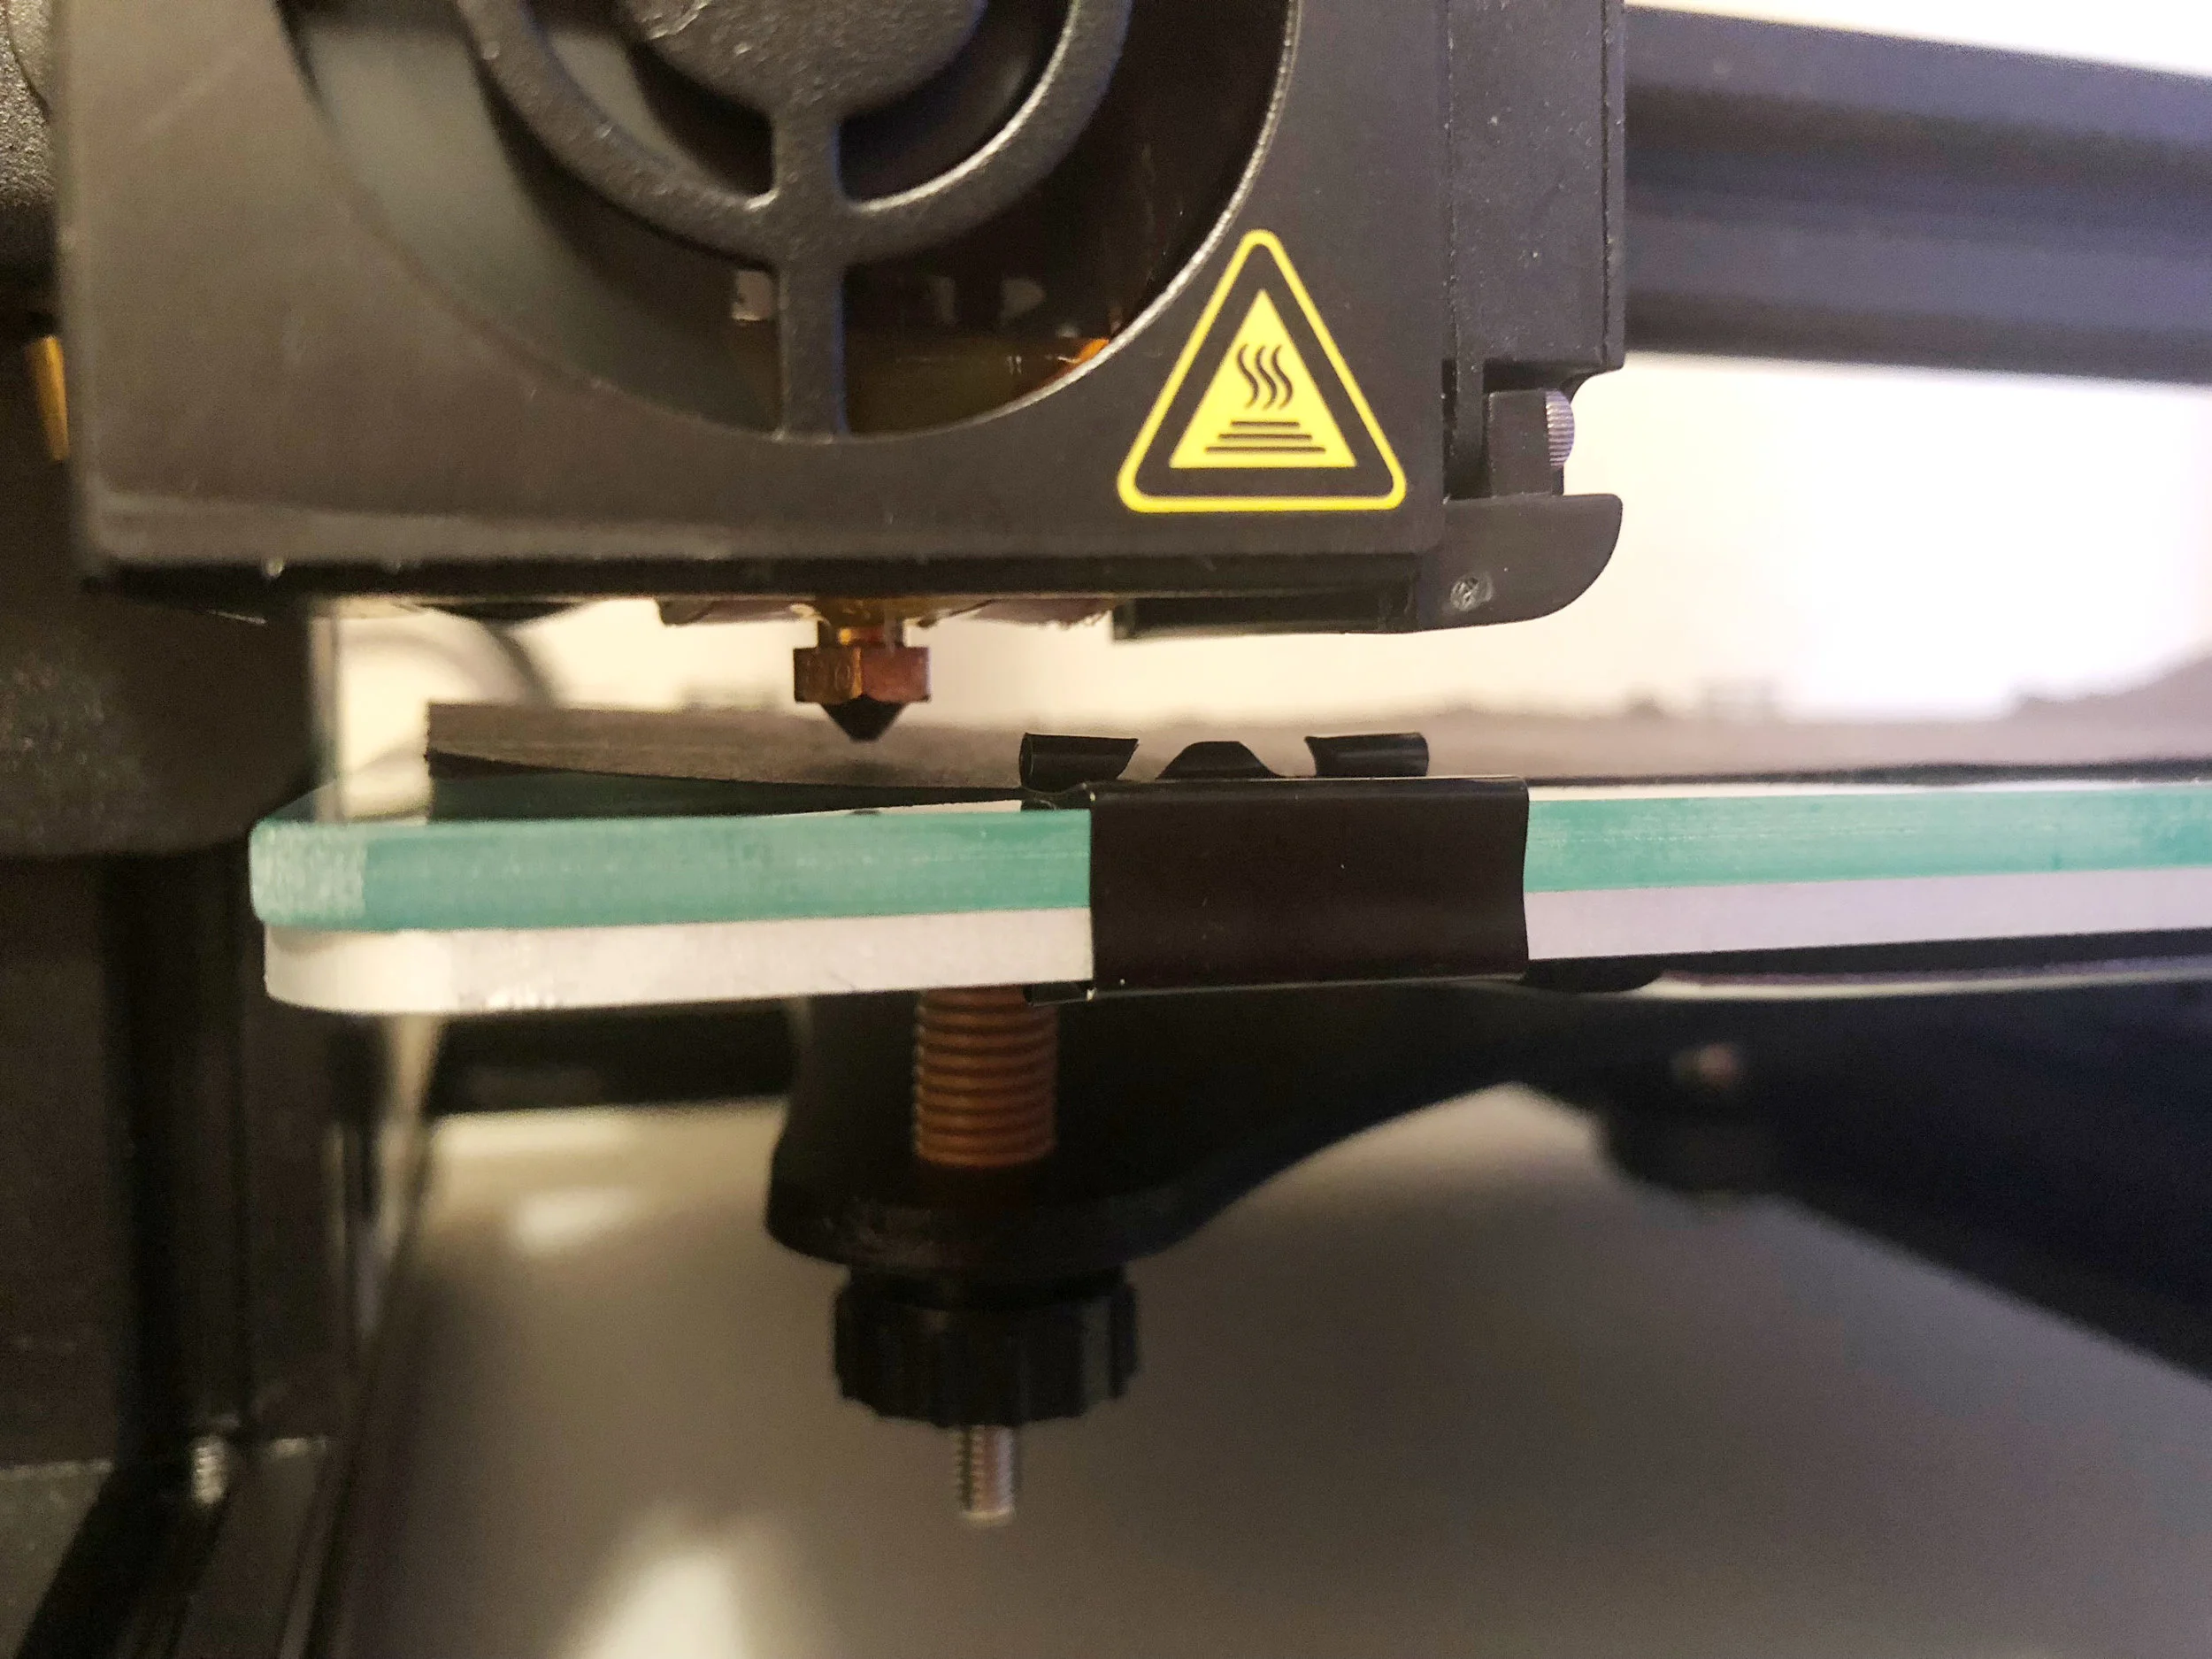
The nozzle is too far from the bed in this picture.

The nozzle is too close to the bed
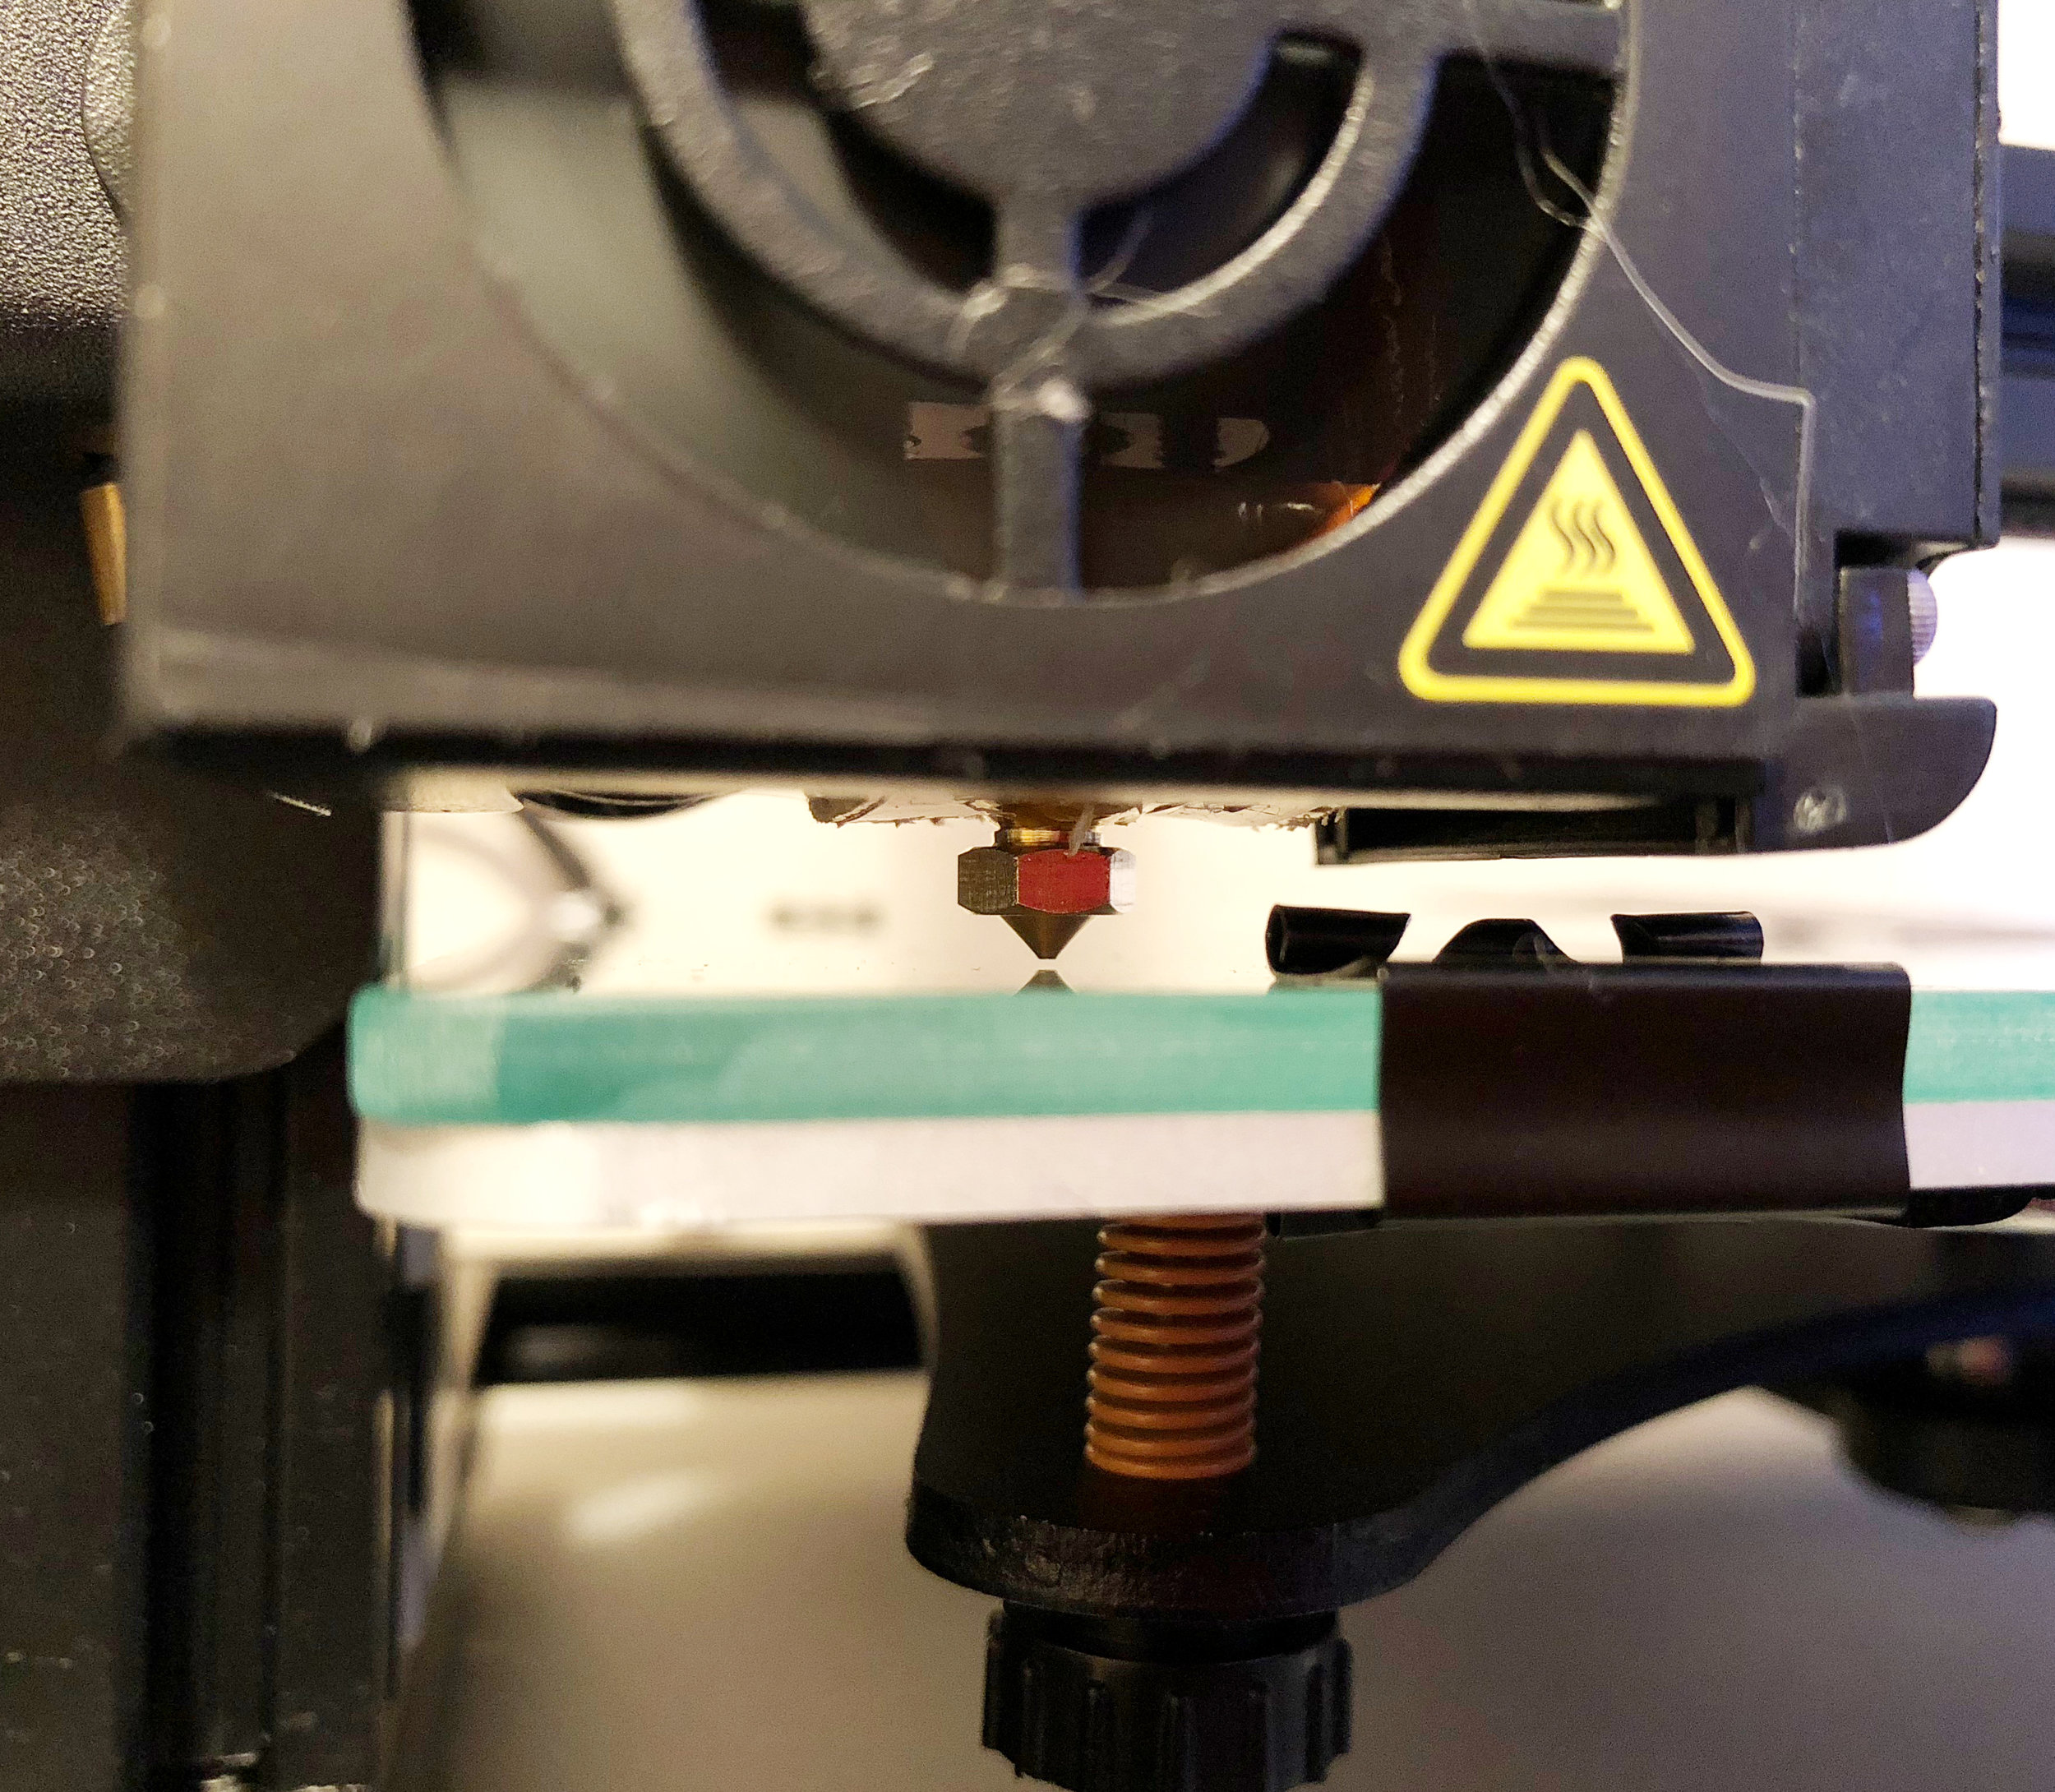
The nozzle is at the correct height above the bed in this picture.
Making Fine Adjustments
The center of the bed is the most important spot to check during the bed leveling process. Many prints will not extend all the way to the edges of the print bed, but every print will use the center part of the bed.
We like to go back to each of the four corners and check the height one more time after homing the printer again, and verify that the center of the bed is also level.
Auto home the printer
Disable the stepper motors
Repeat the leveling process at each of the four corners to verify the level and make any fine adjustments
You will not need to make large adjustments on this second pass, but it’s a good idea to do a quick check and make sure the height is still correct at each corner.
Move the hotend to the center of the print bed, and check that the printer is level here as well. If the center is not level:
Double check that all four corners are level
Ensure that the bed is fastened tight with the bed clips. Over time, the clips can lose their tension, and should be replaced when they do. (you can get more from Amazon here)
If the center gap is too large, you can adjust the center upwards by placing a small piece of paper (such as a post-it note) under the glass in the middle
if the center gap is too small, place a small piece of paper under each corner, and level the corners again
Check Your Work with a Test Print
Once you’ve leveled the print bed, print a test piece to confirm that the bed is level and the nozzle is at the correct height above the bed. We like to use this 3D model made for checking bed leveling. It covers the entire print bed and will print quickly because it’s only one layer.
Note: To make sure you have great bed adhesion, we have found that applying hairspray to the bed every 10-15 prints is very helpful. Hold the can about 8 inches away and do one continuous spray in a "Z" motion across the bed. Let the hairspray dry for a minute or two before trying to print. We have had the best results with AquaNet Extra Super Hold Hairspray, which is available on amazon or at any grocery store.
Checking the First Layer
You should watch the printer during the printing process. As the model is printing, pay attention to whether the plastic is sticking to the bed correctly.
If the nozzle is at the correct height, you will notice that the nozzle will slightly “squish” the plastic down onto the print bed, spreading it out slightly as the nozzle moves across the bed.
If the nozzle is too close to the bed, the layer will be so flat that the extrusion will be inconsistent and you may see roughness where the nozzle is grinding against previously printed lines. You may hear clicking sounds from the extruder or see no extrusion in severe cases.
If the nozzle is too far away, the plastic will create thin lines and appear to drop out of the nozzle and fall onto the bed. This is undesirable because it will cause prints to not stick to the bed. In extreme cases, the plastic will not adhere to the bed at all.
Use the images below to help you determine if your print bed is leveled correctly.

If the nozzle is too close, the lines may appear unusually thin or wavy. As the infill on the first layer prints, you will see it bubble up and form a rough texture.

If the nozzle is too far, the infill on the first layer lines will not be touching, and in many cases will not stick to the print bed. The lines will often delaminate from the bed if touched lightly

When the leveling is correct, infill lines on the first layer touch and form a smooth surface. The plastic will not delaminate from the bed from a light touch.

When too close, the base of the print will have ugly defects

When too far, the layer will have large gaps, if the print succeeds at all

The perfect first layer, both solid and smooth
On-The-Fly Adjustments
You can use the thumb wheels to make small adjustments to the bed height during the printing process. This is a great way to fix leveling issues that may occur over time since you’ll get immediate feedback on your changes. This type of leveling can take some practice, but will allow you to keep your bed level quickly and easily.
As a general rule, you should always watch the first layer, or at minimum the first perimeter of any print. Most print failures occur due to incorrect leveling or other issues with the first layer, and this will drastically reduce your chances of walking in to a print bed full of spaghetti.
Optional Upgrade: Auto Bed Leveling
If you find yourself needing to level the bed often, you should consider upgrading your printer to use auto bed leveling. While we have found Creality’s printers to hold their leveling between prints, you will still need to adjust the leveling any time you change the nozzle or extruder. Additionally, if you are attempting to print at small layer heights, you may need to tweak your bed leveling more often.
The auto bed leveling kit from Amazon uses a BLTouch sensor to detect exactly how far away the nozzle is from the bed. By measuring this distance at different points on the bed, the printer can automatically adjust its Z height when printing to account for any variations in the bed’s height at different positions. This ensures extremely consistant first layers across the entire print surface. Some of Creality’s higher-end printers come with an auto bed leveling system pre-installed; you can find information on those printers on this page. For example, the CR-10S Pro V2 includes a BLTouch probe. However, if you’re using a printer such as the Creality CR-10, Ender 3, or S4, this BLTouch auto bed leveling kit will add auto bed leveling to your existing printer.
Use the table below to find the BLTouch upgrade kit that corresponds to your 3D printer. Take a look at our guide for upgrading your 3D printer with a BLtouch sensor for more information on how to install the sensor.
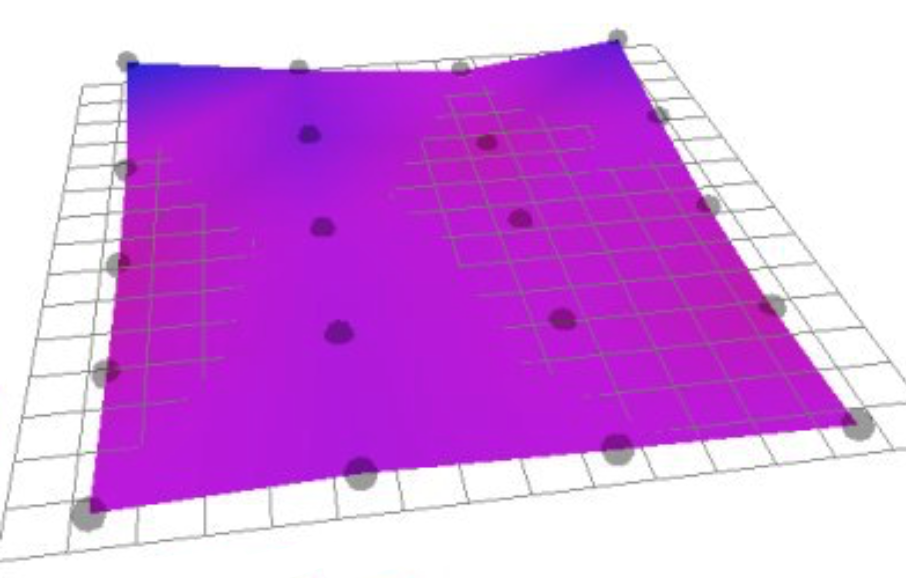
With an auto-leveling sensor, the 3D printer can probe the bed height at many points on the bed, and account for small inconsistencies, such as the higher back corners on this print surface.
| Ships with Auto Leveling | Firmware Update Method | Motherboard Connections | Required Hardware | Tutorial Link | |
|---|---|---|---|---|---|
| Ender 3 / Ender 3 Pro | - | ISP Adapter | connects via provided adapter | Kit 1 | |
| Ender 3 V2 / Max | - | SD Card | plugs into dedicated port on mainboard | Kit 2 | |
| Ender 5 | - | ISP Adapter | connects via provided adapter | Kit 1 | |
| Ender 5 Pro | - | SD Card | plugs into dedicated port on mainboard | Kit 2 | |
| Ender 5 Plus | Yes | - | - | - | - |
| Ender 6 | - | SD Card | plugs into dedicated port near Z motor | Kit 3 (+ printed bracket) | |
| CR-10 / CR-10 Mini | - | ISP Adapter | connects to pinboard and Z endstop | Kit 1 | |
| CR-10 S / S4 / S5 | - | ISP Adapter | connects to pinboard and Z endstop | Kit 1 | |
| CR-10 Max | Yes | - | - | - | - |
| CR-10S Pro V2 | Yes | - | - | - | - |
| CR-10 V2/V3 | - | USB Connection | plugs into dedicated port near Z motor | Kit 4 | |
| CR-X | - | ISP Adapter | connects to pinboard and Z endstop | Kit 1 | |
| CR-X Pro | Yes | - | - | - | - |
Success!
After completing this process, you can be confident that your bed is properly leveled and prepared for printing. The bed leveling process takes some time but is well worth it to ensure successful prints when you start using your Creality printer.

Ready to start printing? Check out our guide to buying filament for your printer.
Need parts to repair or upgrade your Creality printer? Check out our guide for recommendations on what to buy to get your printer running again.
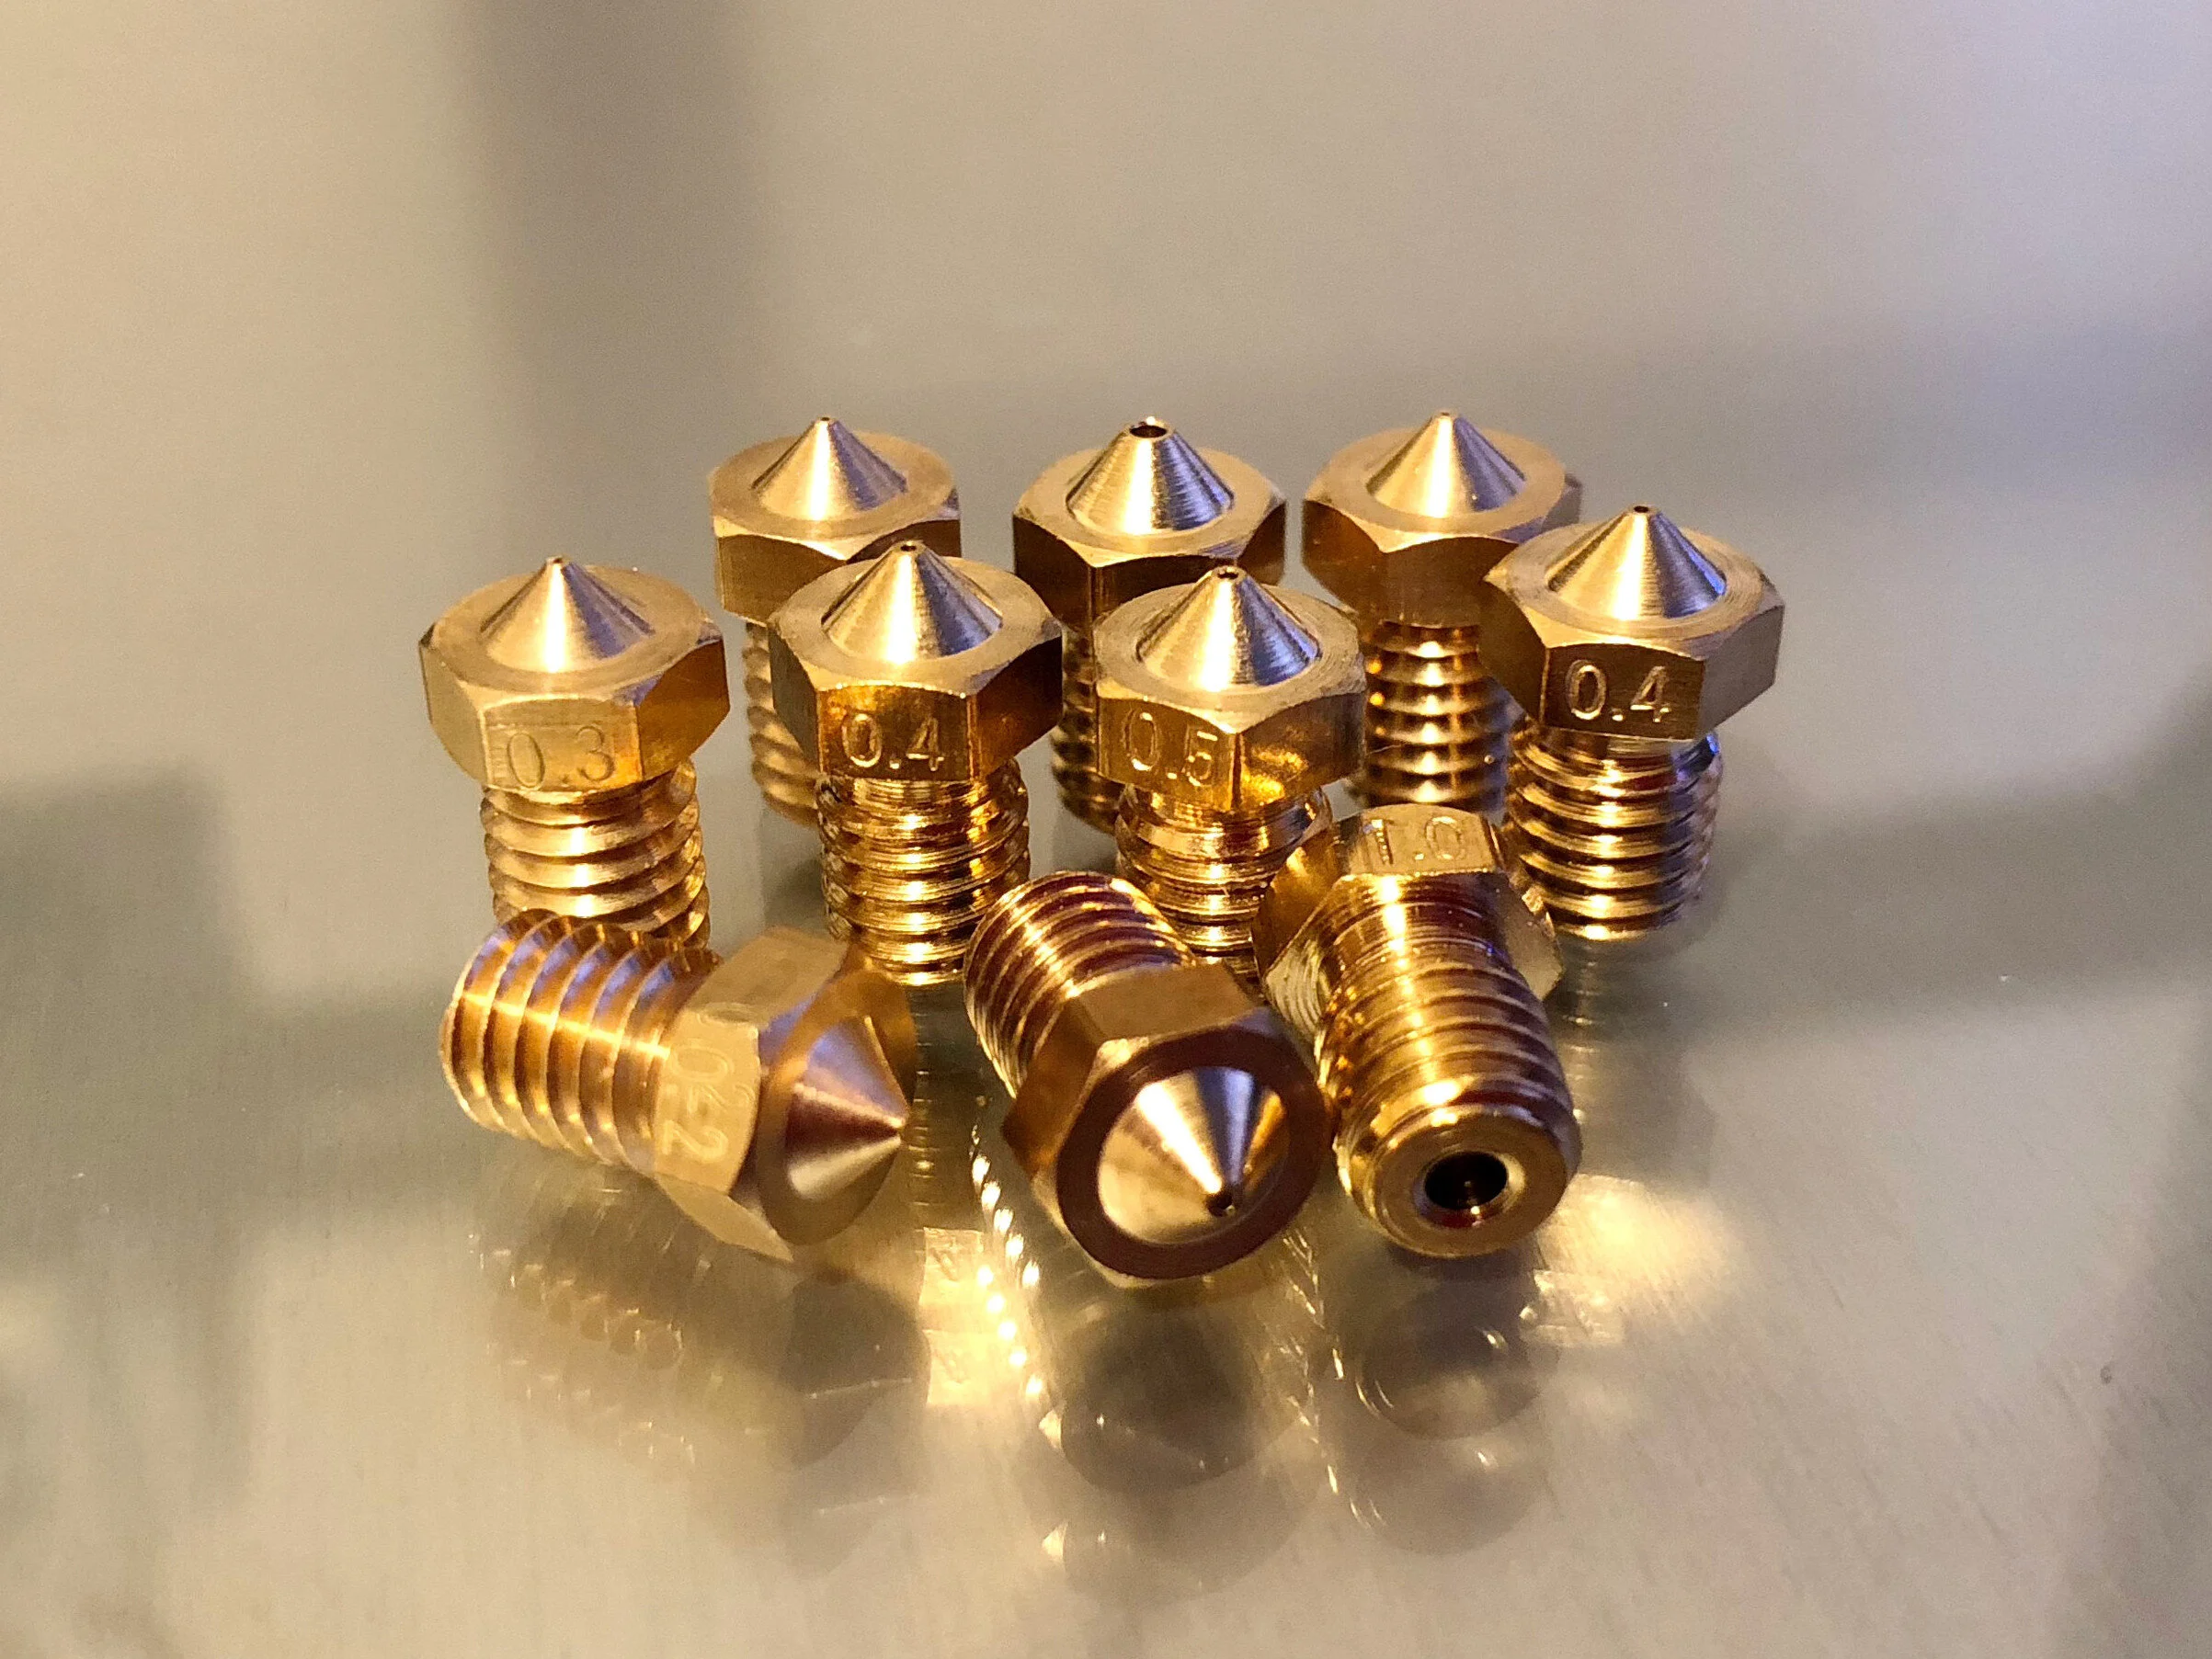
Need to change the nozzle on your Creality printer hot end? Check out our step-by-step process.