Calibrating Your Creality 3D Printer
Achieving the best performance and quality from your Creality 3D printer requires fine-tune adjustments of critical print settings which have a significant effect on your prints. The default slicer profiles you can find online for Creality printers like the Ender 3, CR-10, or Ender 5 will typically have good starting settings which you can use to print out of the box. However, you can further optimize these with a bit of testing and calibration to get the best quality out of your printer.
Since these settings can vary slightly between machines, you’ll get the best results by testing them yourself on your own 3D printer. Fortunately, with the Cura slicer and a popular free add-on, you can run calibration tests on your Creality printer very easily.
In this article, we look at how to calibrate three important settings:
Extrusion flow rate - ensure that your printer is extruding filament at the proper rate to avoid underextrusion or overextrusion
Print temperature - make sure you are printing at the best temperature to avoid hot end clogs and underextrusion
Retraction distance - ensure clean prints with no stringing
We recommend calibrating these in the above order, but you can skip ahead to any section if you prefer using the links below:
Note: Creality Experts receives a commission for items you purchase from this page, at no additional cost to you. For more information, please see our affiliate link policy.
Extrusion Flow Rate
The extrusion flow rate refers to how much filament the extruder pushes through for a given distance, which is controlled by the e-steps configuration on the 3D printer. This setting is typically pretty accurate on Creality 3D printers, but it’s a good idea to test it to make sure there are no issues, and to fine-tune it. The consequences of incorrectly setting e-steps are self explanatory: over-extrusion if it’s too high, or under-extrusion if it’s too low.
To make sure the flow rate is correct, we’ll perform an e-steps calibration. In this test, you extrude the filament 100 mm, then confirm via measurement that the actual results match the expected 100mm. We recommend using calipers (Amazon link) to get the most accurate measurement, but you can also use a ruler if you don’t have calipers. We are using an Ender 3 V2 for this calibration—the menu options may vary somewhat for other printers, but the process is the same.
E-steps Calibration Procedure
1) Heat the nozzle to 180 ºC and remove any loaded filament. Note: even if the printer is not loaded, you still need to heat it in order to manually extrude filament.
2) Remove the Bowden tube from the coupler on the extruder side by pressing down on the plastic coupler ring, or by unscrewing the coupler with a wrench.
3) Feed filament into the extruder until it starts feeding through and out the other side.
4) Use a Sharpie or similar marker to mark the filament as closely as you can to the flat side of the extruder.

5) Using the printer menu, access the Move menu, and move the extruder 100mm.
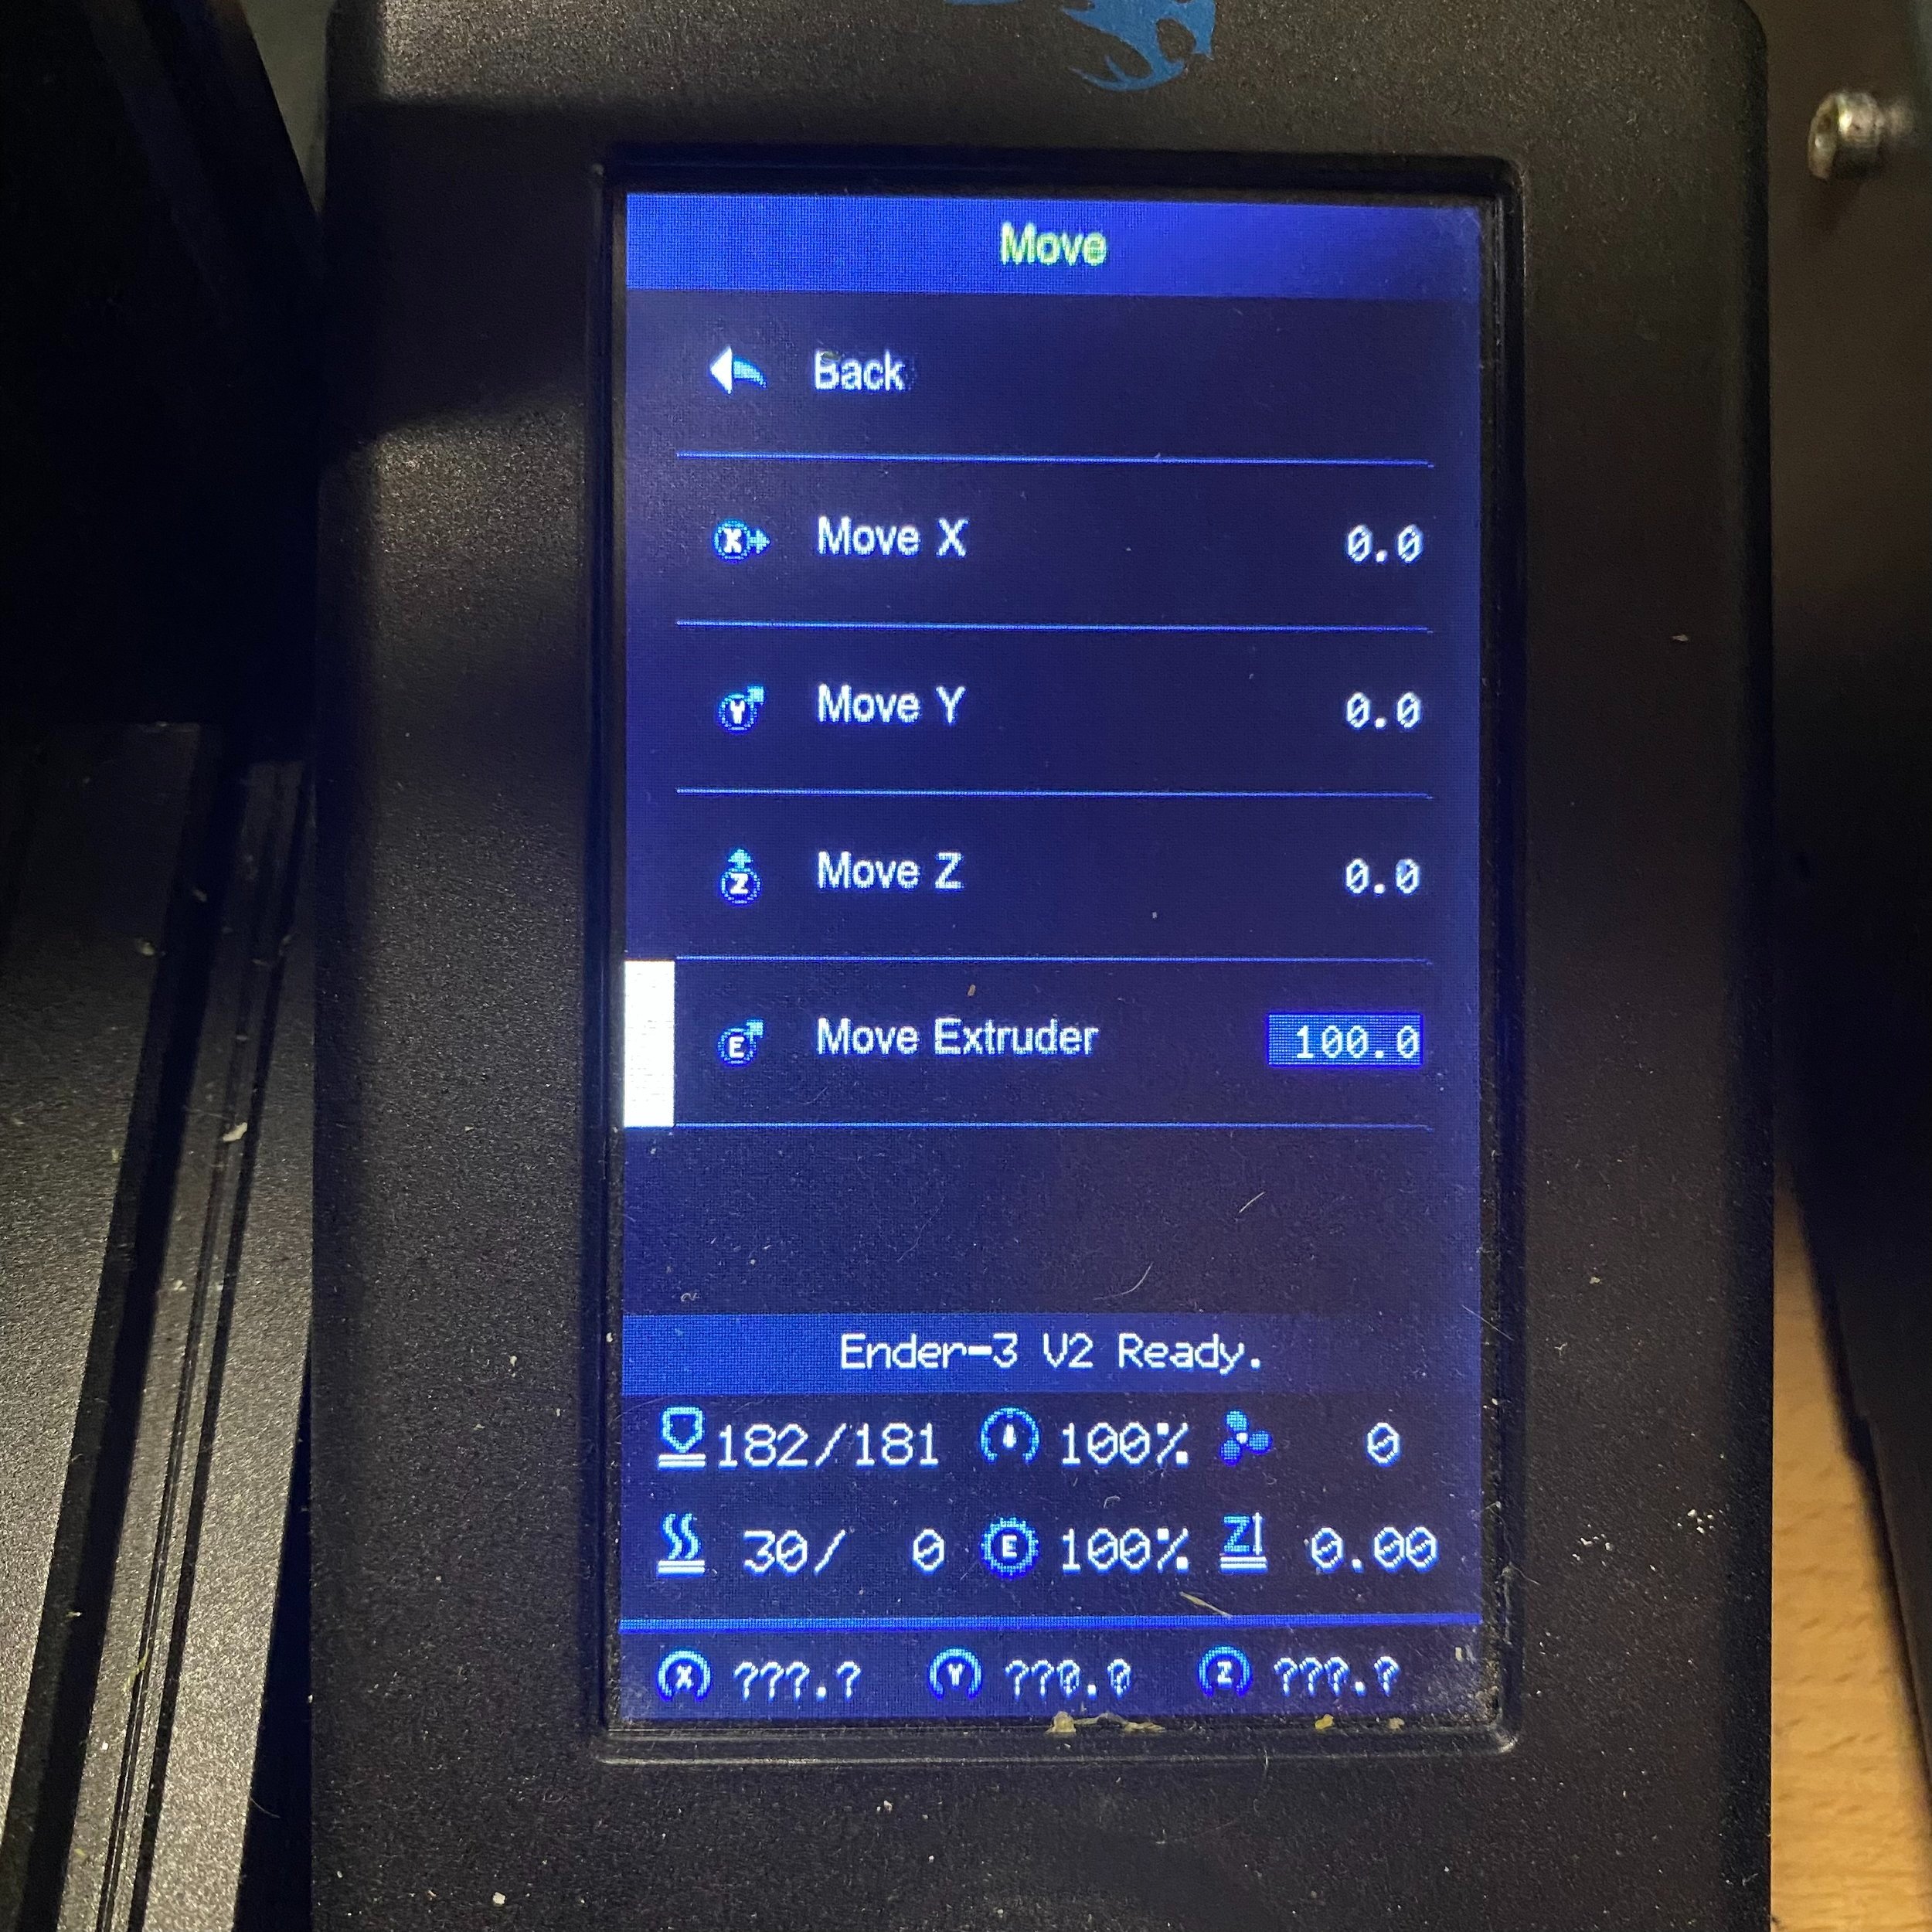
6) Once the filament stops moving, again mark the end with the marker. Remove the filament from the extruder, and straighten the marked segment as much as possible (it’s ok if its still a bit curved).

7) Measure the distance (D) between the two marks, making sure to measure the same side each time. In our case, the measurement is 98mm.

8) Navigate to the Motion menu on the 3D printer (Control » Motion on the Ender 3 V2) to find the current e-steps value (93 for our machine).

9) To find the new value, use the formula below. In our case, the new value is 94.9. As a sanity check, the new value should be bigger if your measurement was under 100, and smaller if over 100.

10) Set the e-steps to the new value.

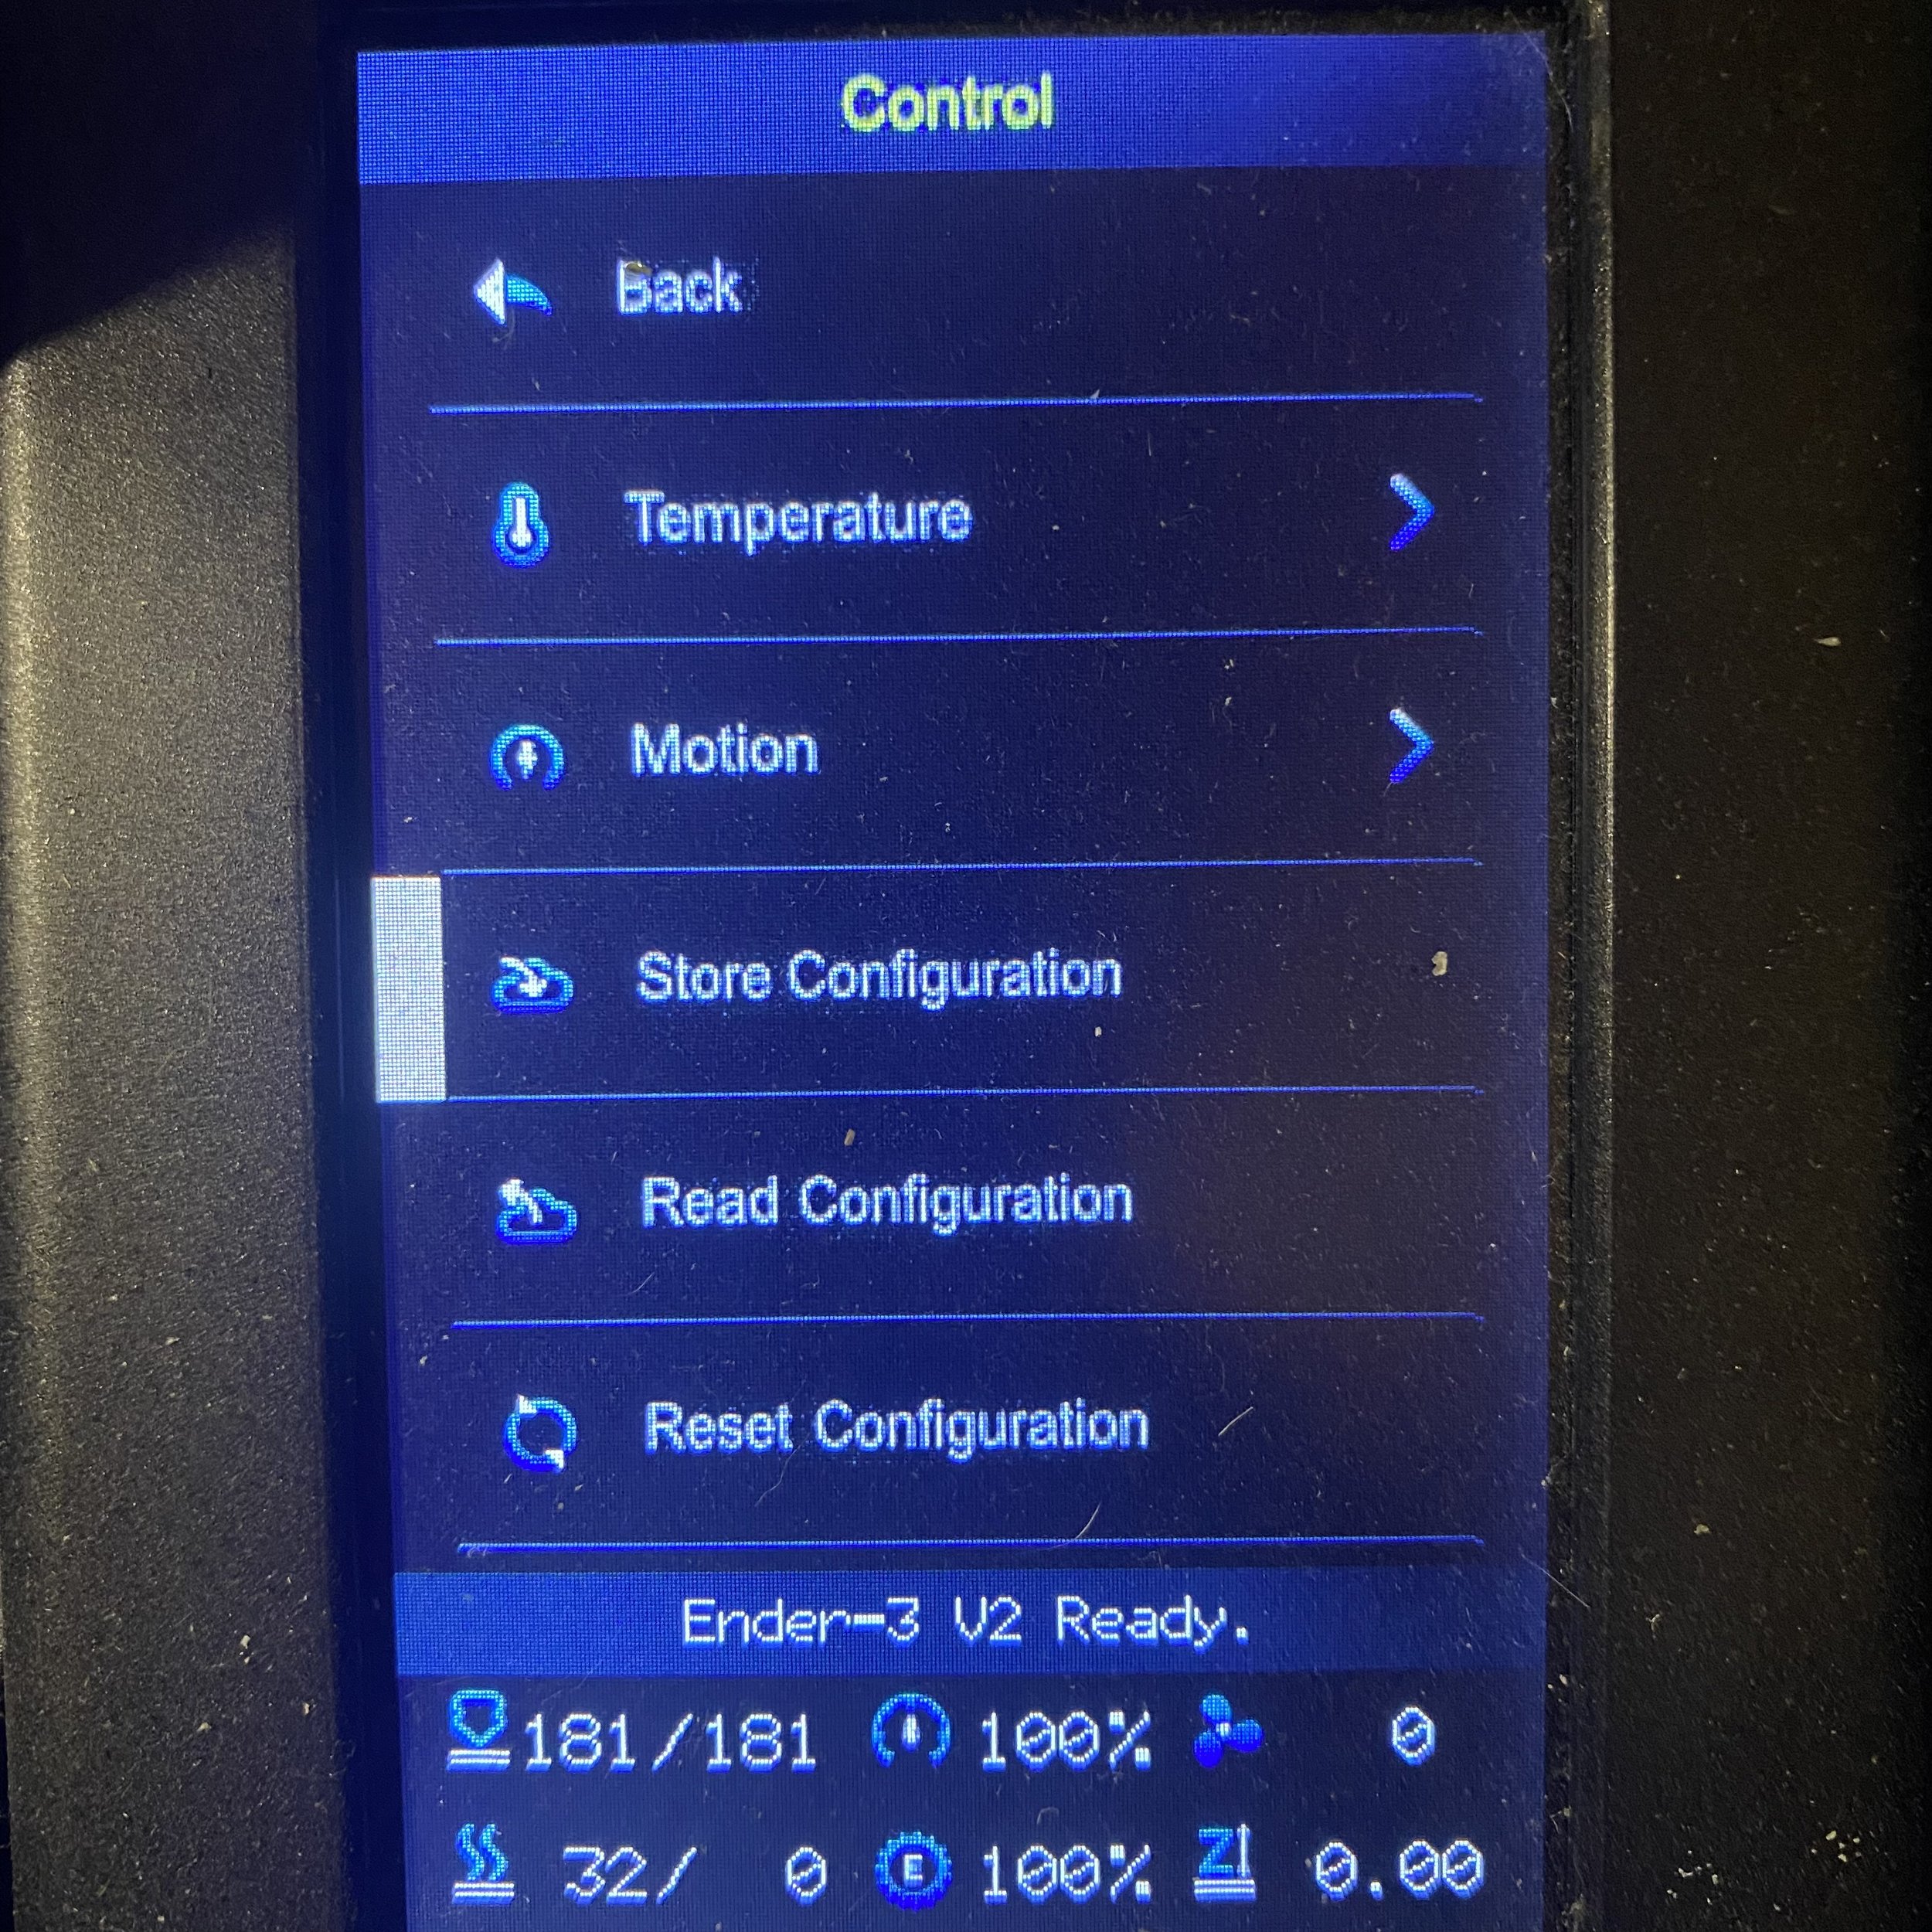
11) Save the new value using the “Store Configuration” option to be sure it will persist after the printer is turned off. Note: on some printers such as the Ender 3 V2, this data is stored on the SD card.
This process should result in cleaner prints without under-extrusion or over-extrusion.
Nozzle Temperature
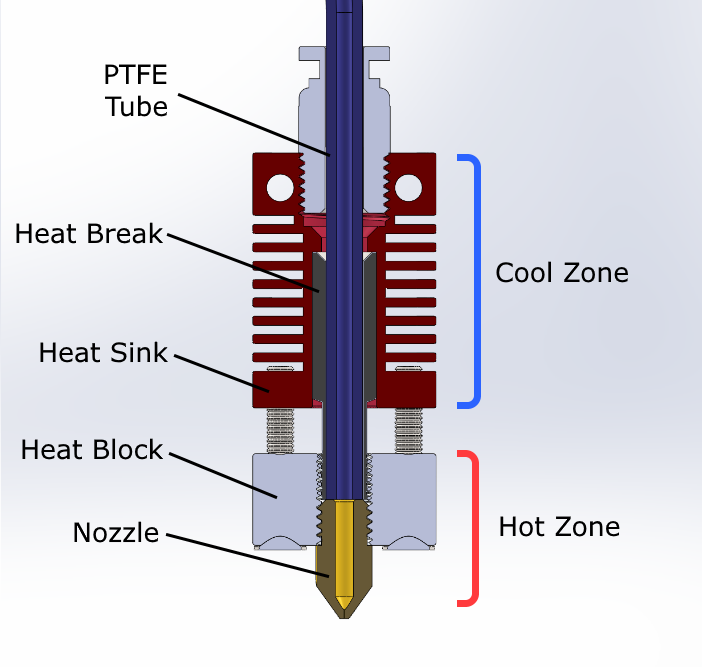
Printing with lower temperatures ensures that the cool zone of your hot end does not get too hot, which can cause jamming.
The nozzle temperature refers to the temperature of the hot end, which melts the filament to deposit it onto the print bed. Sufficient heat is needed to fully melt the filament, but not so much that the filament takes too long to harden after depositing onto the print. When calibrating the ideal temperature, you’ll want to choose the lowest temperature possible that still allows sufficient melting of the filament. For faster printing speeds, you’ll need a higher temperature to fully melt the filament quickly enough to keep up with the rate that new filament is being fed into the hot end.
If the temperature is too low, you’ll notice issues such as under-extrusion or a clicking sound coming from the extruder as it tries to push filament through the hot end but encounters resistance when the hot end can’t melt the filament fast enough.
If the temperature is too high, you’ll notice poor overhang performance and drooping due to the filament taking longer to solidify. You are also more likely to get a jammed hot end, since the high temperatures leak into the cold side of the hot end and cause the filament to melt sooner than it is supposed to. This causes the filament to thicken and jam the hot end.
The quickest way to dial in the correct print temperature is to print a temperature tower, where you vary the temperature at varying heights of the printed part. You can then identify the lowest temperature that you can print before quality issues start to occur. You can use the Calibration Shapes plugin with the Cura slicer to prepare this test quickly without needing to manually configure each of the temperature changes.
Calibrating Temperature
2/6/2023 Update: Cura 5.x now includes an even easier plug-in for calibration, called AutoTowers calibration (by Brad Kartchner), which improves on the Calibration Shapes plug-in by handling varying the print settings for you without needing to set it up in the post-processing scripts. You can still use the Calibration Shapes plugin if you’d like to have finer control of the tests.
1) If you don’t have Cura installed, download it from Ultimaker’s website and install it.
2) Install the Calibration Shapes plugin for Cura through the Cura marketplace (the plugin is free).


3) After installing the add-on, restart Cura. You can now select Part for Calibration from the Extensions menu.
4) Using this menu, select Add a PLA TempTower to add the test model to the build platform.


5) To vary the temperature at each section of the model, you’ll need to add a custom modifier by navigating to Extensions » Post Processing » Modify G-code.

6) In the window, select Add a Script, then select TempFanTower.
7) Configure the values as shown to start the test at 220 C, and decrease it by 5 C on each section of the test print (which matches the numbers on the test model).


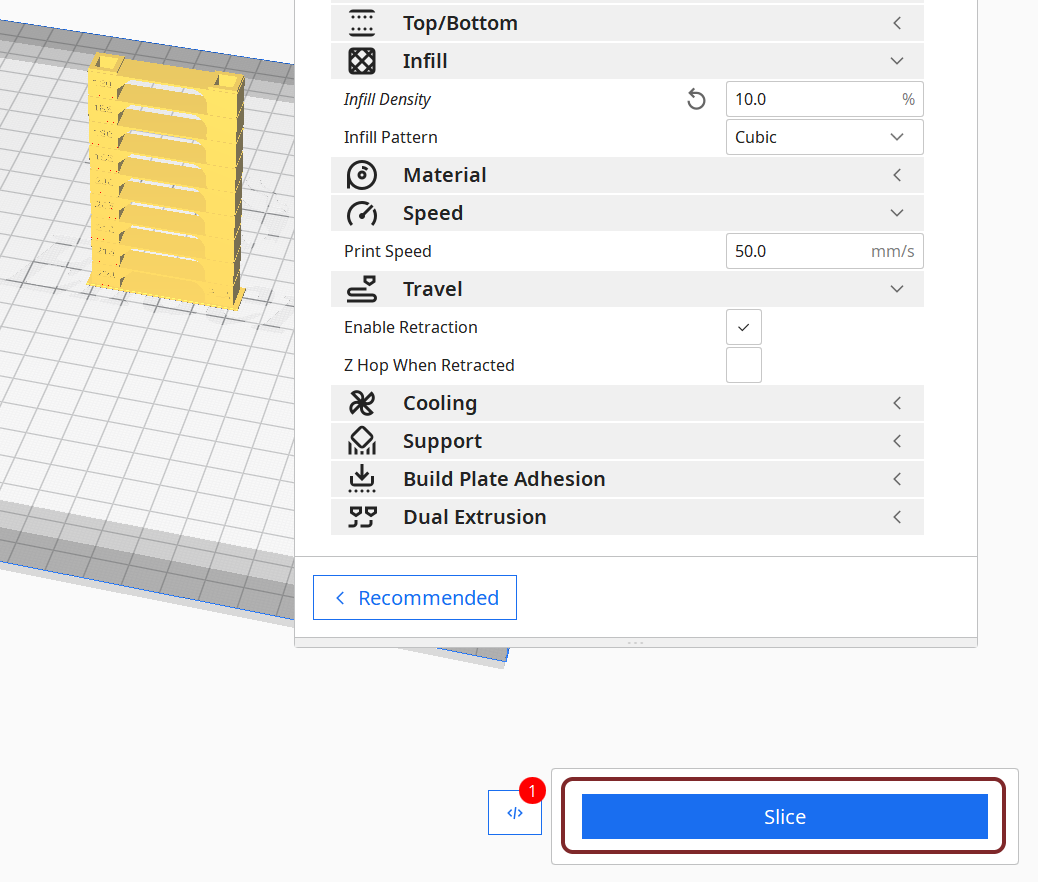
8) Ensure the wall speed setting is 50 mm/s so that we can ensure the temperature we choose can handle all speeds. To set this, search “wall speed” in the Print Settings pane, and change the value to 50 mm/s. Also, be sure to select Standard Quality (.2 mm layers).

9) The Calibration test is ready to print! Select Slice to build the gcode, then save the file to your SD card or print it over USB.
Once the print completes, you’ll be able to see where the lower limit is for print temperature. We typically choose a temperature 5 degrees higher than the lowest working temperature, so for this printer we will use 200 C. Search for "printing temperature” in Cura and change the setting once you’ve completed the test.


Retraction Distance
When the 3D printer nozzle moves between sections of a print, using retraction will pull the filament backwards a certain distance to relieve pressure on the nozzle and prevent extra material from depositing as the nozzle moves. The retraction distance refers to how far the filament moves backward. Like the nozzle temperature, it’s important to find the balance since issues can occur both if it is too high or too low.
If retraction distance is too low, you’ll notice significant stringing between different sections of your part. While this residue can be removed as part of cleaning up the print, it’s much less work overall to tune your retraction settings and drastically reduce or eliminate stringing.
If retraction distance is too high, your 3D printer is more prone to jamming since the heated end of the filament is drawn further back into the cool side of the hot-end. Similar to the case of printing too hot, this causes the filament to get stuck in the cold side and jam the hot end. Extra retraction distance will also slow down your prints since each retraction move requires more time. While the time difference is very small, it adds up to quite a bit when you are retracting many times on each layer of the print.
Calibrating Retraction Distance
We’ll use the same Calibration shapes plugin as the temperature calibration. If you didn’t complete the temperature calibration, refer to steps 1-4 in that section for instructions on installing the Cura plugin.
1) From the Part for calibration menu, select Add a Retract Tower to add the retraction test model to the build platform.


5) To vary the retraction at each section of the model, you’ll need to add the custom modifier by navigating to Extensions » Post Processing » Modify G-code.
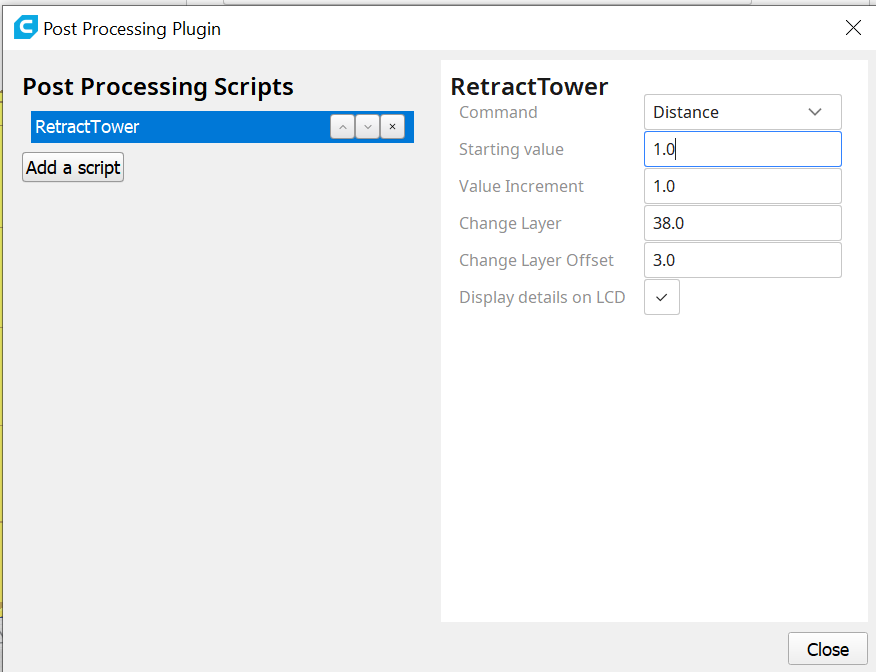
6) In the window, click Add a Script, then select RetractTower. Remove the temperature modifier if it is still present.
7) Configure the values as shown to modify the retraction distance. Start the test at 1 mm, and increase it by 1 mm on each section of the test print (which matches the numbers on the test model).

8) Ensure that Standard Quality (.2 mm layers) is still selected.
9) The calibration test is ready to print! Select Slice to build the gcode, then save the file to your SD card or print it over USB.
Once the test is complete, choose the lowest retraction value where you do not see any stringing on the print. In our case, it was at 4mm. We also suggest setting the Minimum Extrusion Distance Window value to twice the Retraction Distance as shown below.


Next Steps
Now that you’ve calibrated you printer, we suggest saving your updated Cura profile to make sure the settings aren’t lost when making other changes in the future. To do this, select the Create Profile from current settings option and give your profile a name.


Once you save this, you can see the overridden settings in the “Extruder 1” tab.

You can review these settings later by selecting this profile in the Profile dropdown. Feel free to experiment with other settings to see what impact they will have on your prints!
We encourage you to explore the other models and scripts in the Calibration shapes plugin and dial in other settings on your printer. For example, the acceleration and speed tests are great ways to make sure you are printing as fast as possible!
Table of Contents