Comparing the Ender 3 Neo vs Ender 3 V2 Neo
In this article, we’ll pit the Creality Ender 3 Neo against the Creality Ender 3 V2 Neo, two of the most recent upgrades to the Ender 3 Series 3D printers from Creality, and find out which one is the best purchase for a beginner 3D printing enthusiast.
In keeping with tradition, the newest upgrades to the Ender line—the Ender 3 Neo series—have once again managed to combine impressive performance, affordability, simple design, and ease of use in their devices. They give entry-level users everything they need to create excellent quality 3D prints and enjoy a superior learning experience.
However, not all Neo series 3D printers are built the same. On the lower end, the base Creality Ender 3 Neo (Amazon link) costs about $240 while the mid-tier Creality Ender 3 V2 Neo (Amazon link) is typically in the $320 range. If you are looking for a higher-end printer, we encourage you to take a look at the Creality Ender 3 S1 Pro (Amazon link), which offers more features such as a direct drive extruder and premium build surface.
If you are looking for the most affordable Ender 3 that still has most modern features, these two 3D printers are worth considering. In this article, we’ll compare these two lower-end models, the Ender 3 Neo and Ender 3 V2 Neo, with each other to help you figure out if the latter is worth the extra price.
The Ender 3 Neo and Ender 3 V2 Neo share many similarities. In fact, both 3D printers received some of the same upgrades from the previous generation of Ender 3 printers, such as:
CR Touch Auto Leveling System
Metal Bowden Extruder
Redesigned hot end with new heat sink
Some of the most significant areas where the Creality Ender 3 V2 Neo differs from the Creality Ender 3 Neo are:
Much easier assembly
PC spring steel magnetic build plate
Larger LCD and sliced model preview
Note: Creality Experts receives a commission for items you purchase from this page, at no additional cost to you. For more information, please see our affiliate link policy.
Vs.
Creality Ender 3 Neo vs. Ender 3 V2 Neo Similarities
The Neo series printers both include a redesigned hot end with red accents, and include a number of nice-to-have updates compared to their predecessors.
The Ender 3 Neo is an update to the Ender 3 Pro 3D printer. It retains much of the form, function, and philosophy of the Ender 3 Pro, while making some notable updates without steeply pushing the price upward. Users get everything they loved about the Ender 3 Pro, along with some great new features, without having to pay much more.
The Ender 3 V2 Neo similarly upgrades the Ender 3 V2. By and large, the V2 Neo offers the same functionality and features as the V2, with the biggest improvements being in terms of ease of setup and ease of use. Creality has made an effort to make this 3D printer as beginner-friendly as possible. In fact, it might just be one of the easiest 3D printers to get started with in its price segment.
Both of these 3D printers include significant updates from their predecessors. Now, let’s take a closer look at some of the common features shared by the Ender 3 Neo and Ender 3 V2 Neo.
Physical Design: Build Volume, Dimensions, and Design
Both the Ender 3 Neo and Ender 3 V2 Neo feature a build volume of 220 x 220 x 250 mm, which is the standard size on most Ender 3 printers, including the previous non-Neo versions of these printers. It’s slightly larger than the 200 mm cube that most entry-level 3D printers offer, but the slight increase in size is beneficial in a few ways. First, these 3D printers occupy almost the same desktop area as their smaller cousins, meaning you won’t need to clear off a large desk space to use them. Second, the enlarged Z-axis allows 3D printing of models with a taller profile. With some creative planning, you can also print wider 3D prints alongside the Z-axis.
Although the two Neo printers share the same build volume, they do not have the same physical dimensions. The Ender 3 Neo has a total size of 440×440×465mm, while the Ender 3 V2 Neo’s dimensions are 438×424×472mm.
Mainboard
Creality says that the Ender 3 Neo and Ender 3 V2 Neo both feature a v4.2.7 32-bit silent mainboard. However, the v4.2.7 appears functionally identical to the v4.2.2 on older models, albeit with some minor tweaks in stepper motor wiring to suppress noise production. So, don’t expect any performance enhancements over the v4.2.2 mainboard on the older machines.
Since the Ender 3 V2 also featured the v4.2.2 mainboard, the Ender 3 V2 Neo can only boast of a marginal reduction in noise, and although this does make a difference in perceived volume, it won’t be a significant difference. On the other hand, if you’re coming from an original Creality Ender 3, these new silent mainboards are significantly quieter than that older printer—you’d definitely notice and appreciate the difference.
Mechanical Design and Kinematics
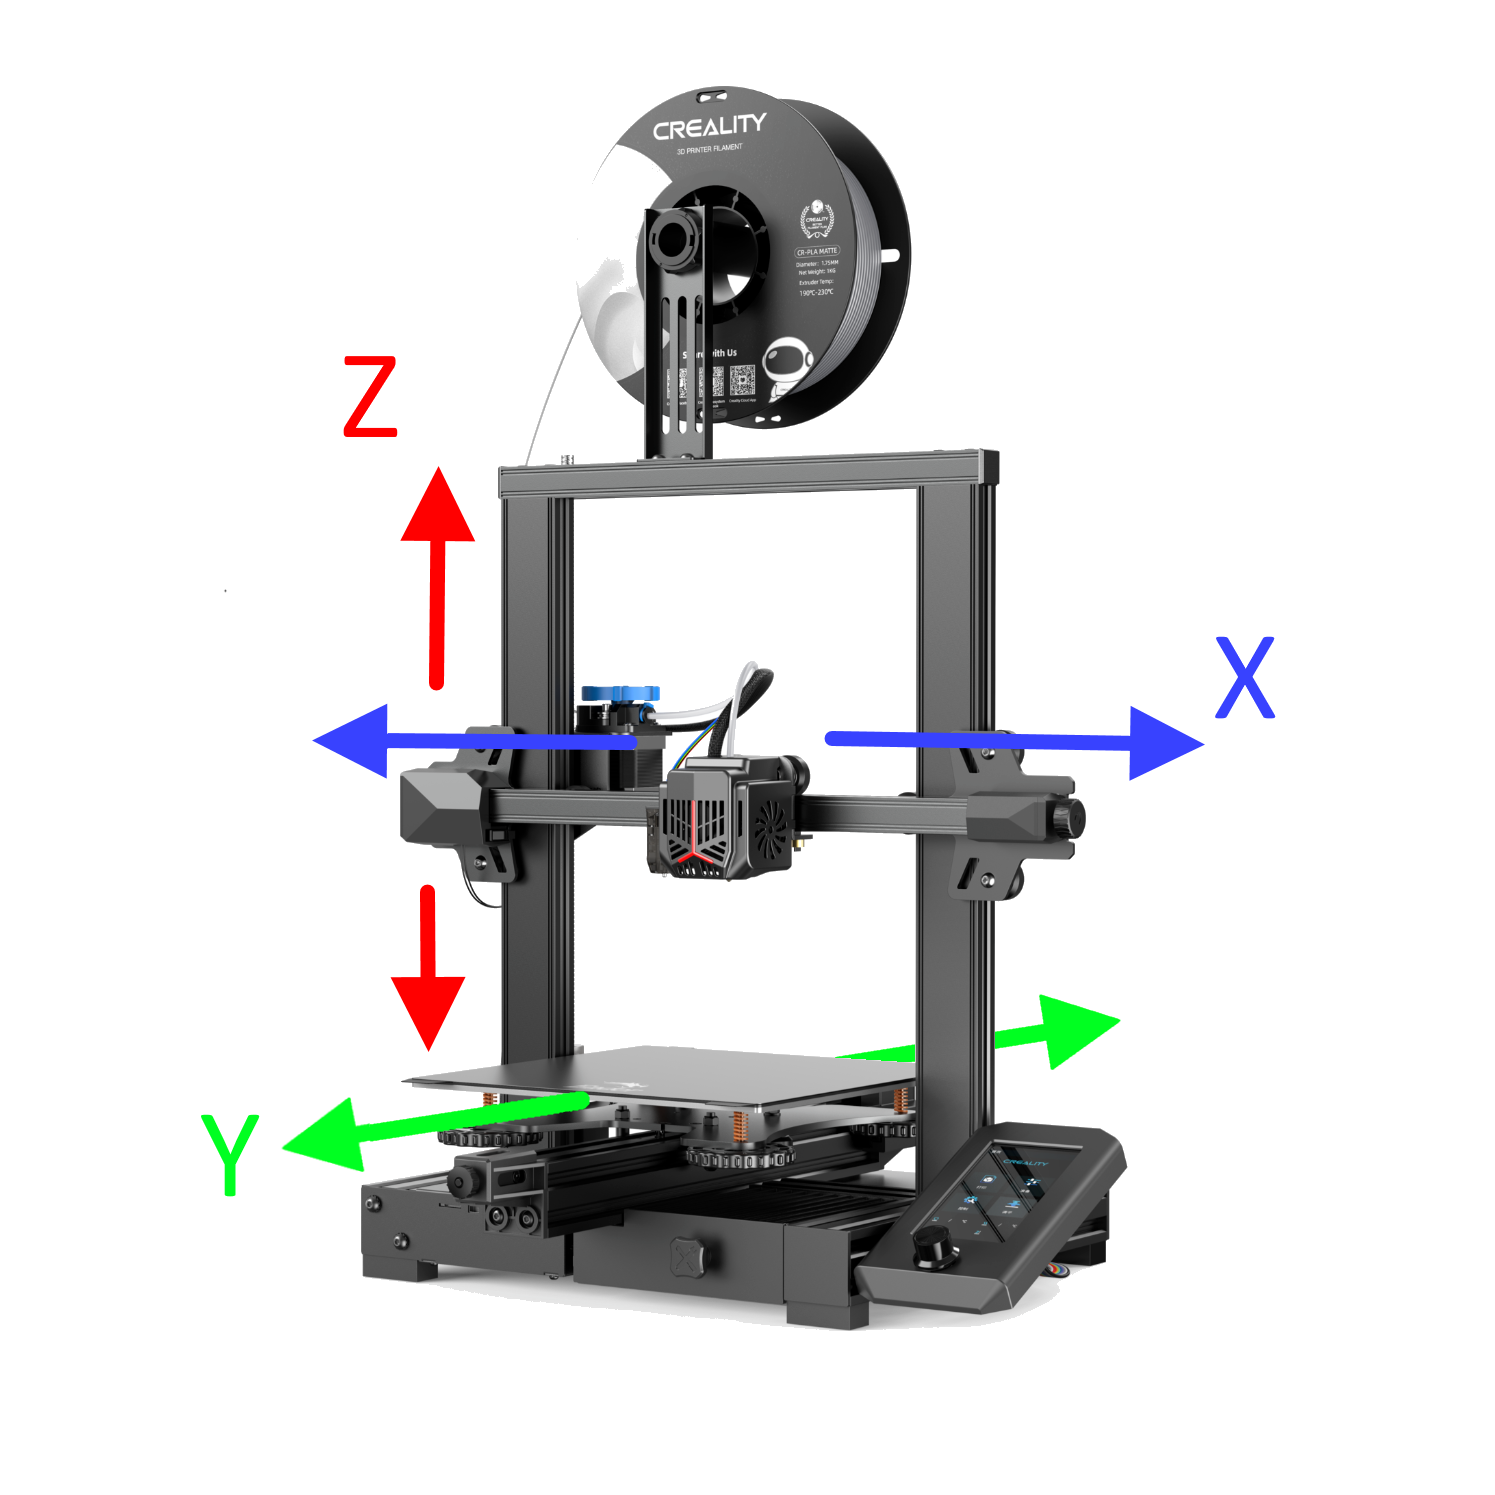
Both printers use the same Cartesian kinematics, where the bed provides one axis of motion while the hot end moves along a gantry.
The Cartesian-XZ design is the standard on most Ender 3 printers, and the Ender 3 Neo and V2 Neo are no exception. They also feature an integrated side LCD display and controller, although the screens are different on the two printers (more on this later).
Extruder Type
The inclusion of a full-metal, single-gear Bowden extruder is a very welcome upgrade that the two printers have received as part of the Neo update. The metal extruder increases the extrusion force and makes jams less likely, a common concern with plastic extruders in the older models that these 3D printers are replacing. This extruder does not offer all of the benefits of the dual gear extruders found on more premium printers like the CR-10 Pro, however we have found that it works very well and is a definite improvement over the plastic extruders in the older models.
Automatic Bed Leveling
The biggest addition in the Neo series is automatic bed leveling as a standard feature. Creality has now made their CR-Touch automatic bed leveling system the new standard among low-end 3D printers by installing it on both the Ender 3 Neo and Ender 3 V2 Neo. The CR-Touch probe automatically probes 16 different points on the bed to identify potential unevenness on the platform and uses that information to automatically adjust the bed during the printing process.
Not only does this eliminate the hassle of manual leveling, but it also produces a cleaner, more accurate first layer, which is vital for the overall quality and bed adhesion of the 3D print. This is also a great feature if you are new to 3D printing, since leveling the bed takes a bit of practice, but even as experienced users we appreciate this feature.
Redesigned Hot End
The Neo series introduces a redesigned hot end, which includes an updated enclosure and a redesigned heat sink on the hot end, providing more surface area and space between the fins to make sure the cold side of the hot end stays cool. This is important to make sure that filament doesn’t melt prematurely, which can cause jamming. While jams can be cleared fairly easily, they are inconvenient and will cause the print to fail, so this is a welcome addition and something that should improve reliability.

The redesigned Neo hot end still has a single cooling fan like its predecessors, despite the symmetrical enclosure.

The Neo hot end features an updated heat sink to reduce jamming, which is a common cause of print failures.
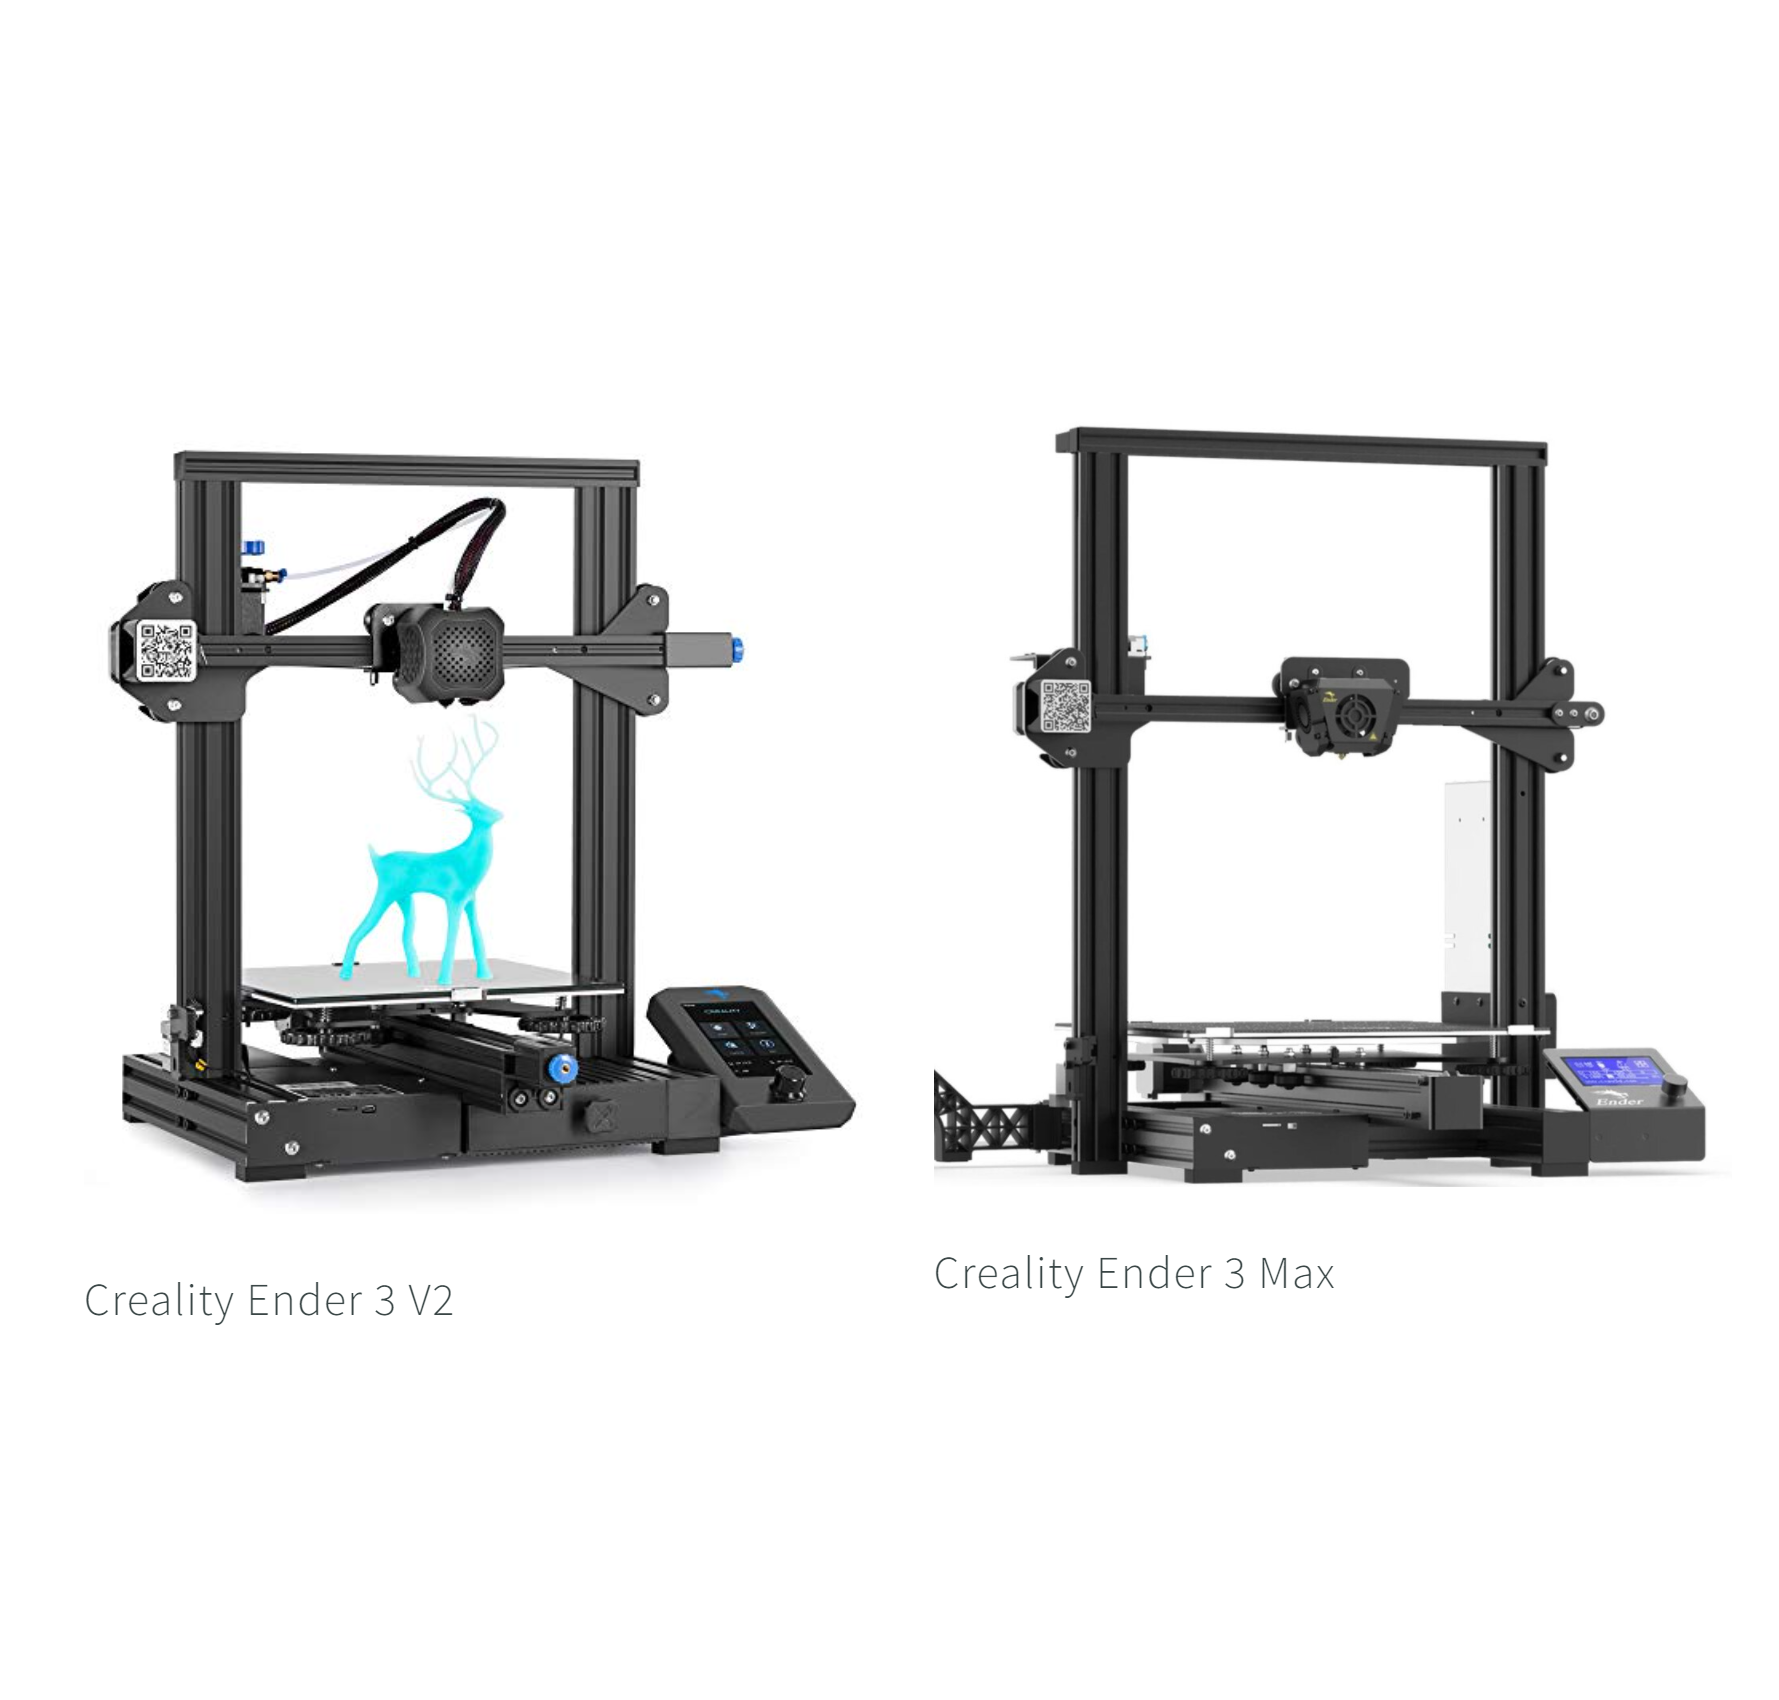
Despite the updated enclosure, the Ender 3 Neo series uses a single part cooling fan just like the earlier Ender 3 series printers, which only blows air on one side of the nozzle. The enclosure features a symmetric design, which makes it appear to have a fan on both sides, but it actually has a single fan located on the right side. This part cooling system is able to handle most overhangs, but does not perform quite as well as the dual fan part cooling on the Creality Ender 3 Max, or the larger fan on the Creality Ender 3 S1 series.
Temperature and Printing Materials
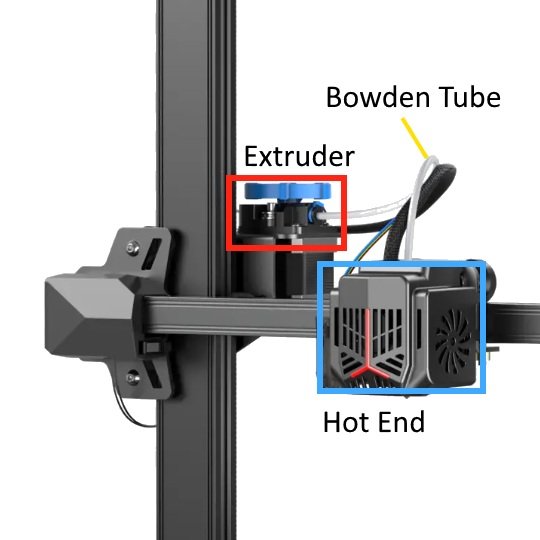
Most Ender 3 models, including the Neo series, use a Bowden extruder, which is separate from the hot end and feeds filament through a Bowden tube to the hot end.
Both printers use a standard hot end that is not a full metal design, meaning that the nozzle temperature is limited to 260 °C like previous printers in the Ender 3 series. The build platform can heat up to 100 °C. These are sufficient temperatures for printing most standard materials, including PLA, PETG, and ABS. These temperatures also allow for TPU, but the Bowden extruder setup makes printing with flexible materials more difficult, and we recommend choosing a printer with direct drive like the Ender 3 S1 if you are looking to print flexible materials.
Because the hot end is limited to 260 °C (and really should be run lower, at a max of 240 °C or so), you will be unable to print exotic materials such as nylon with the Neo printers, unless you upgrade the hot end and printer firmware.
Software Features
The power recovery feature is a convenient feature that is now standard on the Ender 3 Neo series. It protects your work-in-progress 3D prints against interruptions due to power outages. You can resume the 3D printing from where it stopped and continue the process without any hiccups. If your power is out for an extended period of time, it’s unlikely you’ll be able to resume the print because the bed will have cooled and released the partially-printed model, but if you live in an area with frequent power hiccups, this feature can save your in-progress prints.
Differences between the Ender 3 Neo and Ender 3 V2 Neo
So far, we’ve seen how similar the Ender 3 Neo and Ender 3 V2 Neo are in various aspects. But, the Ender 3 V2 Neo is more expensive than the Ender 3 Neo, so what do you get for the added cost? We’ll cover the differences between the Ender 3 Neo and Ender 3 V2 Neo in this section.
Bed Material
The PC-coated flexible magnetic spring steel build plate on the Ender 3 V2 Neo offers excellent adhesion and a hassle-free usage experience. A little flex of the bed material is all it takes to separate the 3D prints. The smooth bed surface requires little to no cleaning. However, the bed surface is more susceptible to damage than other materials, and it can be difficult to remove prints in some cases.
We actually prefer the carborundum bed on the Ender 3 Neo since it is more difficult to damage when removing prints. The carborundum sticks firmly at hot temperatures, but after it cools down, the prints come off with ease. However, it is important to clean this type of bed with a wet towel every so often to ensure good adhesion.

The Ender 3 Neo uses a carborundum glass bed, which provides great adhesion when hot and allows easy part removal when cooled. It’s important to keep it clean to maintain adhesion.

The Ender 3 V2 Neo uses a magnetic PC steel bed, which has great adhesion, but is more difficult to remove parts from. This type of bed is also more susceptible to damage than the carborundum bed.
Screen and UI
Although both Neo printers feature a side-mounted LCD screen, that’s where the similarities end for the screens. The lower-end Ender 3 Neo uses a 3-inch monochrome LCD screen with limited graphics capabilities. On the other hand, the Ender 3 V2 Neo uses a larger a 4.3-inch screen that is capable of displaying more colors and a nicer, more graphical UI. However, neither printer has a touch screen, with both being operated with a single knob that presses in to select items.
One other difference worth noting is that the more premium printer, the Ender 3 V2 Neo, allows you to preview the sliced model on the LCD screen before 3D printing. This is a nice feature that makes it much more clear which model you are printing when you select a file to print.

The Ender 3 Neo uses a dated, smaller LCD screen, but it provides the same menu options as the newer screens.
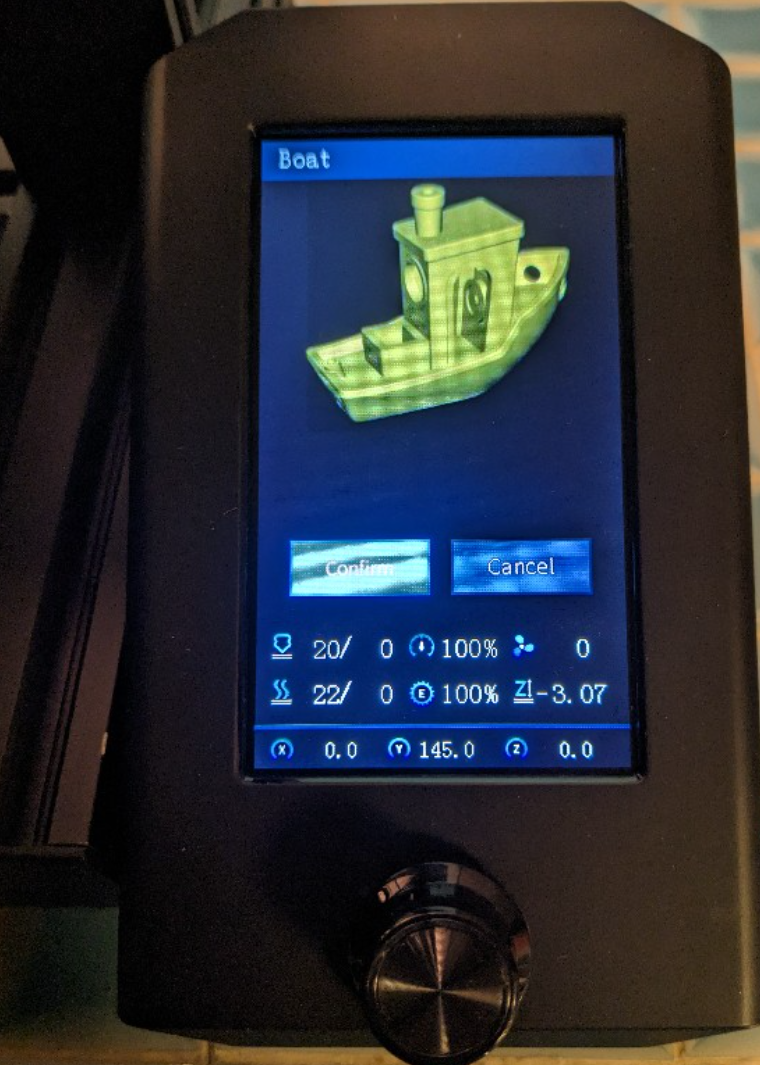
The more modern Ender 3 V2 screen still uses a knob controller, but is much larger and includes new features, like a 3D model preview.
Ease of Assembly
The Ender 3 Neo requires a substantial amount of work to assemble, even though Creality ships it partially assembled. Out of the box, it takes at least an hour to assemble and set up, and may take longer if you are not experienced with 3D printers.
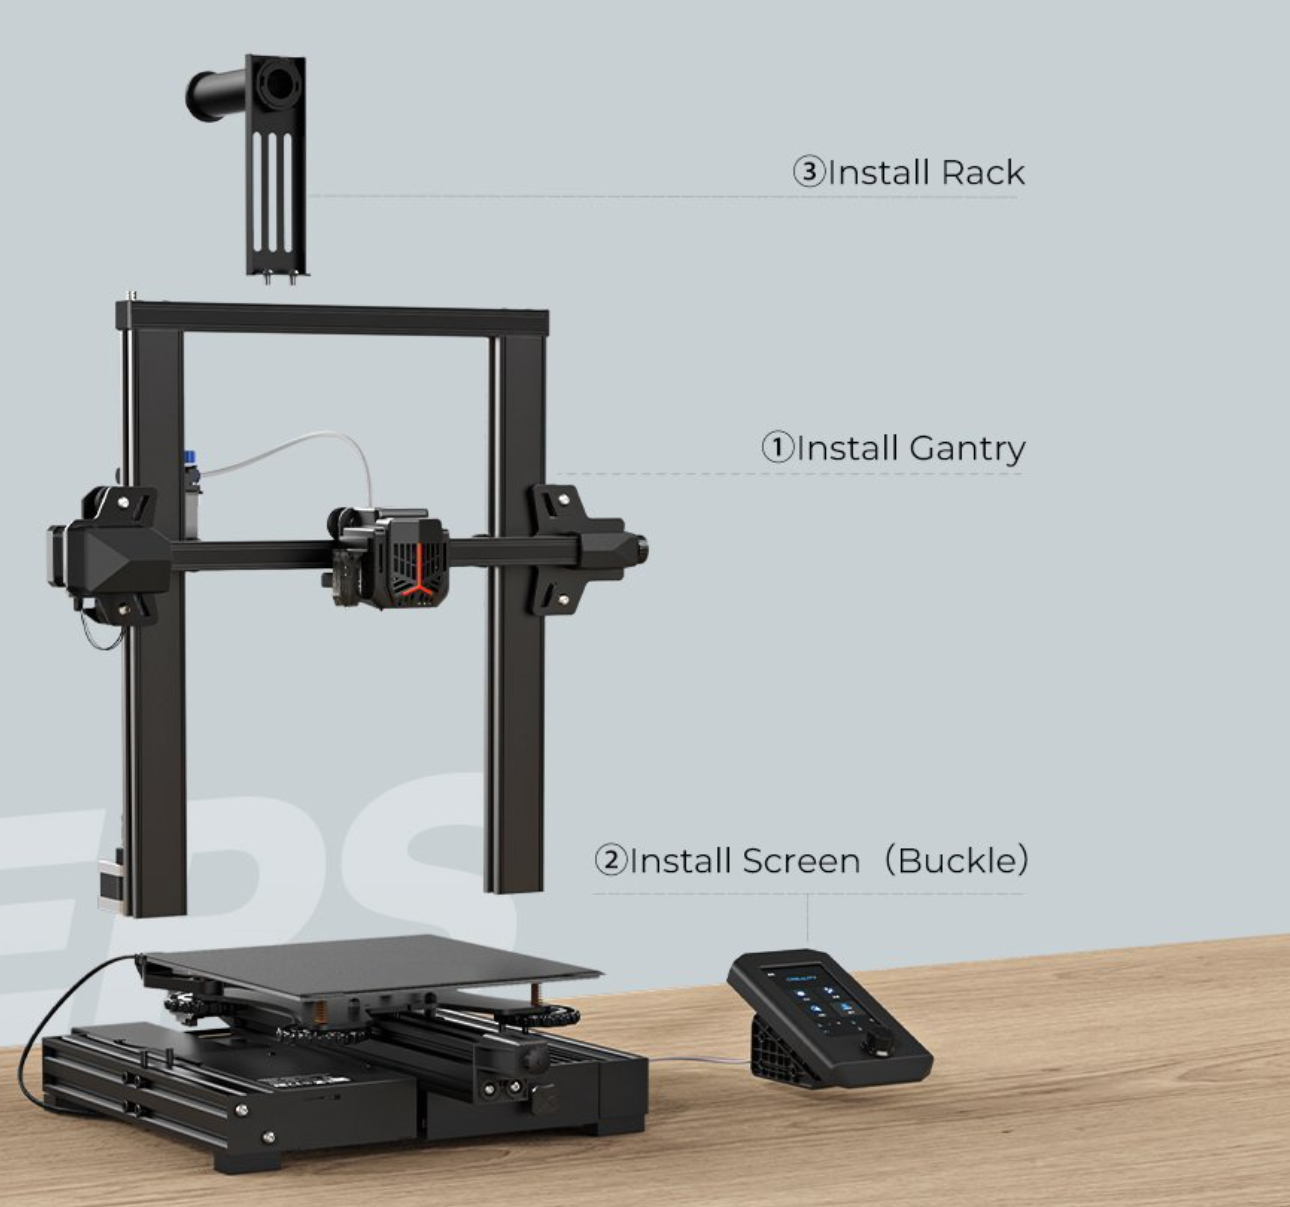
In contrast, the 3-step assembly of the Ender 3 V2 Neo makes it drastically easier to set up. In fact, you’ll have it up and running in less than 15 minutes. This is a major improvement of the Ender 3 V2 Neo over the Ender 3 Neo, especially for beginners or those of us who are impatient and want to use our new 3D printers as quickly as possible.
Other Differences
There are a few other minor differences between the Ender 3 Neo and Ender 3 V2 Neo, which are not dealmakers or dealbreakers in themselves. Still, they are some nice-to-haves for the more premium model. These include an integrated toolbox and belt tensioners, which add to the improved usability and polish of the Ender 3 V2 Neo.
Interestingly, the Ender 3 Neo one-ups the Ender 3 V2 Neo in one area: the user interface supports 9 languages, including English, Spanish, German, Chinese, and others, while the Ender 3 V2 supports only English and Chinese.
Which 3D Printer Should You Choose?
In our opinion, both the Creality Ender 3 Neo (Amazon link) and the Creality Ender 3 V2 Neo (Amazon link) are capable entry-level 3D printers featuring advanced features at a surprisingly low price point. Overall, the similarities between them outnumber the differences, and the quality of the prints they produce is identical too.
The main area where the Ender 3 V2 Neo really outshines the Ender 3 Neo is in terms of usability and getting started experience. Whether it’s assembling the printer, operating it, or maintaining it, the Ender 3 V2 Neo is an easier machine to work with. We think that these features are worth the extra $80 price difference, especially if you are new to 3D printing.
That said, if your budget is constrained and you don’t mind tinkering with gadgets, then the Ender 3 Neo is a great buy too. It’s definitely not a compromise in terms of print quality or performance.
We hope you have a better idea what you are getting with the Creality Ender 3 Neo and Ender 3 V2 Neo and feel more prepared to make a decision. Here’s a full recap to summarize:
If you’d like to compare other printers, take a look at our 3D Printer Comparison Tool. This tool lets you view multiple 3D printers side by side to easily compare features.