
How to Upgrade the Extruder on a Creality Ender 3 or CR-10
In this article, we will show you how to install our recommended extruder upgrades for the Creality Ender 3 and Creality CR-10. The following upgrades are covered in these instructions: This article provides detailed instructions or installing our recommended extruder upgrades (click to check prices on Amazon):
If you don’t have these parts, we suggest you start with our Recommended Upgrades page to see why we recommend upgrading these, and for links to purchase them.
Note: Creality Experts receives a commission for items you purchase from this page, at no additional cost to you. For more information, please see our affiliate link policy.
Extruder Installation Guide
Follow these steps to replace the extruder on your Creality Ender 3 or CR-10 printer:
Tools Required: Allen wrenches included with the printer (1.5, 2, 2.5, and 3 mm sizes are all used)
1. Make sure you have unloaded any filament from the extruder, and turn the printer off.
2. Unscrew the coupling holding the tube in place. If you are upgrading the couplings, press downward on the plastic piece to release the coupling from the tube to remove it.
3. Remove the screw attaching the lever arm with the 2.5mm allen wrench while applying pressure to the arm to keep it aligned.
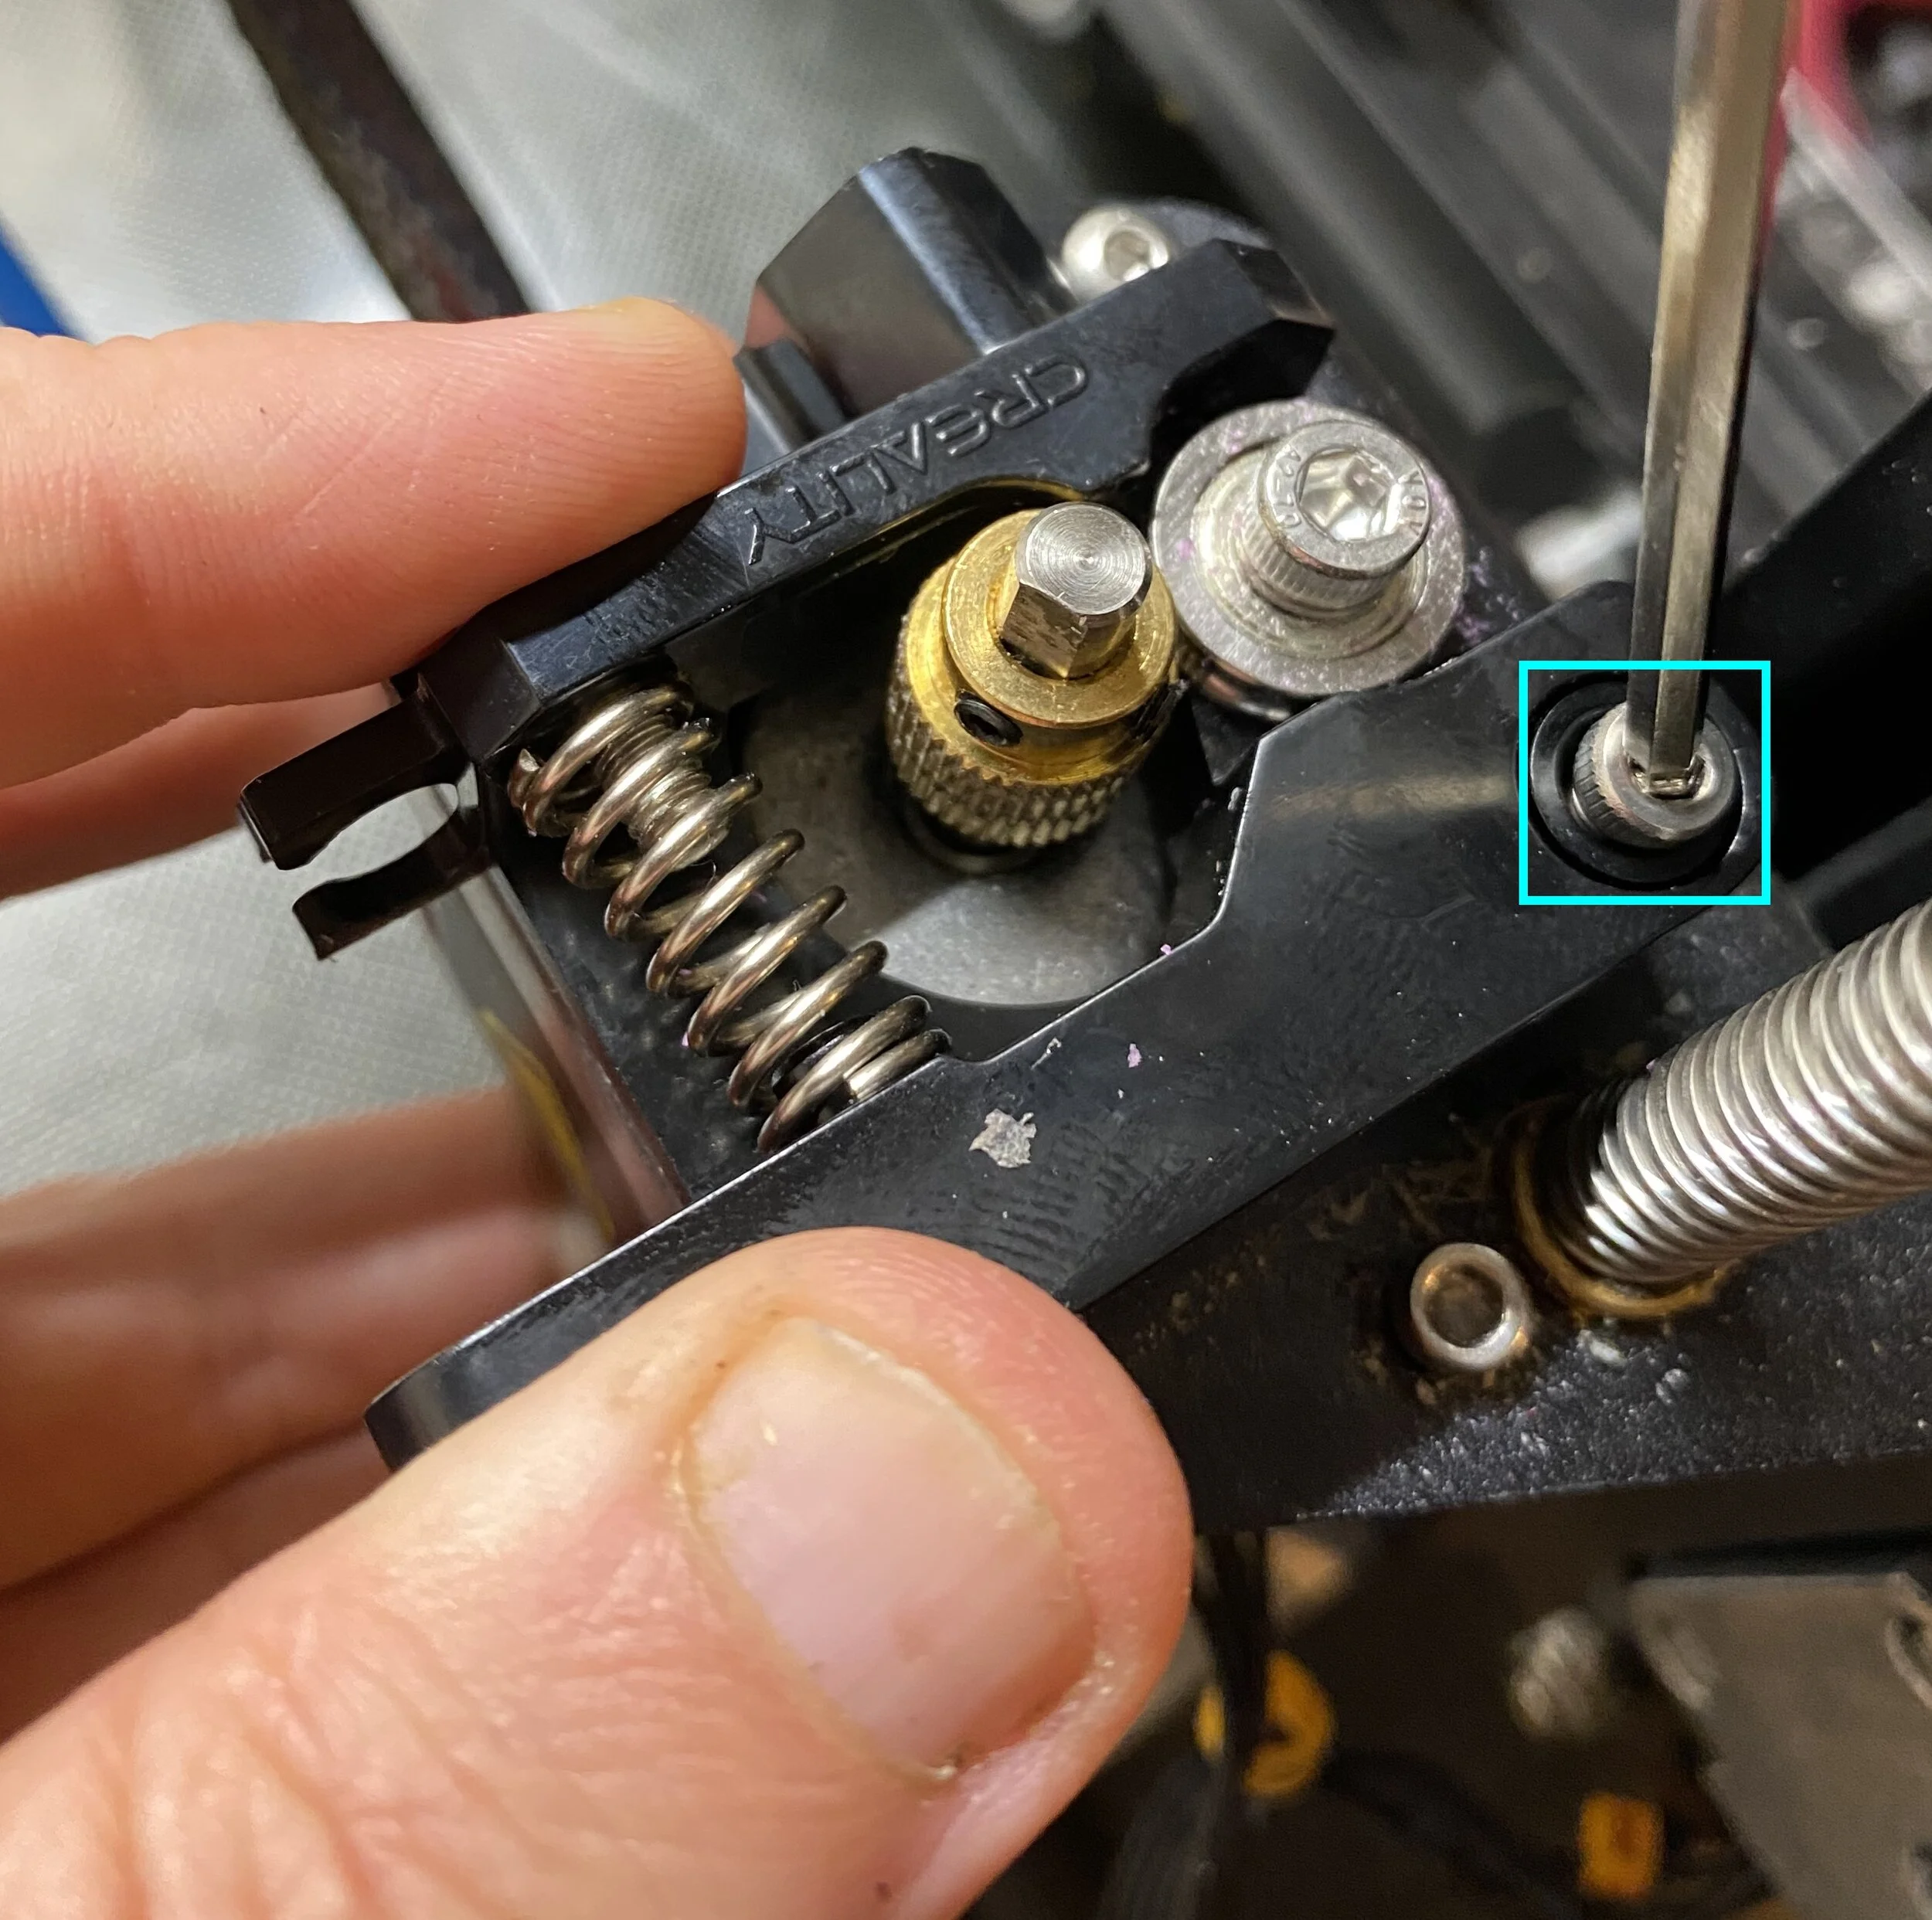
4. Remove the spring retaining screw from the housing with the 2.5mm Allen wrench to access the screw underneath it
5. Once the lever arm is removed, remove the three remaining screws with the 2mm Allen. These screws are all that is holding up the motor, so don’t let it fall.

6. (If you are not replacing the extruder gear, skip this step) Now that the motor is detached, use the smallest Allen wrench to loosen the two grub screws holding the gear on the motor, then remove the gear.
7. Attach the new extruder gear in the same position. You may need to loosen the grub screws on the gear before it will slide onto the motor. Make sure one of the grub screws lines up with the flat part of the motor shaft to prevent sliding.

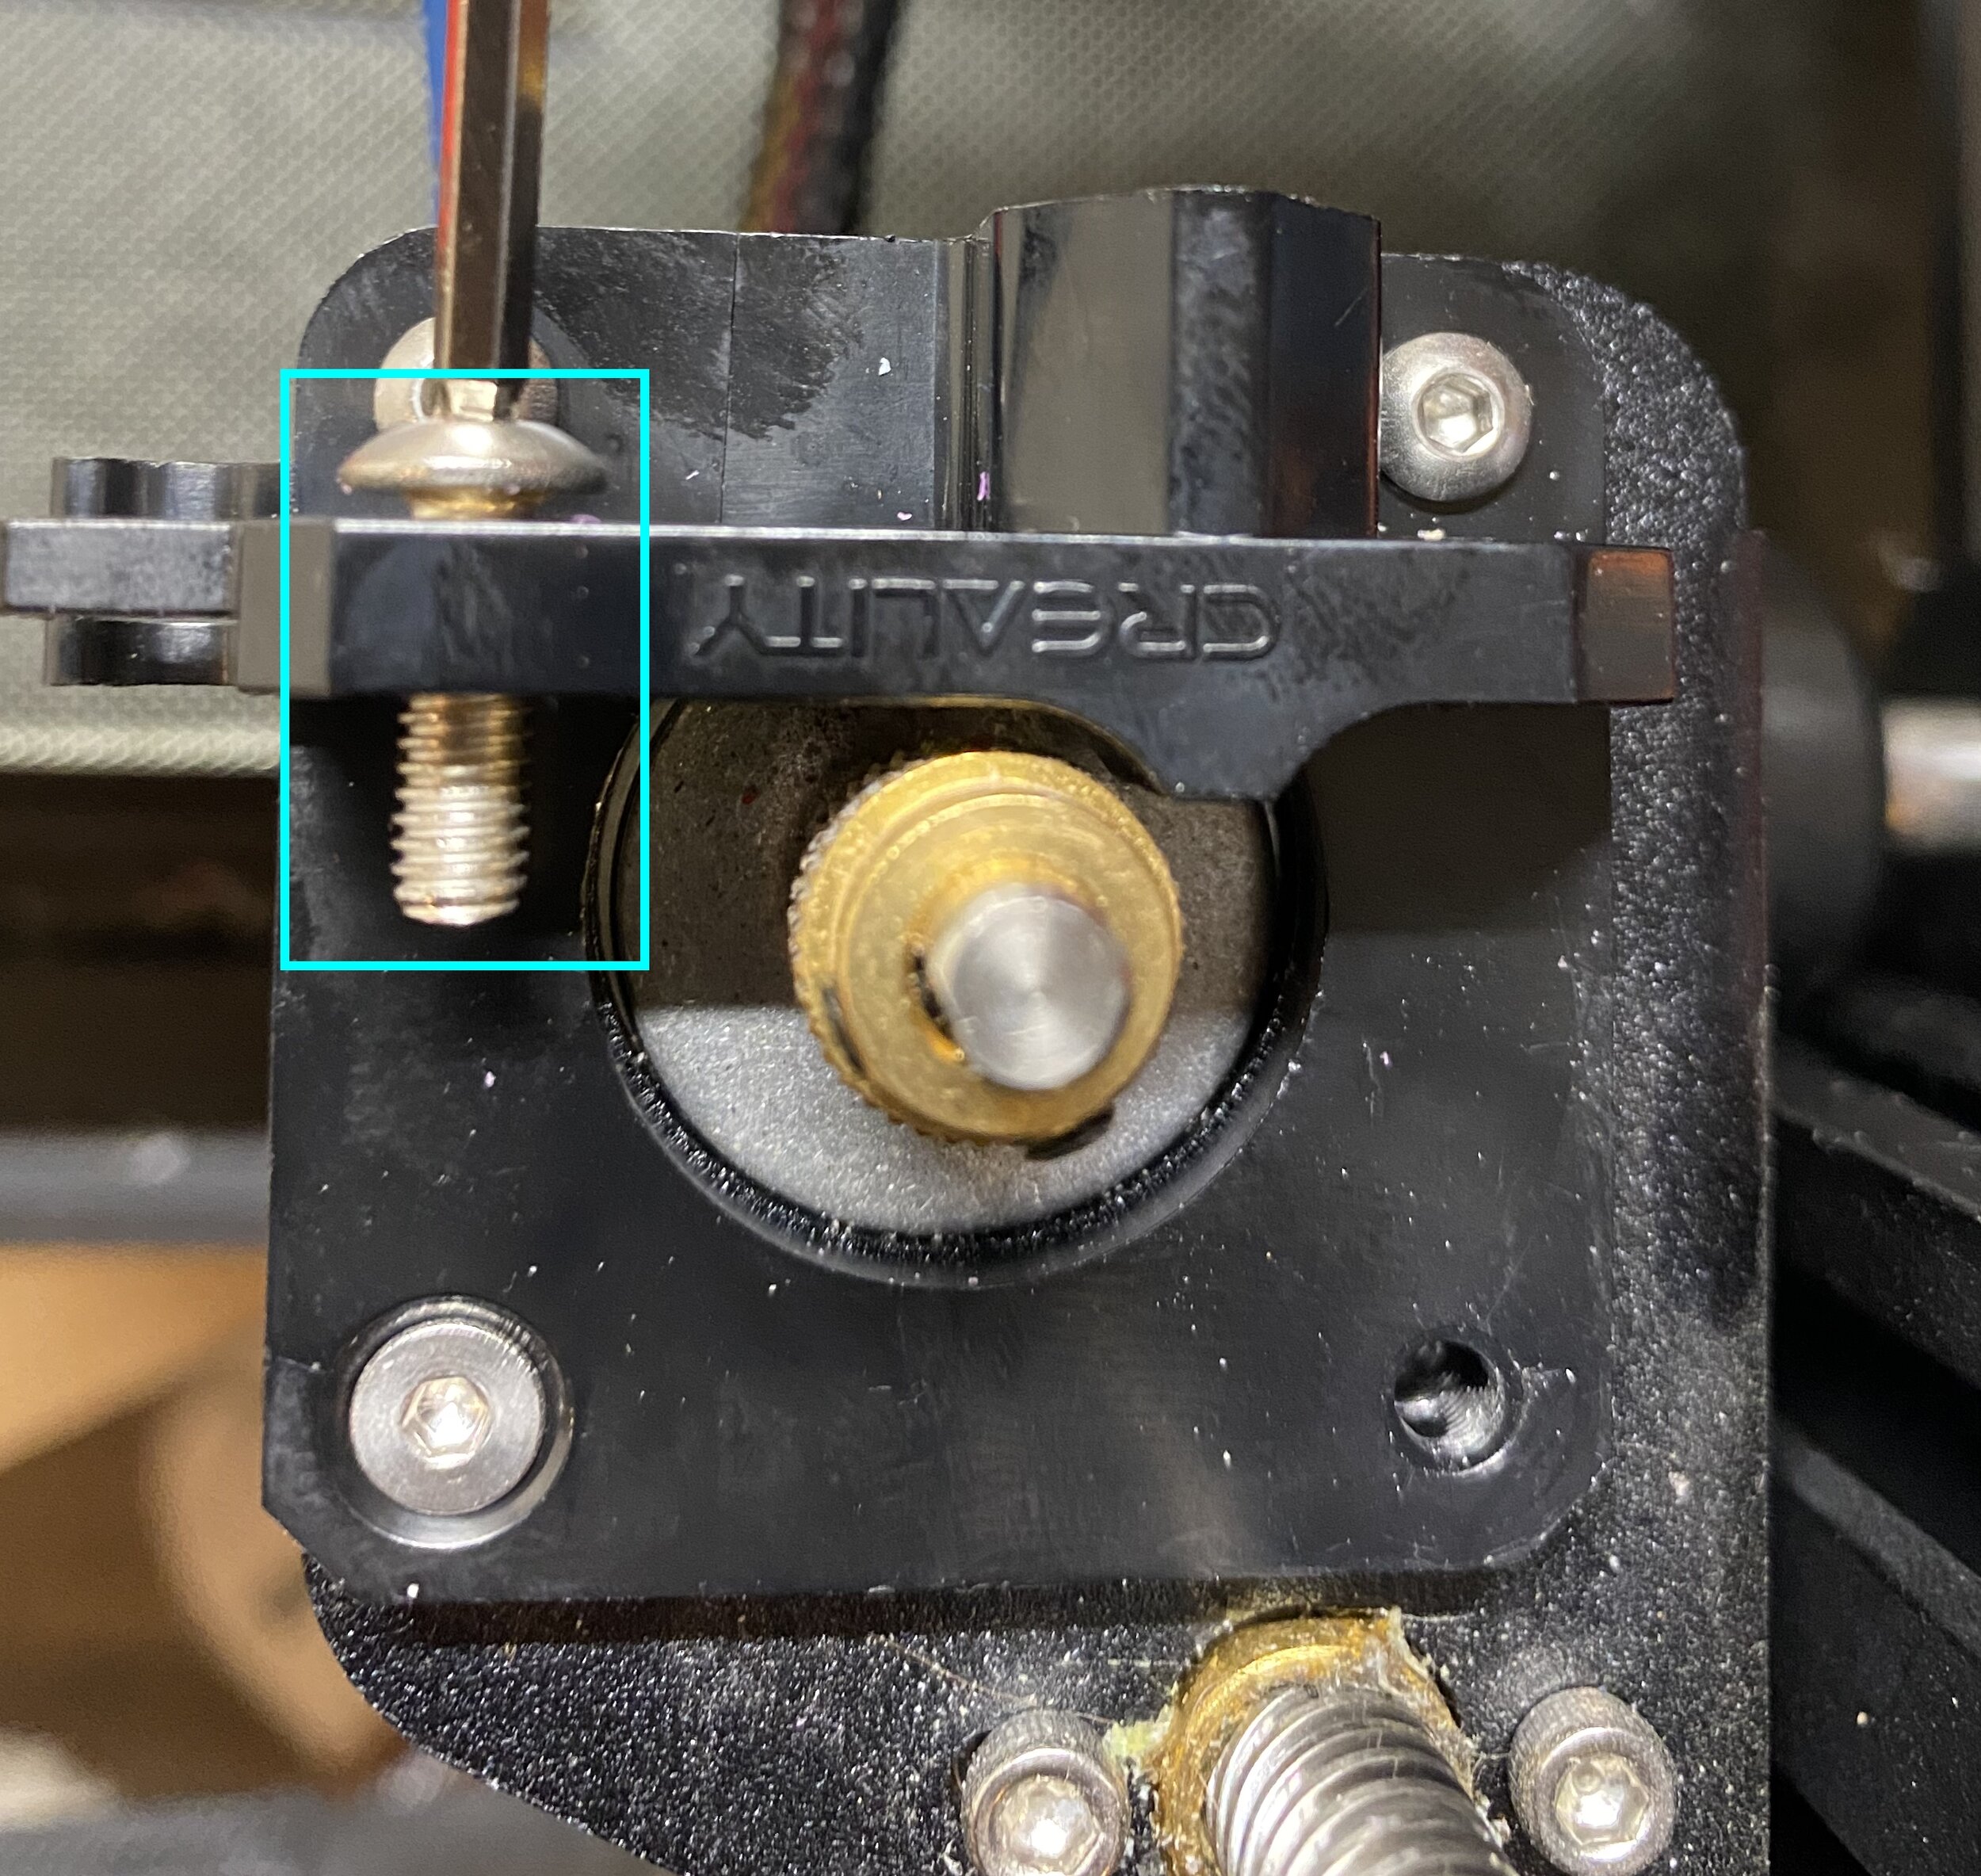
8. Attach the metal extruder housing using the 3 new screws. Make sure you use the countersunk (conical head) screw for the lowermost hole. Also, be sure the motor cable is oriented correctly. (see blue arrow)

9. Attach the longer, thick headed screw to hold the spring in place, some kits include a spring mount as well (it was in our kit), but this isn’t required. Don’t screw it in all the way, or it will prevent the lever arm from moving later

10. Assemble the new lever arm with the idler pulley using the thicker screw (don’t overtighten, the pulley should easily turn), and attach the spring retaining screw.
11. Attach the lever arm to the housing with the spring in place. After tightening, the lever arm should spring back into place after pressing it, but it should only move in the direction of the spring

12. Re-attach the PTFE tube. Depending on the design, the coupler may be built into the extruder houusing, or may be a seperate piece that is screwed in. In either case, push the PTFE inward until it won’t move, and cannot be tugged back out

Testing the Extruder
Once installed, check that the extruder gear is lined up with the filament path. If it’s too low, loosen the grub screws and move the gear slightly upward while holding the lever arm.
To test that the extruder is properly gripping the filament, use the control interface to raise the temperature, then move the extruder motor. Note that if the hot end is not heated, the extruder motor will not push filament (this is a feature to prevent grinding if there is a hot end problem). After the extruder movement is complete, the motor will be locked and should hold the filament in place. Pull firmly on the filament and ensure that it does not slide through the extruder. If it does, make sure that you did not overtighten the screw holding the lever arm, which would prevent it from providing enough tension.
Now that these are installed, your extruder is ready for the long haul. If you liked this upgrade, take a look at the other upgrades we’ve applied to our Creality Ender 3s on our Recommended Upgrades page.