Comparing the Creality Ender 3 S1 vs Ender 3 S1 Pro
The Creality Ender 3 S1 and Ender 3 S1 Pro are unique in Creality’s 3D printer lineup as being two of their only machines with direct-drive extruders. At first glance, the printers look very similar. But is the Pro version worth the added price over the original Ender 3 S1?
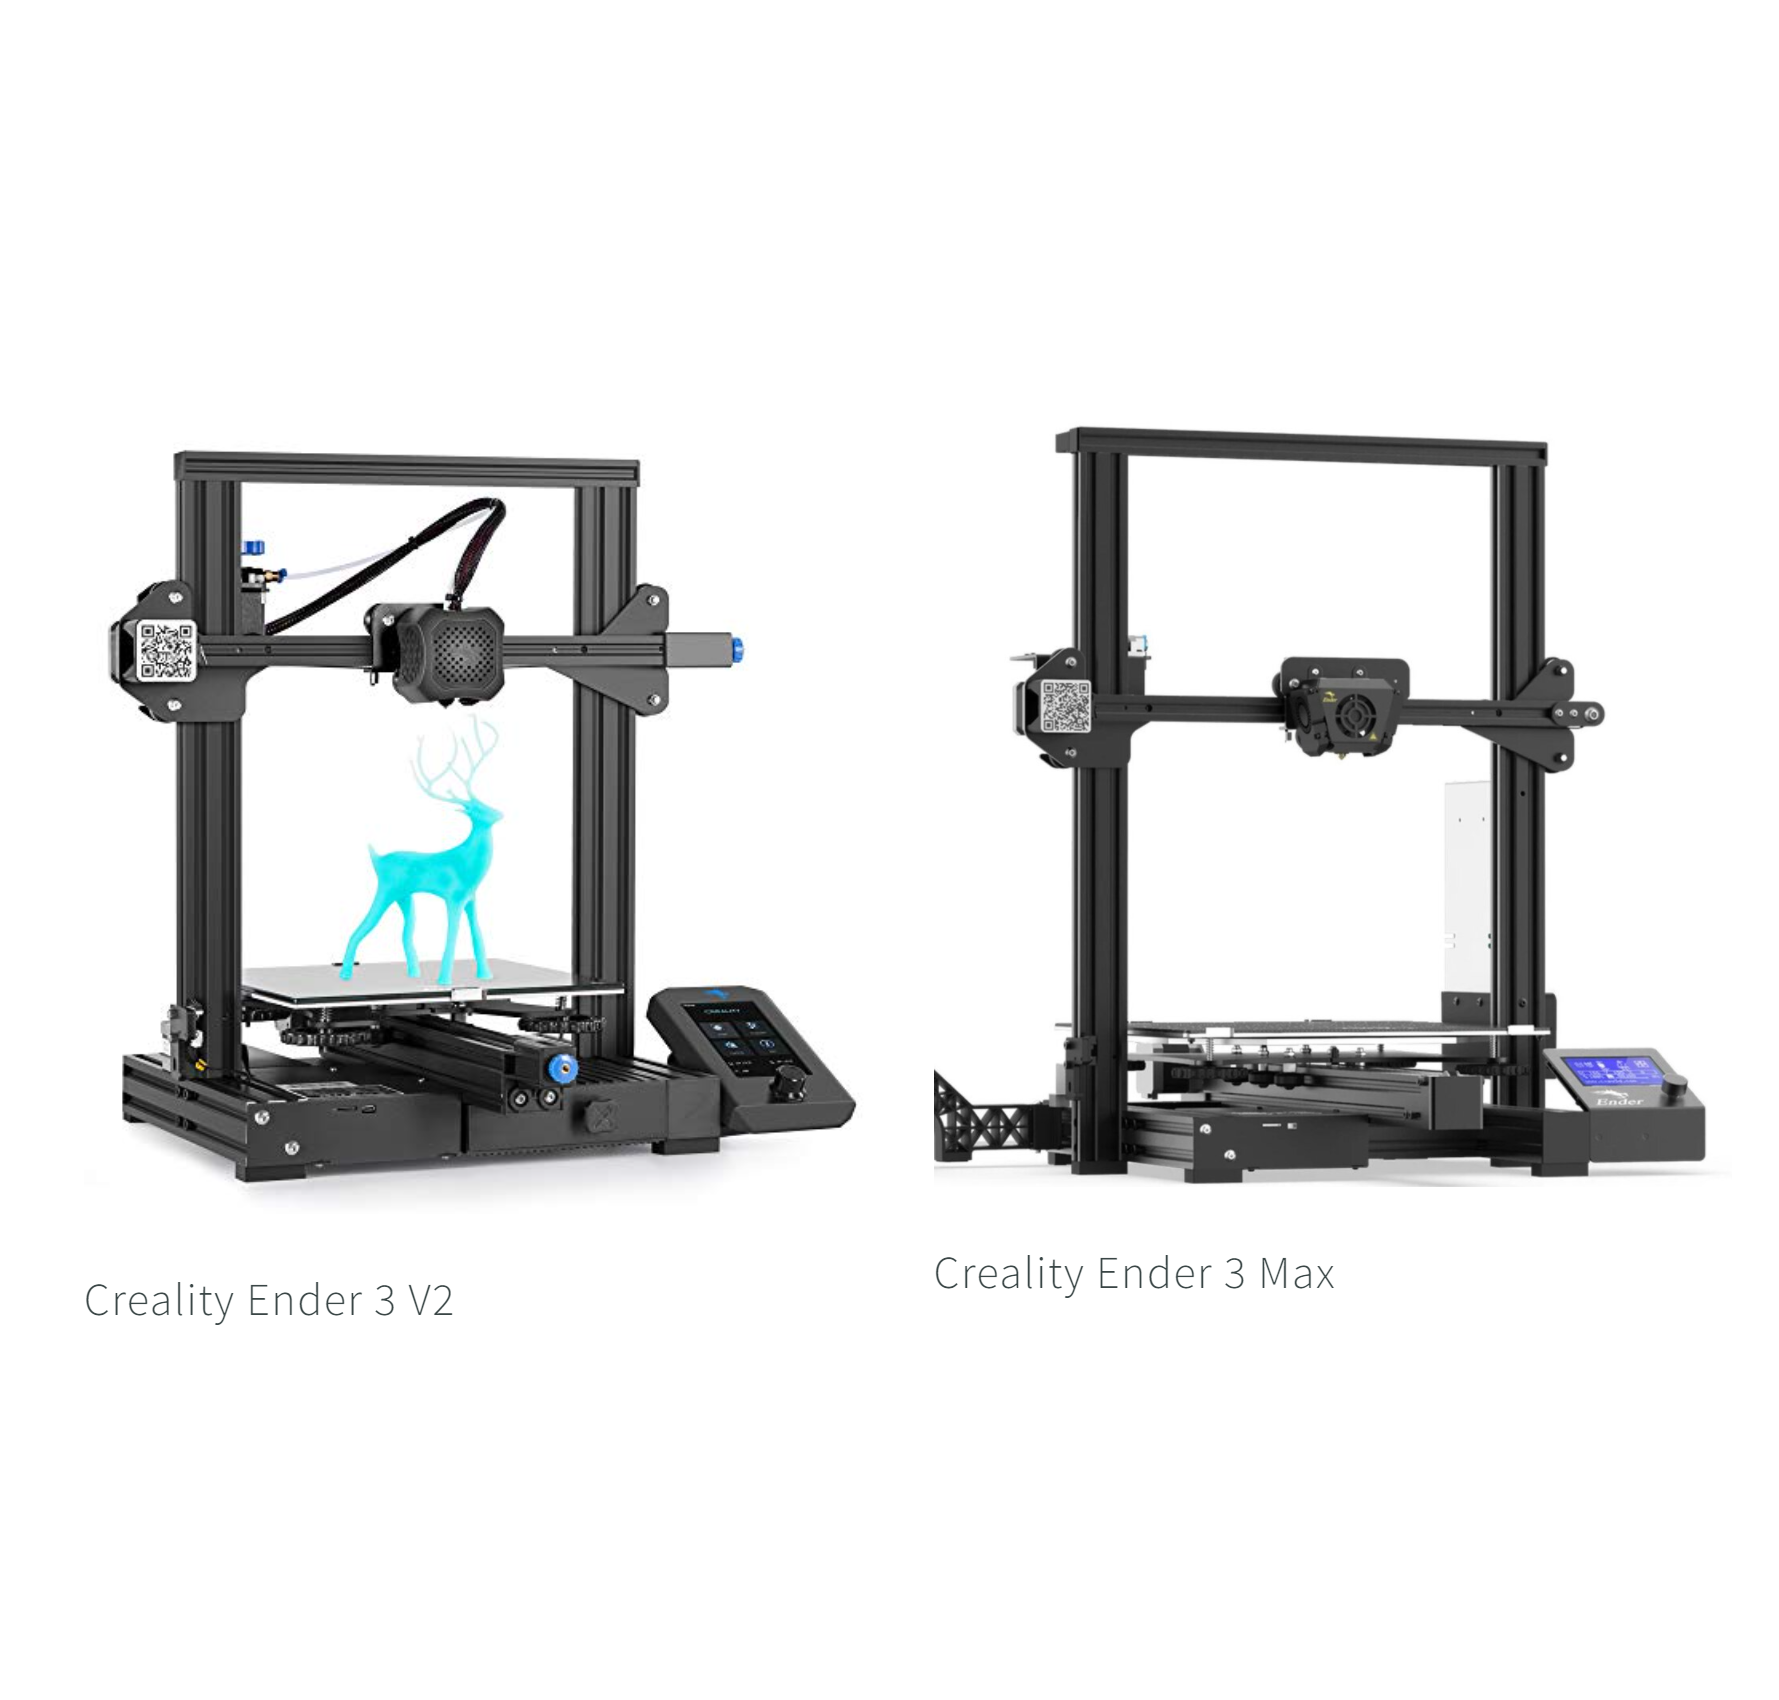
In 2021, Creality released the Ender 3 S1, which was a major update to their popular Ender 3 V2. It introduced premium features like a direct drive extruder, auto bed leveling, and a flexible bed and took a clear step into the midrange market from the budget space of the Ender 3 V2. For a more detailed look at the features of the S1 series and how it compares to its predecessor the Ender 3 V2, take a look at our article on the printers here.
Creality soon followed up with the Ender 3 S1 Pro in early 2022. It’s very similar to the standard Ender 3 S1, but there are a number of improvements to the Pro that make it an upgrade worth considering. If you are looking for a mid-range 3D printer, you may be wondering if the S1 Pro is worth the extra cost, and what was actually added in this fast new release. In this article, we’ll take a look at the baseline features that both of these printers share, then take a look at the added features of the S1 Pro.
Note: Creality Experts receives a commission for items you purchase from this page, at no additional cost to you. For more information, please see our affiliate link policy.
Vs.
Shared Features
We’ll first take a look at the features that both of the Ender 3 S1 series printers include before looking at the differences between them.
Material Capabilities
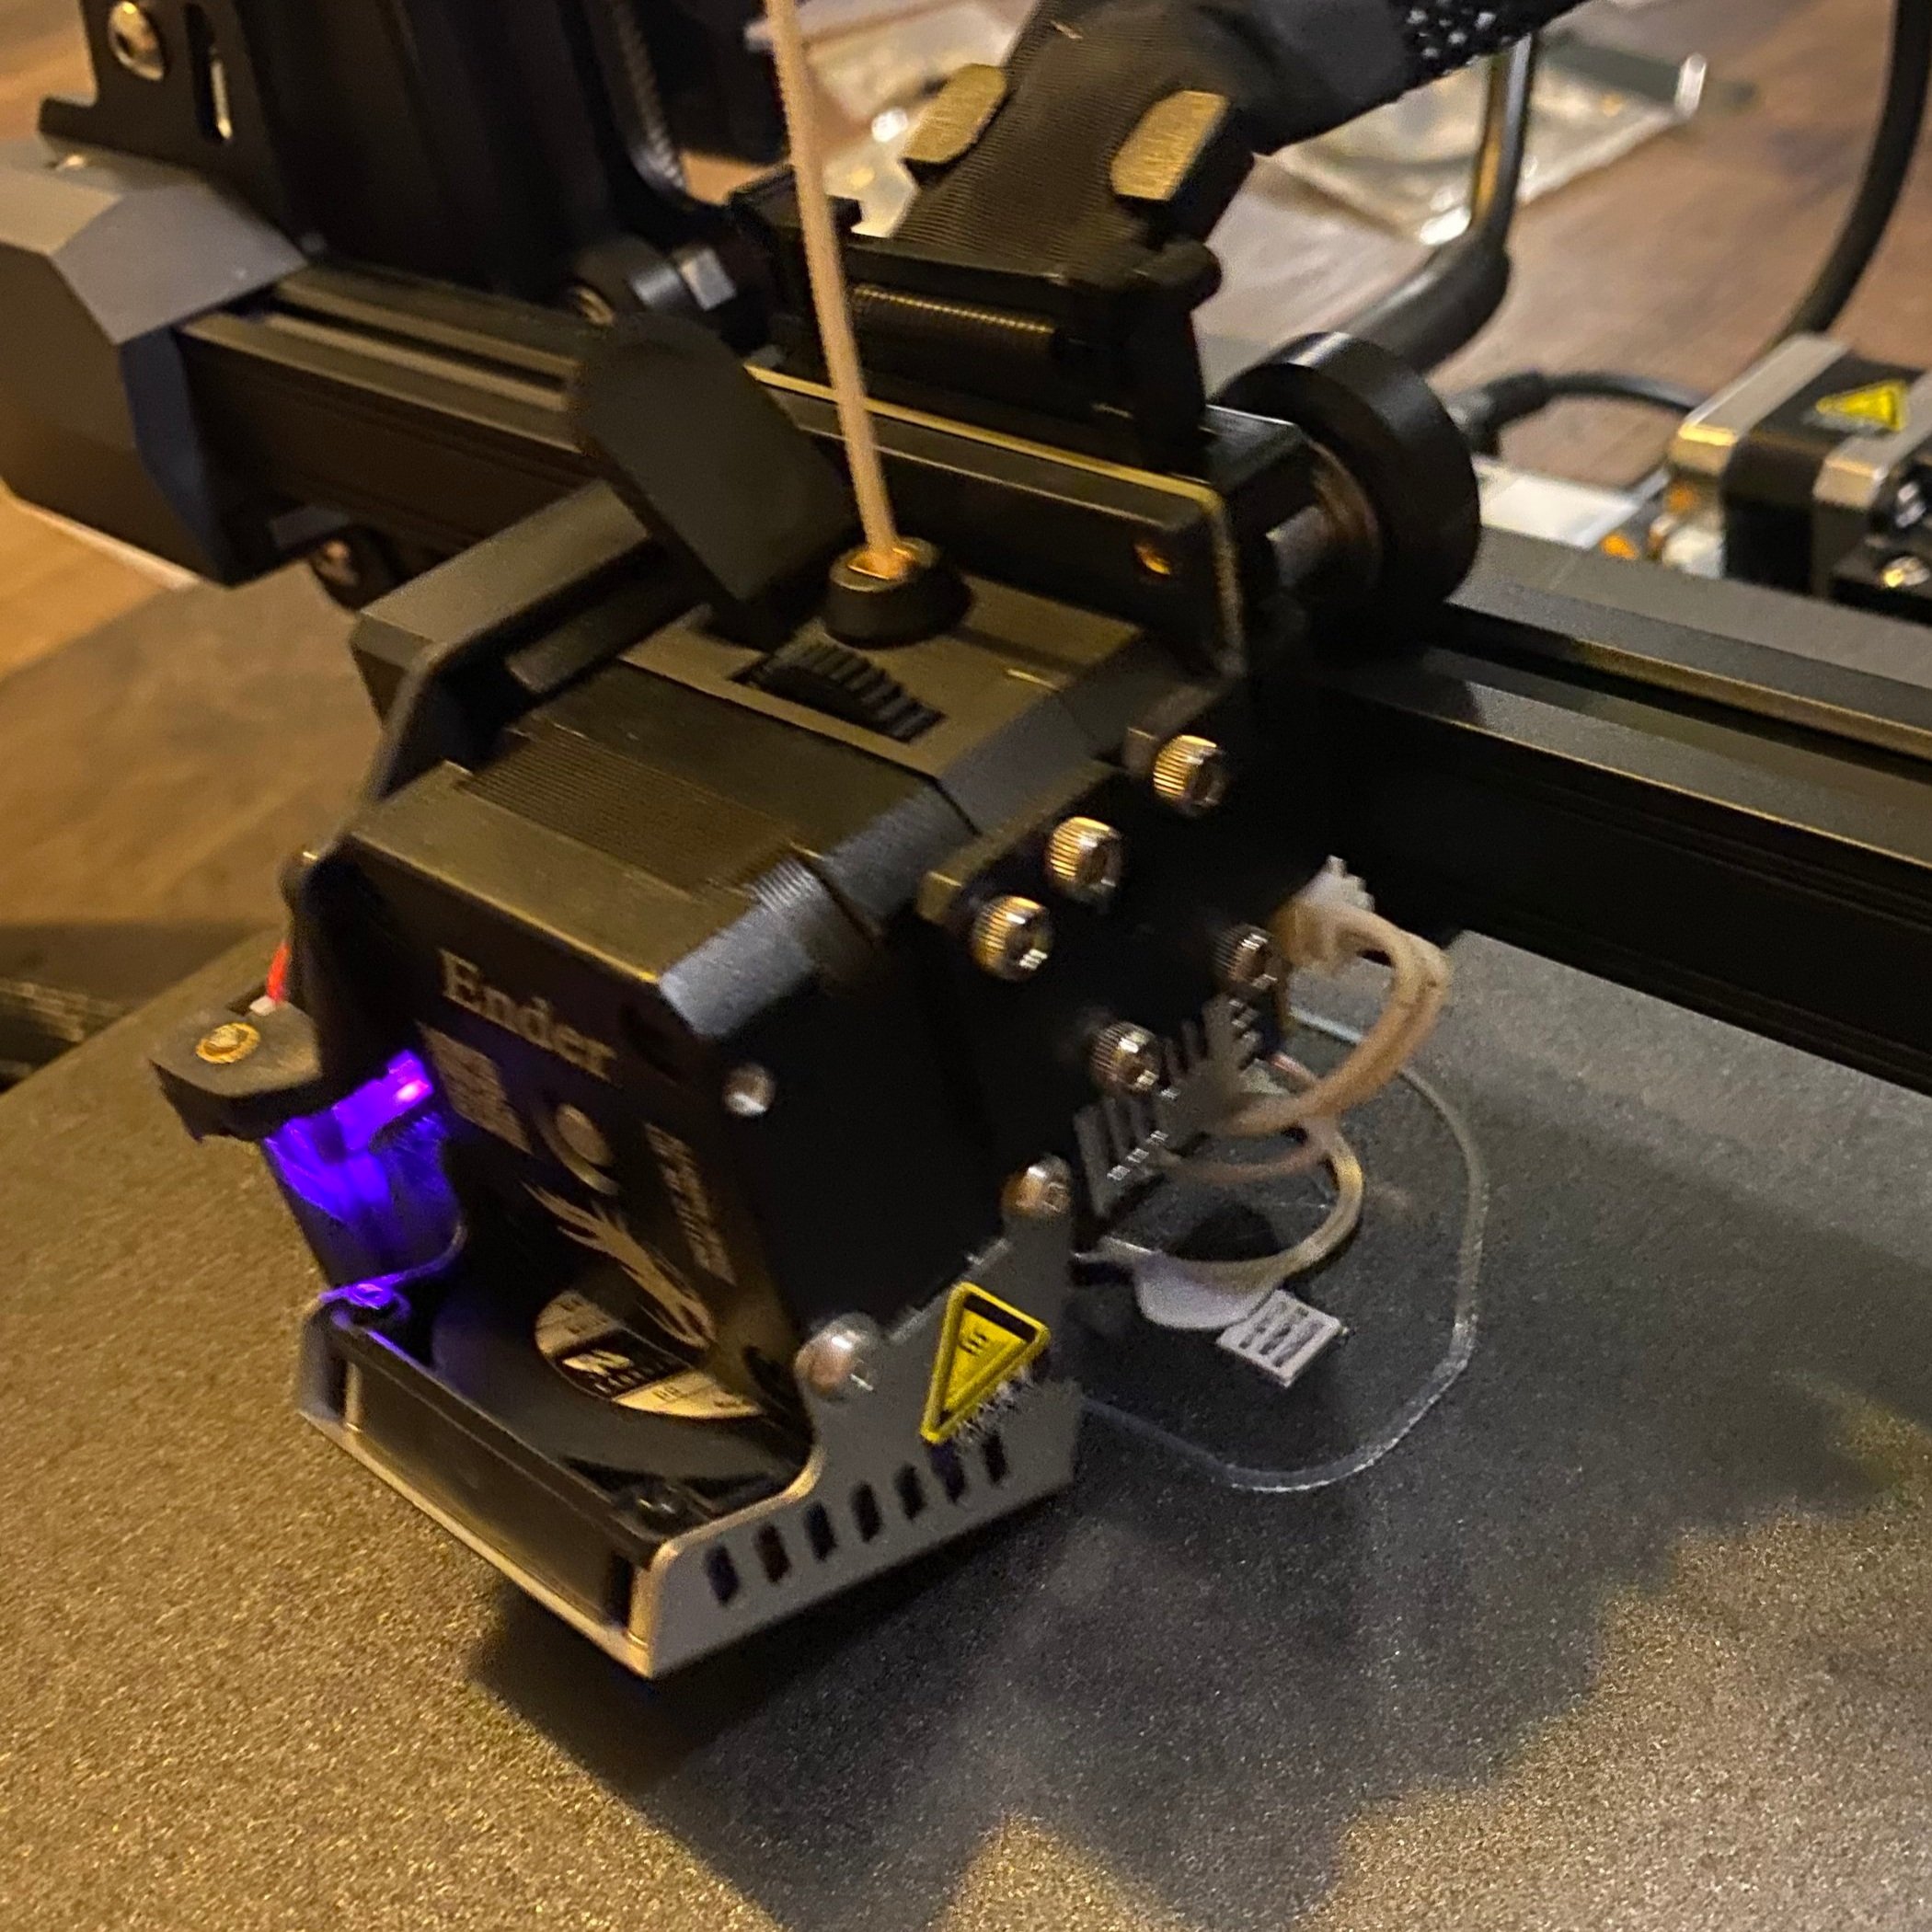
Both the S1 and The S1 Pro use the direct drive Sprite extruder
Both Ender 3 S1 models, like the previous Ender 3 Series printers, are capable of heating up to 260C, hot enough to print common materials such as PLA, PETG, and ABS. The hot end includes a part cooling fan which cools models as they print and is especially useful when printing in PLA. Both printers in the S1 series use the new Sprite direct drive extruder, which neatly packs the extruder and hot end into a single compact assembly. Previous ender models used a Bowden style extruder, where the extruder was mounted separately on the side of the printer.
Direct drive extruders offer a number of benefits, most notably:

Opening the sprite extruder reveals a durable two-gear extruder which provides improved grip on the filament. The lever arm assembly is plastic which may be a failure point, but the new extruder arm is not under as much tension as the previous Ender 3 extruder.
Less prone to stringing, which can occur if material continues to flow when the printer moves between two sections of the print but material does not fully stop flowing. Bowden style extruders require more retraction to combat this, and it is generally a bit harder to calibrate this setting on Bowden extruders, since too much retraction can cause the hot end to jam.
Much easier to print with flexible materials, such as TPU. While it is possible to print with these materials on a Bowden setup, you have to print very slowly, and even so the extruder can often jam.
Loading and unloading filament is faster, since there is no Bowden tube to run the filament through.
They do not require Bowden tube couplers. These are a common failure point on other Creality 3D printers, and while this is an easy problem to fix, it is a nuisance that isn’t encountered on direct drive extruders.
Bowden extruders do have some benefits as well, most notably that they allow the hot end assembly to be lighter without the extruder. The Ender 3 S1 series addresses this with an additional Z axis motor to handle the additional weight of the direct drive extruder.
Chassis Style
The Ender 3 S1 and S1 Pro have the same compact body style typical of the Ender series. While not as sleek as the more premium printers like the CR-10S Pro V2, we like this body style because it doesn’t require a separate control box with messy wires, and these printers are easy to move around since it is all a single piece. This is in contrast to the CR-10 series printers, which use a separate control box that makes the printer more difficult to move.
Print Quality
The Ender 3 S1 and S1 Pro both offer impressive print quality out of the box. Since the printers use similar components along the filament path and both use direct drive, you should not expect a significant print quality difference between the two machines.
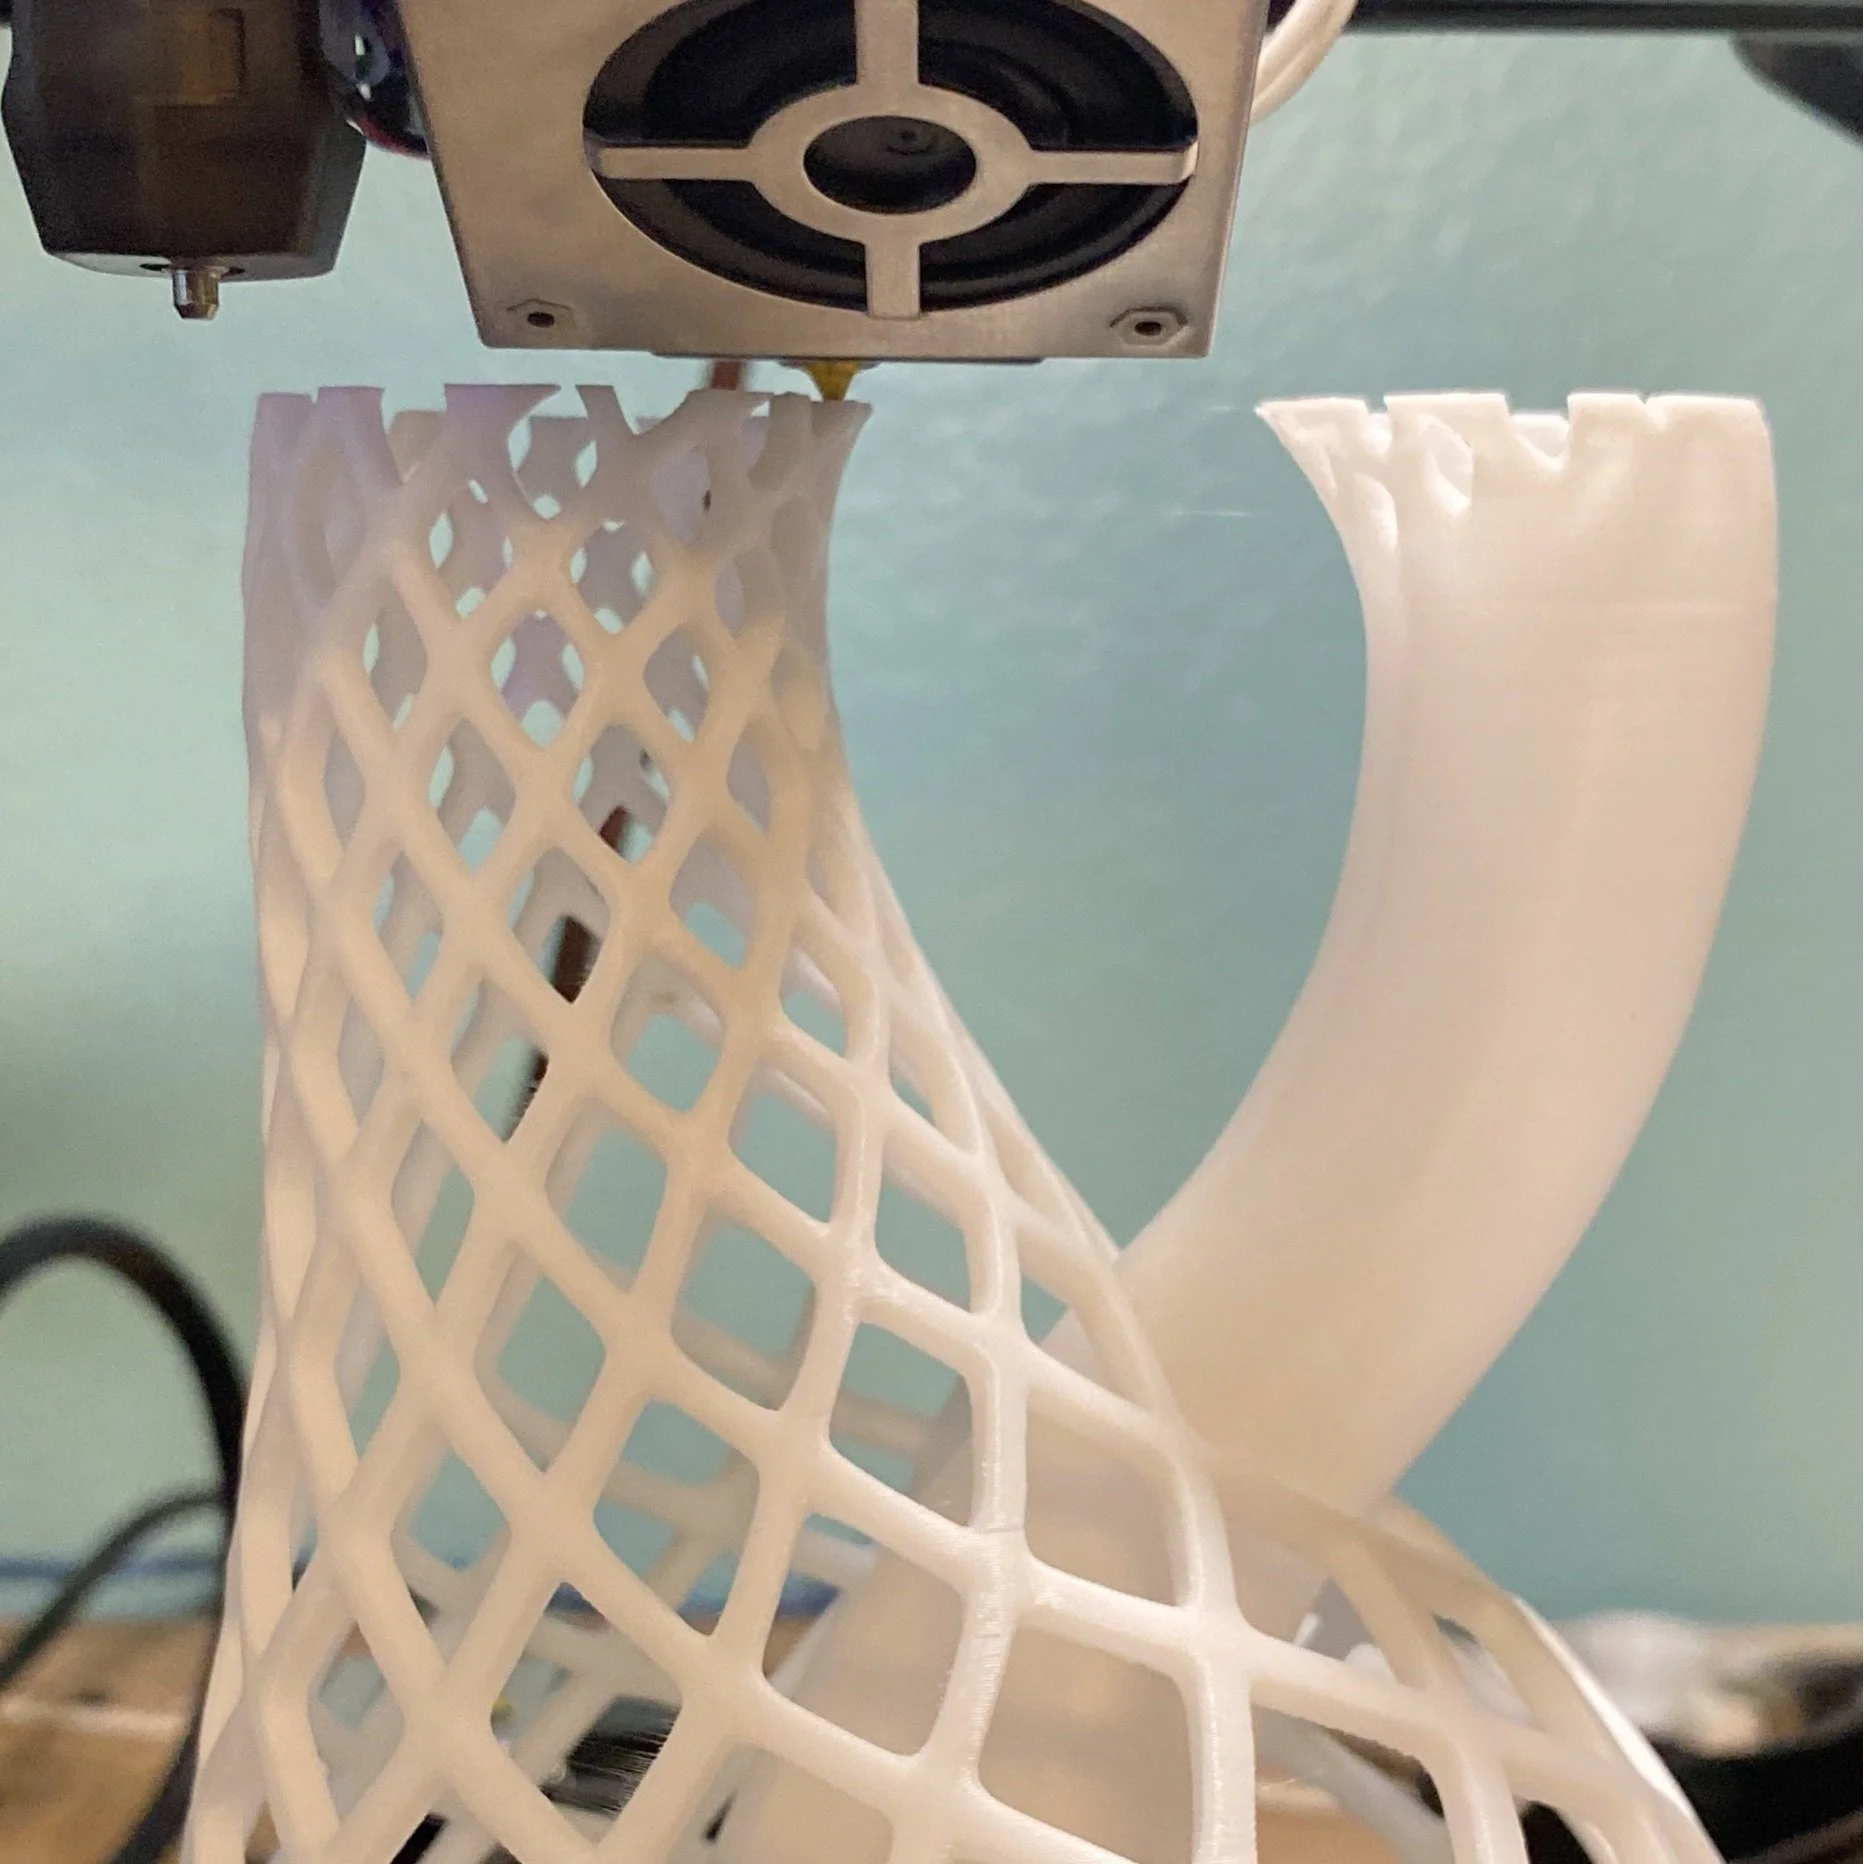
These are a few samples we have printed with the Ender 3 S1 to show the quality you can expect from either of these 3D printers.

A 3D benchy test print showing a smooth surface finish.

This starship model shows the great overhang performance of the Ender 3 S1 hot end and cooling fan.
The direct drive extruder is able to handle small details like the ones in this print without any stringing.
Other Features
Both printers have a number of modern features that are beneficial:
The Ender 3 S1 and S1 Pro both include auto leveling, which is a major improvement over previous printers in the Ender series, and one of the reasons for the higher price point on these machines. The CR-touch auto leveling sensor probes many points on the bed before each print, and automatically compensates for any inconsistencies.
Both 3D printers are equipped with thermal runaway protection, an important safety feature which ensures that the heated bed and hot end will not overheat if the temperature sensor malfunctions.
Both 3D printers are also equipped with power recovery, allowing you to resume a print if the printer shuts off due to a power failure.
Updated Mainboard with Silent Stepper Drivers - Older printers such as the CR-10 produce a song-like sound when printing due to the frequencies of the motors moving. Newer electronics prevent this issue, making the printer substantially quieter. The only sound you will hear are the fans.
24V base power - This drastically decreases the heating time for the hot end and bed. This is especially noticeable if you print materials like PETG and ABS, which require hotter print bed temperatures.
Assembly
The Ender 3 V2 ships in many pieces, and takes much longer to put together.
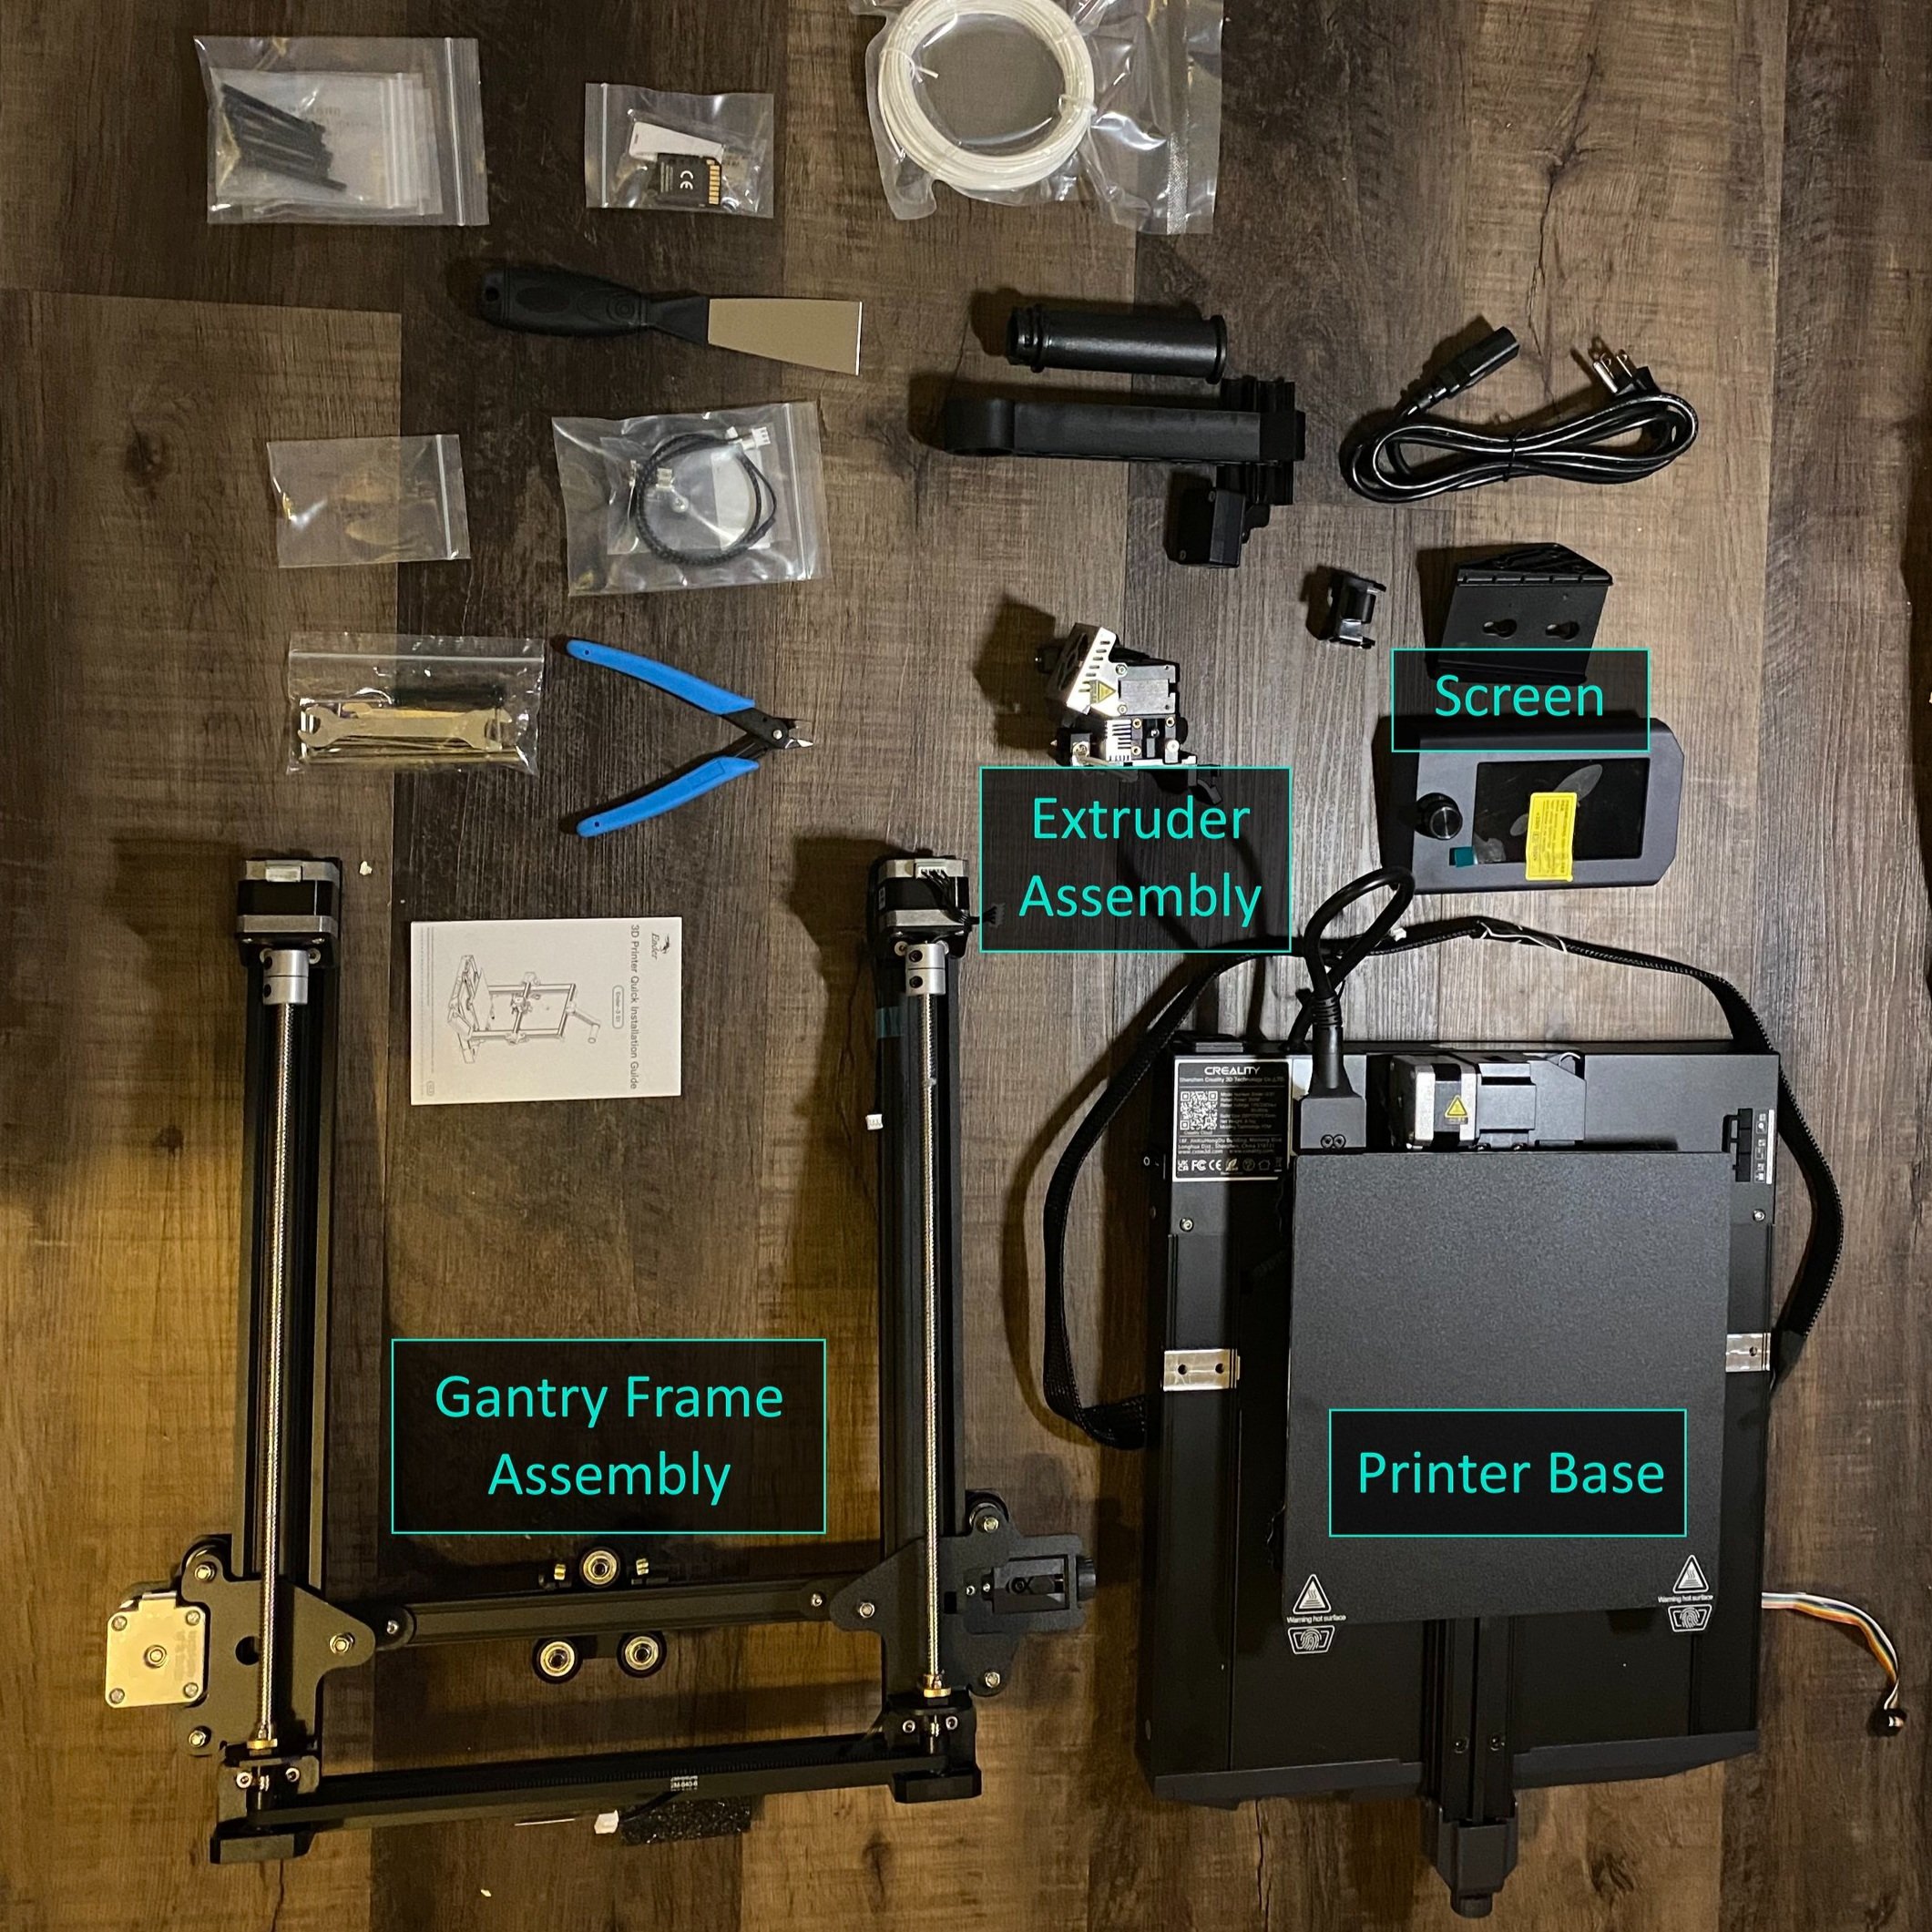
Both the S1 and S1 Pro are fairly easy to assemble, requiring you to put together only a few prebuilt pieces. The entire Sprite extruder and Z axis beams are pre-assembled, and just need to be mounted to the base of the printer. The S1 and S1 Pro typically take 10-15 minutes to fully assemble.
Physical Size / Footprint
The S1 series printers are about the same size as their predecessor, the Ender 3 V2, but they do require more vertical space due to the top mounted filament storage and increased Z build volume. The Ender 3 V2 uses a side mounted spool holder, which requires about 8-10” of clearance on the left side of the printer. We prefer the top mount position since it makes it easier to fit the printer in a compact space, and the filament is easier to access.
Total size of each printer:
Ender 3 S1 and S1 Pro: 487 x 453 x 622 mm (19.1” x 17.8” x 24.5”)
Ender 3 V2: 475 x 450 x 490 mm (18.7” x 17.7” x 19.3”)
Note: this does not include the filament holder since it retracts when not in use
Build Volume
The Ender 3 S1 and S1 Pro have a build volume of 220 x 220 x 270 mm. While this is a bit larger than the standard 200mm cube of many 3D printers on the market, it is still small enough that the printer can easily fit on a desk. The extended Z height is convenient to allow larger parts while not increasing the amount of required desk space.
Part Cooling
The Ender 3 S1 and S1 Pro Sprite hot end uses a larger front-mounted fan that is close to the nozzle, allowing more air to flow to the part to cool it.
The Sprite extruder on the Ender 3 S1 and S1 Pro utilizes a single blower fan mounted to the front of the hot end. This fan is a bit larger than the one on the previous Ender 3 models, and it is positioned closer to the nozzle, which leads to superior cooling and overhang performance.
Improvements in the Ender 3 S1 Pro
Functional Updates
The Ender 3 S1 Pro has two notable functional updates to consider.
First, the Ender 3 S1 uses an all-metal hot end within the Sprite extruder assembly, which will allow you to print higher temperature materials without worry of any wear to the hot end. Printing higher temperatures like PETG and ABS require temperatures around 250 C, which starts to break down the PTFE tubing that is used in the standard Ender 3 S1 hot end. Over time, you may need to replace the PTFE section after extended printing with these materials.
Additionally, if you are looking to print hotter materials like nylon, the Ender 3 S1 Pro is one of the few Creality printers that will allow you to heat the nozzle to up to 300 C. While third party all-metal hot ends are available for other Creality printers, you would need to update the firmware on those printers to change the maximum temperature from 260C.
The other major change is that the Ender 3 S1 Pro uses a PEI print bed, while the Ender 3 S1 uses PC Steel. We found that the PC bed is much easier to damage if you make a mistake which causes the nozzle to drag on the bed, such as leveling the bed improperly, so this is a welcome improvement. Both beds have good adhesion, and feature a magnetic bed surface that can be removed and bent to remove prints more easily.
Usability Updates
The most notable usability update is that the Ender 3 S1 Pro uses a 4.3 inch touch screen interface, while the Ender 3 S1 uses a knob-controlled LCD similar to the Ender 3 V2. We definitely noticed that the touch screen interface is more intuitive to use than a knob, but the interfaces are largely the same.

The Ender 3 S1 knob-controlled screen (left) versus the Ender 3 S1 Pro touch screen (right)
Another convenient feature of the S1 Pro is a built in LED light bar across the top of the printer. This doesn’t sound like a big deal, but having extra light is convenient when you are inspecting the start of a print to make sure if it working as expected. We have actually mounted lights to most of our printers for this reason, so having this built in without any additional cables to manage is a welcome feature. If you opt for the Ender 3 S1, you can purchase the LED bar (view on Amazon) as a separate upgrade - the standard S1 does have the port required, it just doesn’t include the light itself.
Should You Buy The Pro?
While the Ender 3 S1 Pro includes a number of nice improvements, we generally don’t feel like they are worth the additional $100 you’ll pay for these upgrades. However, if you plan to print high temperature materials such as ABS or nylon, the Ender 3 S1 Pro’s all-metal hot end is a compelling choice. Additionally, if budget is less of a concern and you are looking for a more polished and premium printer, the Ender 3 S1 Pro is a higher end machine.
If you are looking for a bit more print volume, you may also want to look into the Ender 3 S1 Plus. This 3D printer is mostly the same as the Ender 3 S1, but with a larger 300 x 300 x 300mm build volume. It uses the same PTFE hot end as the standard Ender S1, as well as the PC steel build surface. It does include the touchscreen LCD from the Ender 3 S1 Pro.
Here’s a quick comparison of these printers to sum up the similarities and differences: