
Creality Ender 3 V2 vs Ender 3 S1
Update: in late 2023, Creality released the Ender 3 V3 SE, which we highly recommend over either the Ender 3 V2 or the Ender 3 S1. For more detail, see our Ender 3 V3 SE vs Ender 3 S1 comparison.
Since 2018, the Creality Ender 3 series have been some of the most popular 3D printer models on the market, but have lacked many of the features of more premium 3D printers like the Prusa MK3S, such as standard auto-leveling, a flexible magnetic print bed, direct drive extrusion, and improved motion systems. While the Prusa does offer a substantial feature set, these printers come with an even more substantial price tag - the Prusa MK3s costs more than 3 times as much as the Ender 3 V2.
In 2021, Creality Introduced the Ender 3 S1, which packs in a lot of improved features, but at a substantially higher price. It’s a 3D printer that has the single body chassis and affordable price of the Ender 3 series, but with several key upgrades, most notably:
Direct drive extrusion
Flexible magnetic print bed
CR-touch auto-leveling
With this 3D printer, Creality is pushing the Ender 3 series solidly from a budget printer into the mid-range printer space. In this article, we’ll take a look at the upgrades the Ender 3 S1 has to help you decide if the extra benefits are worth it for you.
Note: Creality Experts receives a commission for items you purchase from this page, at no additional cost to you. For more information, please see our affiliate link policy.
Vs.
Improvements in the Ender 3 S1
The Ender 3 S1 is objectively a better 3D printer than its predecessors; but the question is if the extra features are worth the substantial increase in price of approximately $150. The answer really depends on your needs, so we’ll start by taking a closer look at the new features.
Direct Drive Extruder
The most significant upgrade from the Ender 3 V2 to the Ender 3 S1 is the new direct drive extruder, which has a number of benefits over the Bowden style extruder of the Ender 3 V2 and most other Creality 3D printers. Direct drive has several advantages:
Better support for flexible materials
Improved printing of parts with many small features
Less susceptible to jamming
Bowden extruders offer the advantage of a lighter hot end, however we did not encounter any of the common issues with the increased weight from the direct drive extruder, such as waviness in prints or limited print speed.

On the Ender 3 V2, the extruder is located on the side of the printer, and is connected to the extruder with a long PTFE tube. This is known as a Bowden extruder.

On the Ender 3 S1, the extruder and hot end are located directly next to one another, and no connecting tube is needed. This is known as a direct drive extruder.
The Ender 3 S1 stands out due to its ability to print flexible materials like TPU much more effectively. While it is possible to print these materials on the Ender 3 V2, it requires very slow print speeds and is prone to jamming frequently. You also typically cannot use retraction when printing TPU on a Bowden extruder, so the resulting prints will require cleanup to remove strings. The direct drive extruder on the Ender 3 S1 can print these materials with no jamming, at much faster speeds, and with retraction enabled.
We also found that the direct drive extruder offers improved performance for prints with many small features, where frequent retractions are necessary. Due to the close proximity of the extruder to the hot end, direct drive extruders require much less retraction than Bowden extruders. We typically use 7.5mm of retraction on the Ender 3 V2, but the Ender 3 S1 worked best with only 0.6mm. A lower retraction distance offers a few benefits:

The inside of the Ender 3 S1 extruder shows the dual drive extruder gears and the internal gearing to improve torque.
Less likelihood of jamming. Frequent retractions in succession, which is needed if your object has many small features, is far less likely to cause a jam. This is due to the fact that the large retractions needed for Bowden extruders bring the heated filament backwards into the cold section of the hot end, and brings the heat with it. If this heat creeps too far up the hot end, the filament will begin to widen before it reaches the nozzle and can jam within the tubing.
Retractions occur much faster, which speeds up the printing time. This is not a substantial amount of time for a single retraction, but if your print includes hundreds or thousands of retractions, it adds up.
The new extruder also uses a dual gear extrusion system, and uses a 3.5 : 1 gear ratio to increase the torque of the extruder motor, which allows the extruder to perform more consistently. If you are curious to learn more about the extruder, we did a full teardown to look inside, which is documented in this article.
Auto Bed Leveling
Another big feature of the Ender 3 S1 is auto-bed leveling. While it is possible to upgrade the previous models with this feature, it is a fairly involved upgrade, and costs around $50, so it is a welcome feature to come standard on the printer.
With traditional manual leveling, the 3D Printer uses a Z endstop—a small switch located by the Z axis motor—to tell the printer when the nozzle is fully lowered to the print bed. Since this does not take into account the position of the print bed, you’ll need to use the knobs on the corners of the bed to adjust the bed’s vertical position until it is exactly the right distance from the nozzle. This process requires a fair amount of manual effort and calibration to get just right.
An automatic leveling system instead uses a small probe near the hot end to measure the distance of the nozzle from the bed. As the printer lowers the nozzle closer to the print bed, the probe detects when the nozzle has reached the desired offset. Since this accounts for the position of the bed, the nozzle can be positioned correctly regardless of the position of the print bed. Overall, this means that the 3D printer will print the first layer more accurately, and you won’t need to worry about adjusting the leveling knobs.
We were also pleased to see that the sensor in use is the CR-touch, Creality’s version of the BL-touch sensor. The Creality version uses a metal pin to probe the bed, which is an improvement since the plastic pins of the BL-touch sensor can break or bend if they collide with a misprinted part.
Flexible Magnetic Print Bed
Before getting the Creality Ender S1, we firmly believed that a glass bed with hairspray was the best bed option available, and it is what we use on all of our other printers. However, the Ender 3 S1 bed has really impressed us to the point of rethinking this assessment. The PC coating on the bed surface has a very good grip, similar to the bed of the Ender 3 Pro and a few other Creality printers. When we tried these beds in the past, we were frustrated by how difficult it was to remove parts once the print completed. With a glass bed, parts detach easily after the bed cools.
The big difference on the Ender 3 S1 is that the bed can be removed and flexed, which makes removing the parts much easier. Combined with the extremely good adhesion, this bed is very effective, especially when printing parts that have intricate first layers. We have been printing parts on our Ender 3 S1 for a couple weeks as of this writing and have not noticed any degradation in adhesion of the bed. We have not used any adhesives such as hairspray, and we haven’t cleaned the bed so far. While the earlier Ender 3 Pro also had a removable magnetic bed, it did not have the metal backing, so it was not possible to remove parts by simply flexing the bed.
One drawback of this new bed is that it is easier to damage. If you are not careful and allow the nozzle to get below the bed due to an incorrect Z-offset setting, or if your print starts too close to the bed, it is possible to damage the PC bed. We accidentally did this and ended up pulling a couple small chunks out of the bed surface.

Removing parts is very easy with the Ender 3 S1, since you can remove the bed and bend it to loosen the parts.

The adhesion on the Ender 3 S1 bed is impressive, which is extremely helpful when printing parts with many small features on the first layer.

We accidentally damaged the bed by printing a part too close. While this was our fault, glass is more tolerant to these kinds of mistakes.
Easier Assembly
We were pleased to see that the Ender 3 S1 is much easier to assemble than the Ender 3 V2 (and the previous Ender 3 series printers), requiring you to assemble only a few pieces. The entire hot end carriage and Z axis beams are pre-assembled and just need to be mounted to the base of the printer. The Creality Ender 3 S1 takes approximately 10-15 minutes to fully assemble. Check out our Ender 3 S1 Assembly Guide to see the process in more detail.
The Ender 3 V2 is a different story. The printer is shipped in approximately 12 separate pieces to reduce packaging size. It takes approximately an hour to assemble the Creality Ender 3 V2 with the included tools. We have found that the assembly can be helpful in getting to know the printer hardware, and will make it easier to troubleshoot issues you may encounter in the future. That said, if you are looking for something that will be quicker and easier to assemble, the Ender 3 S1 is the clear better choice.
Chassis Updates
While Ender 3 V2 and Ender 3 S1 have the same unibody style typical of the Ender 3 series, the Ender 3 S1 includes some appearance upgrades, such as the use of flat aluminum beams instead of the typical aluminum extrusion, and improved styling of the base to give the printer a sleeker look. The filament mount of the Ender 3 S1 is on the top of the printer versus the side, which makes it easier to fit in spaces where horizontal space is limited.

The Ender 3 V2 ships in many pieces, and takes much longer to put together.

The Ender 3 S1 is mostly pre-assembled, with only four pre-assembled components that are easy to connect together.
Other Improvements in the Ender 3 S1
Filament Runout Detection
The Ender 3 S1 includes a filament runout sensor. If your printer runs out of filament, the printer will pause and beep to let you know, allowing you to reload it and start again.
Dual Z Axis Lead Screws
The Ender 3 S1 has two Z motors and lead screws, so the extruder carriage is supported on both sides. This does not have a large impact on the performance of the printer, but was likely added due to the additional weight of the direct dive extruder. We were pleased to see that the two Z lead screws are mechanically linked by a belt, which ensures that the left and right sides always stay at the same height.
Other Considerations
Reliability
Both the Creality Ender 3 V2 and Ender 3 S1 are reliable 3D printers. We have had to replace a few parts on every Creality printer after extended use, including multiple new hot ends, extruder gears, and new power supplies. We have not had the Ender 3 S1 for long enough to speak about long-term reliability, but from using it so far we have seen consistent performance.
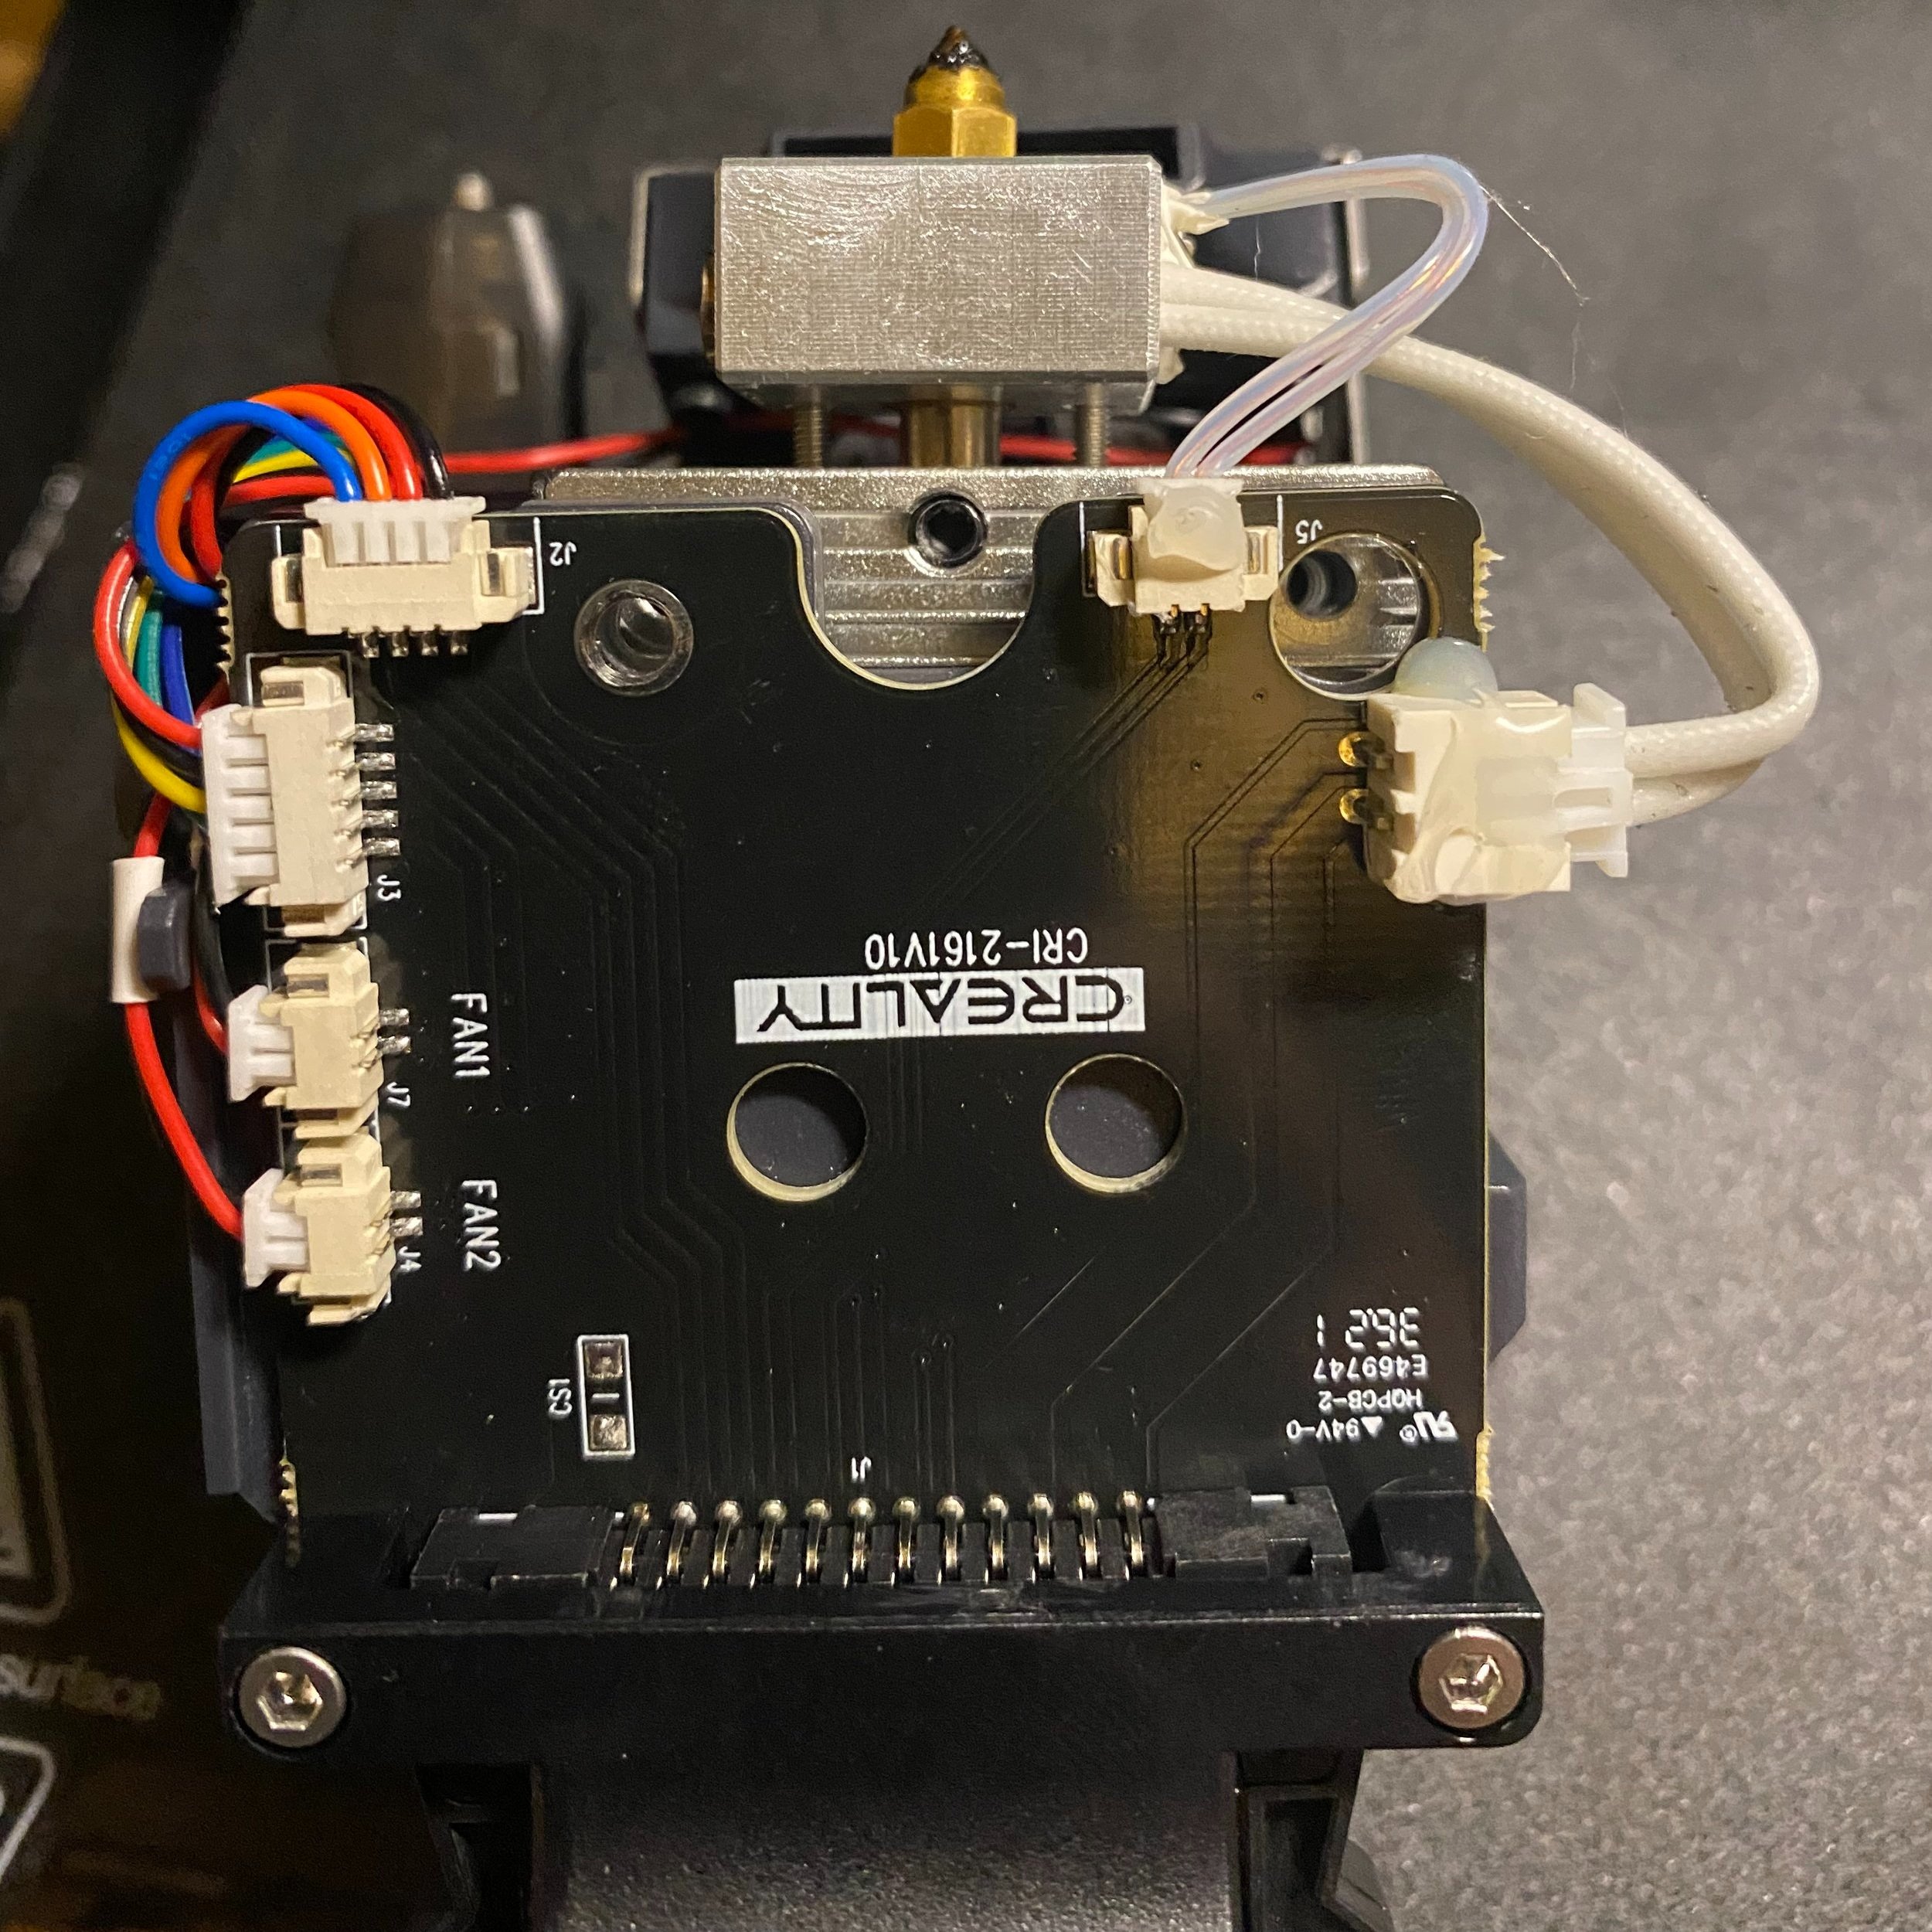
The new Ender 3 S1 hotend has a breakout board where all of the components are connected.
The new Ender 3 S1 hotend has a breakout board which provides plug-in connection interfaces for all the hot end and extruder components. The cabling is sized so that it all fits very well within the hotend. We initially thought that this would make replacing these components much easier than other printers, which require splicing the wires together. However, as of this writing, thermistor and heat cartridges with these connectors are not readily available to purchase, so replacement would still require wire splicing. We are hopeful that as this printer matures, more direct replacement parts will become available.
The Ender 3 S1’s direct drive extruder appears to be more reliable than its predecessor, since it uses a dual drive gear system and has gearing to increase the motor’s torque. However, we are a bit concerned that the interior of the extruder is plastic, which could potentially wear down. The filament path is reinforced with a copper tube, which should help to reduce wear. Still, we are a bit wary since the plastic extruder of the Ender 3 V2 is known to break, and we always recommend a metal extruder upgrade for the Ender 3 V2.
The plastic Ender 3 V2 Bowden extruder is known to break, however it is fairly easy to replace it with an all-metal extruder assembly.
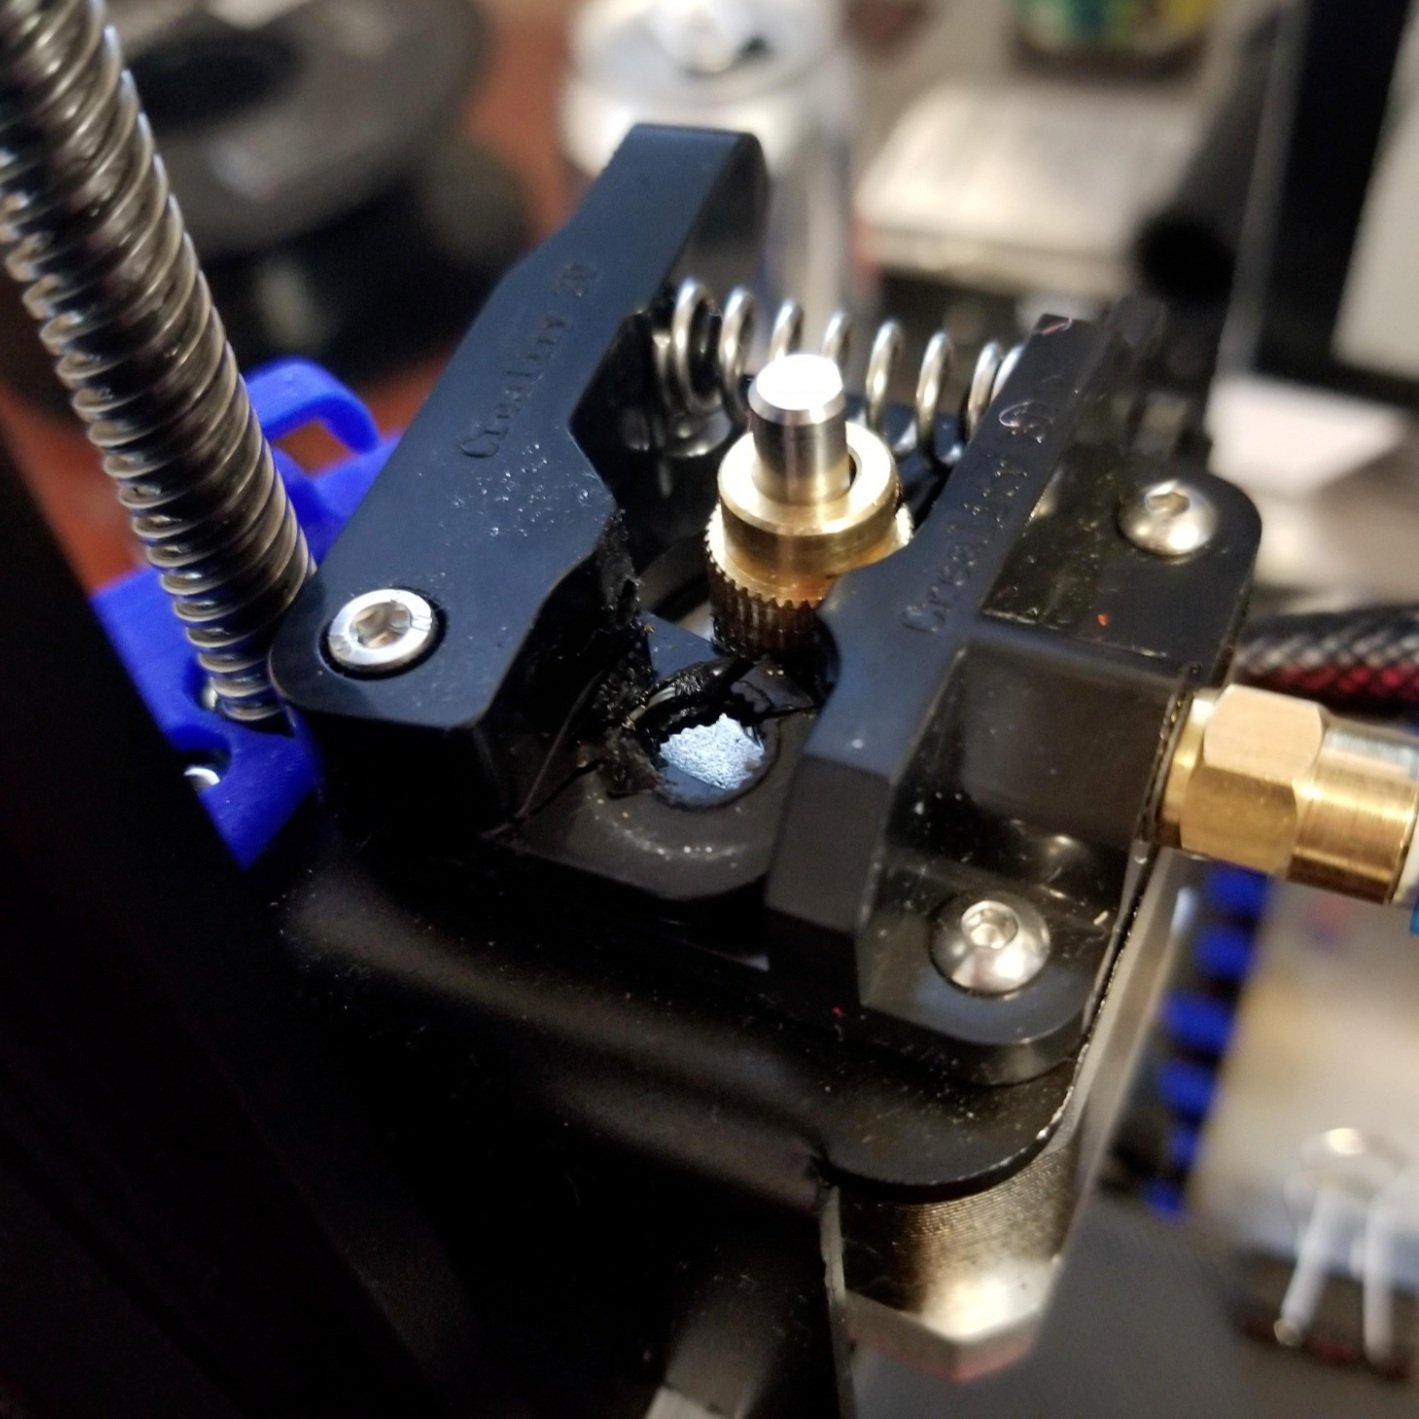
We are concerned that some of the parts under tension, like the filament release arm, may break over time. However, these parts are under less stress from the spring compared to the Ender 3 V2 due to the smaller lever arm. If these parts were to fail, accessing and replacing them is substantially more difficult than the Ender 3 V2 extruder.
Power Supply and Safety
The Ender 3 S1 is the first printer we have seen that uses a Creality-branded power supply. We aren’t sure yet how the reliability compares to the version used on the Ender 3 V2, but we expect it will be comparable in performance and reliability.
Both printers include Thermal Runaway Protection, an important safety feature that allows the printer to detect when there is a malfunction on the temperature sensor and shut off the power to the heater cartridge. Without this protection, if the temperature sensor malfunctions while the printer is active, the heat cartridge will continue to try to heat, potentially reaching very high temperatures.
Build Volume
The build volume of the Ender 3 S1 is identical to the Ender 3 V2.
Both Printers have a build volume of 220 x 220 x 250 mm. While this is a bit larger than the standard 200mm cube of many 3D printers on the market, it is still small enough that the printer can easily fit on a desk. The extended Z height is convenient to allow larger parts while not increasing the amount of required desk space.
Usability
Both printers are very similar to use, with the same general chassis and LCD interface with knob control. Both also include a small tool drawer to store your tools.
Due to the direct drive extruder, it is easier to load and unload filament on the Ender 3 S1, both due to the reduced distance you need to move the filament, and since the extruder is right at the front of the printer, and not on the side.
Other Shared Features
Both printers have many modern features that are nice to have on any 3D printer.
Both 3D printers are equipped with thermal runaway protection, an important safety feature which ensures that the heated bed and hot end will not overheat if the temperature sensor malfunctions.
Both 3D printers are also equipped with power recovery, allowing you to resume a print if the printer shuts off due to a power failure.
Updated Mainboard with Silent Stepper Drivers - Older printers such as the CR-10 produce a song-like sound when printing due to the frequencies of the motors moving. Newer electronics prevent this issue, making the printer substantially quieter. The only sound you will hear are the fans.
24V base power - This drastically decreases the heating time for the hot end and bed. This is especially noticeable if you print materials like PETG and ABS, which require hotter bed temperatures.
The Verdict
Overall, we feel that the many new features of the Creality Ender 3 S1 (view on Amazon) are worth the price tag if you are looking for a printer that will be easy to use and produce consistent quality without much monitoring. Also, if you are looking to print with flexible materials, then the Ender 3 S1 is the clear winner. If budget isn’t a concern, the newer Ender 3 S1 Pro offers a few extra features like an all-metal hot end and touch screen.
If you are looking for a printer to tinker with or upgrade, then we would suggest sticking with the Creality Ender 3 V2 (view on Amazon). Since it has been a popular printer for so long, it has many 3rd party upgrades and a large community to help. In addition, the parts are simpler to work with since the extruder and hot end are separate.
Here’s a recap of the printers to help you compare:
If you are looking for a larger 3D printer, we’d suggest taking a look at the Creality Ender 3 Max (view on Amazon), which offers a larger 300 x 300 mm build volume and has many nice features like an improved hot end and metal extruder, at a great price point. You can learn more about this printer in the Ender 3 V2 vs Ender 3 Max comparison.
If you are looking for a larger printer with the benefits of the Ender 3 S1 such as auto-leveling and a direct-drive extruder, The CR-10 Smart (view on Amazon) is a premium larger 3D printer with these features, but a higher price tag compared to the Ender 3 Max.