Comparing the Creality Ender 3 V3 SE vs Anycubic Kobra 2 Neo
Note: Creality Experts receives a commission for items you purchase from this page, at no additional cost to you. For more information, please see our affiliate link policy.
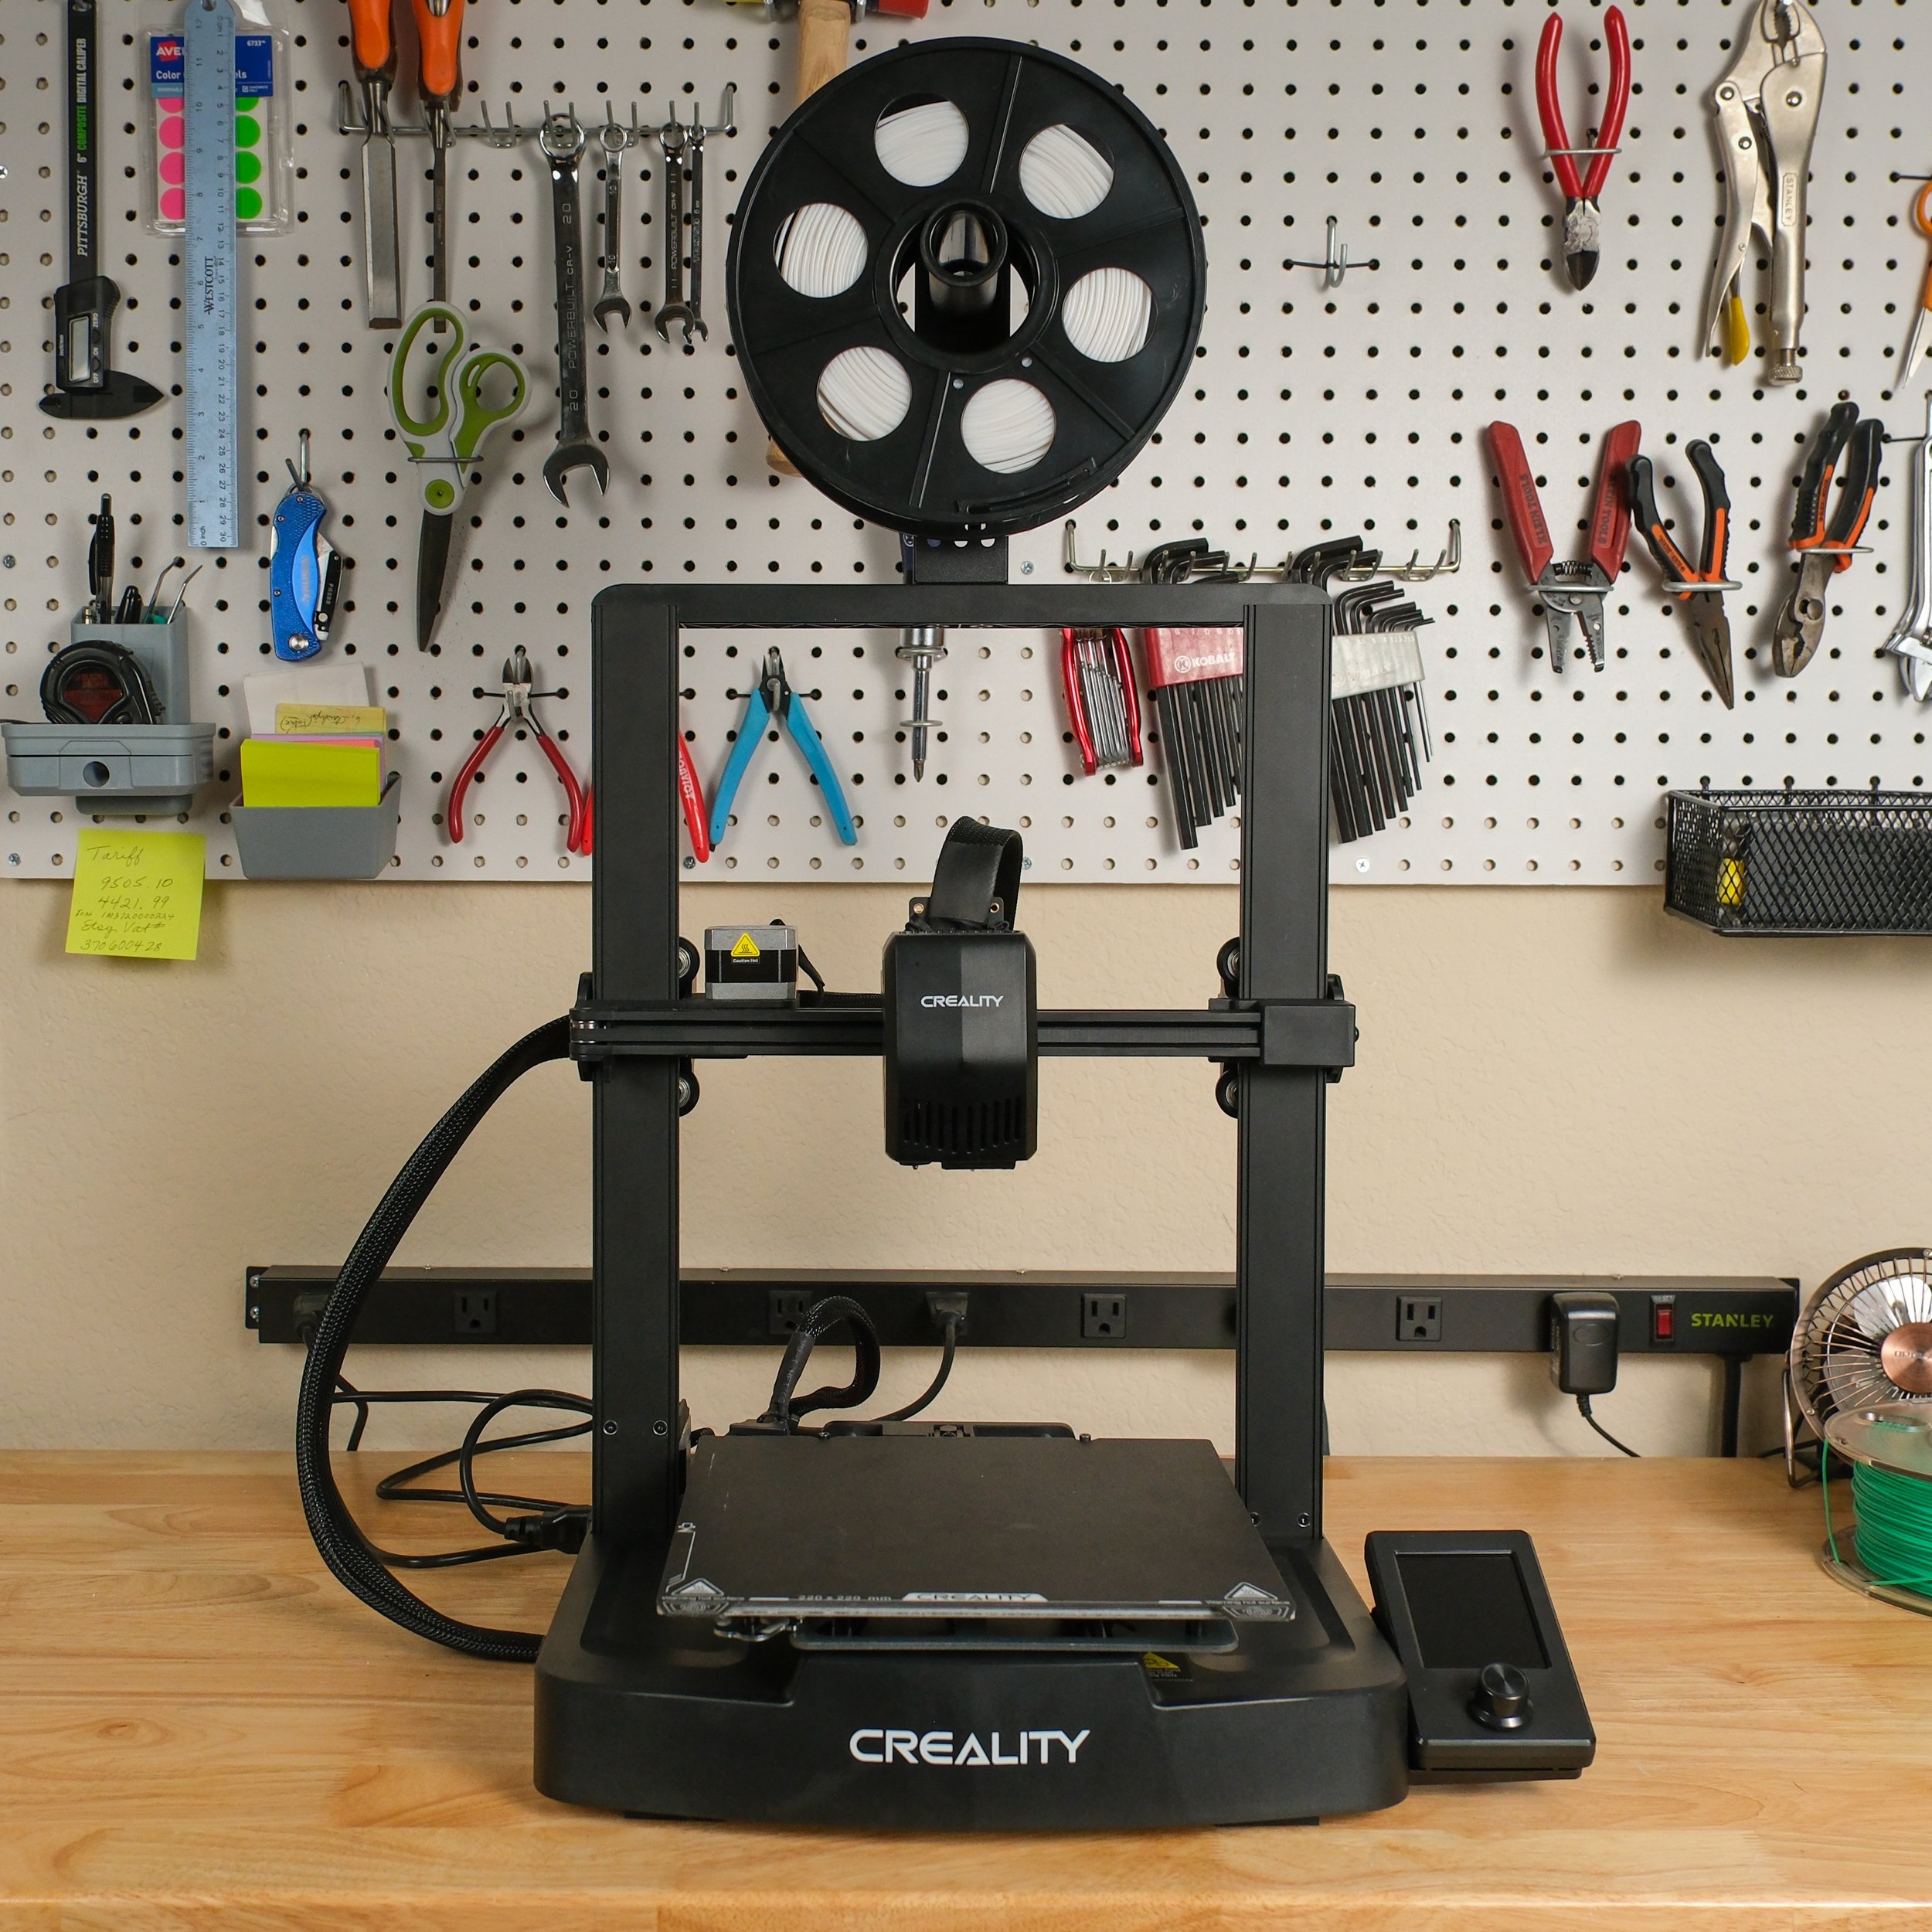
The Ender 3 V3 SE brings faster print speeds to a new low price point.
The latest trend in 3D printers is speed. At first, new, disruptive entrants to the market shocked established manufacturers like Creality. Creality responded with their own faster printers, but this was initially limited to the mid-range and high end price brackets. Now that Creality has more experience with faster designs, this high speed trend is filtering down to budget 3D printers.
Rumors about the 250mm/s Creality Ender 3 V3 SE started emerging on July 14, 2023, with first units shipping about a month later on August 20. Hot on Creality’s heels, Anycubic launched their updated Kobra 2 Neo printer on August 31, with first units shipping September 1. The Kobra 2 Neo had obviously been in development for quite some time and the timing of the release was probably prompted by Creality’s surprise Ender 3 V3 SE.
Anycubic’s Kobra 2 Neo matches Creality’s Ender 3 V3 SE’s speed of 250mm/s and seems to be a direct competitor. In this article, we’re going to compare these two printers to see how well they really match up.
First, we’ll go through the similarities between the two 3D printers. After that, we’ll compare the differences and give our opinion of which printer is the better choice.
Vs.
Shared Features Between the Ender 3 V3 SE and Kobra 2 Neo
The printers seem to be fundamentally similar. But are they? We’ll go through each of the similar features, and point out aspects where the printers implement each feature differently.
Print Speed
The most obvious similarity between these two printers is print speed. Creality seems to have defined a new category of high-speed, low-cost 3D printers, with the Ender 3 V3 SE printing at up to 250mm/s. This isn’t the fastest speed we’ve seen for a consumer 3D printer—they’ve reserved even faster 500mm/s speeds for more expensive models—but it’s significantly faster than older Ender 3 models that could only reliably print at 60-100 mm/s.
The Anycubic Kobra 2 Neo matches the Ender 3 V3 SE’s speed at 250 mm/s, which is likely not a coincidence.
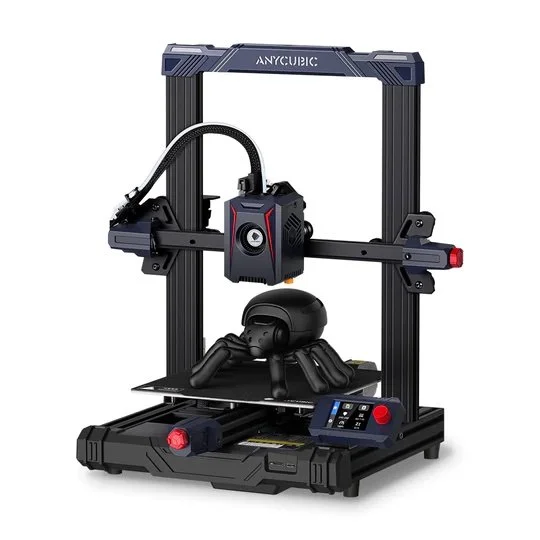
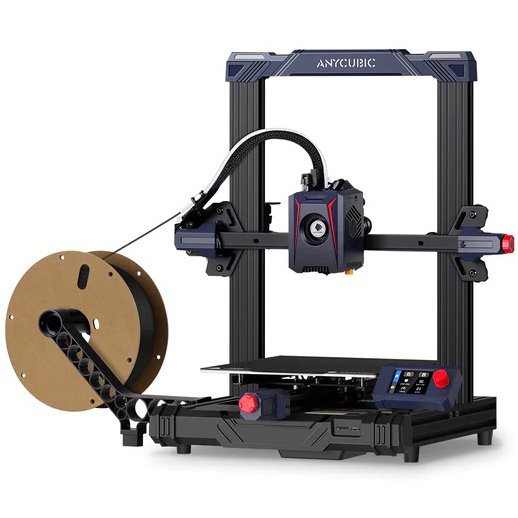
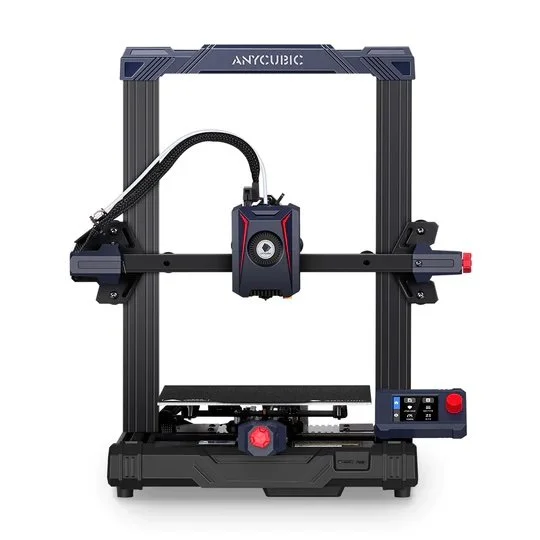
The Anycubic Kobra 2 Neo shares many design characteristics with the Creality Ender 3 V3 SE.
Build Volume
Both printers have a build volume of 220 X 220 X 250 mm (8.6” x 8.6” x 9.8”). These dimensions were established by the original Creality Ender 3, and have since become the most common build volume for standard 3D printers. It allows the printing of fairly large, tall models yet the printer itself remains a modest, manageable size. It also does not require a large amount of power for the bed heater, unlike larger printers which can consume much more power.
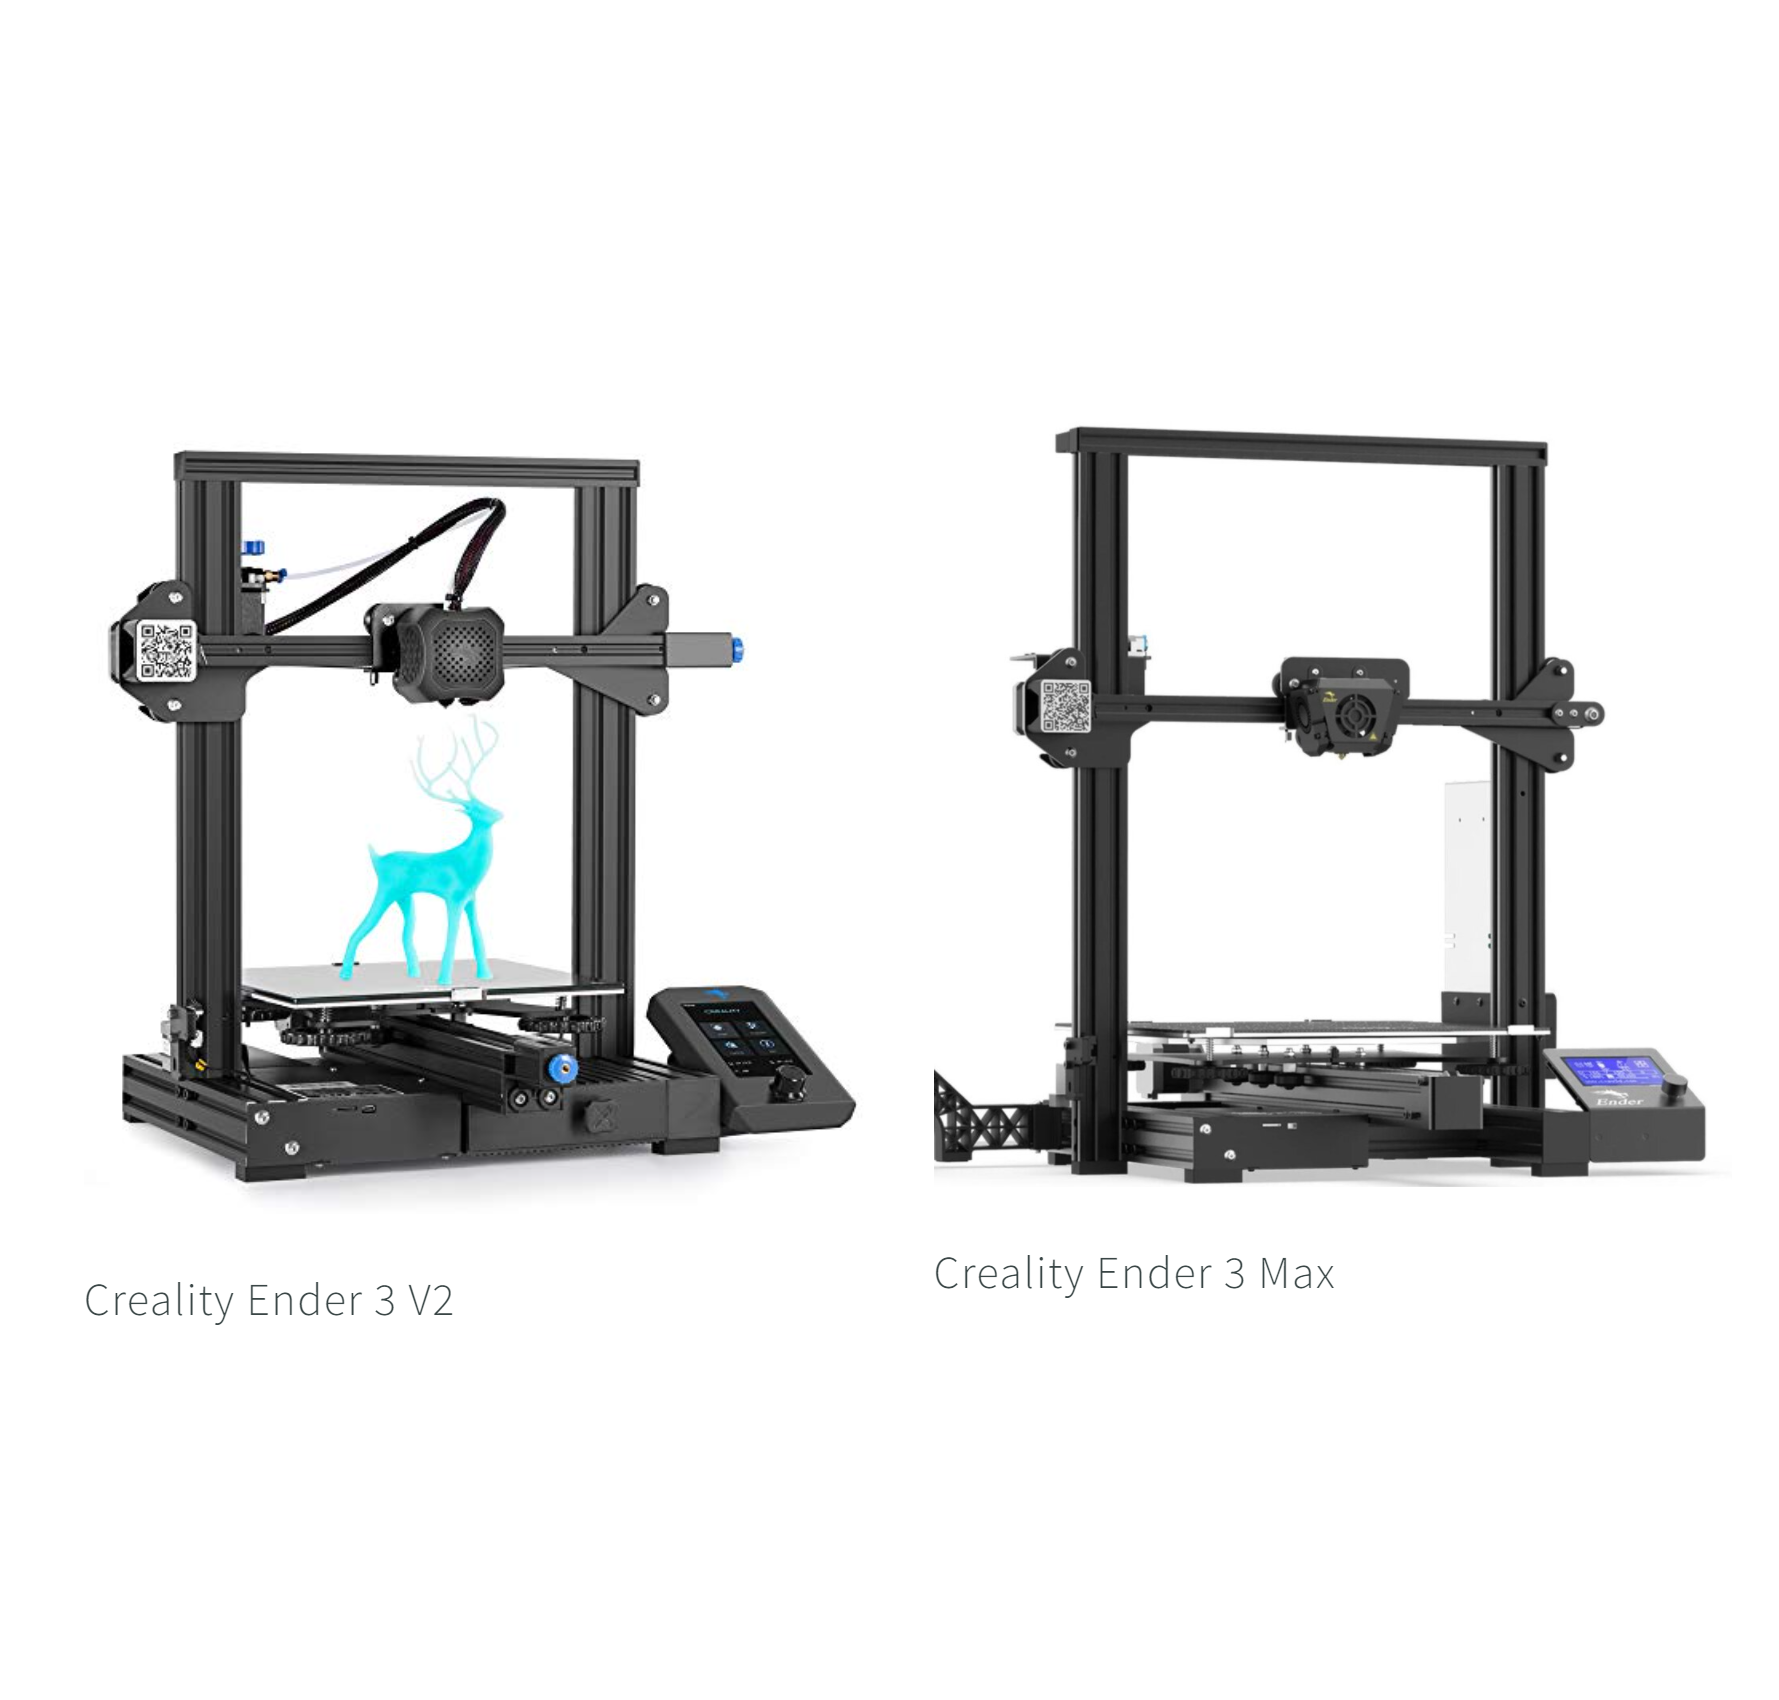
Physical Design
The Creality Ender 3 V3 SE is a descendent of the Ender 3 and its fundamental design remains the same. The Y axis is mounted on the base, and has the bed mounted to it. An upright gantry is bolted to the middle of the base. The X axis moves the hot end back and forth on a beam which is raised and lowered up and down the gantry by a Z axis lead screw. A cross beam spans the top of the gantry uprights. The display is mounted on the right side. This is a tried and true design and a common choice for affordable 3D printers.
Anycubic follows this design with the Kobra 2 Neo exactly, though it does not look as sleek cosmetically and looks closer to the original Creality Ender 3 than the Ender 3 V3 SE.
However, there are some key differences in how these two printers implement the details of their motion systems. We’ll cover that in detail in the Differences section below.
Direct Drive Extruder
Both the Ender 3 V3 SE and Kobra 2 Neo feature a direct drive extruder. This extruder type helps in attaining high print speeds by shortening the distance between the extruder and the hot end. This enables filament to be pushed through the hot end quickly without much of a risk of it folding over and jamming. In addition to the speed advantage, direct drive extruders are also more reliable than other designs.
This is a new feature for Creality’s base Ender 3 models, but Anycubic has used direct drive extruders in their budget models previously. However, Creality has used direct drive extruders on some of its other printers, such as the Ender 3 S1, and the design used on the Ender 3 V3 SE is nearly identical to their previous extruders.
Automatic Bed Leveling
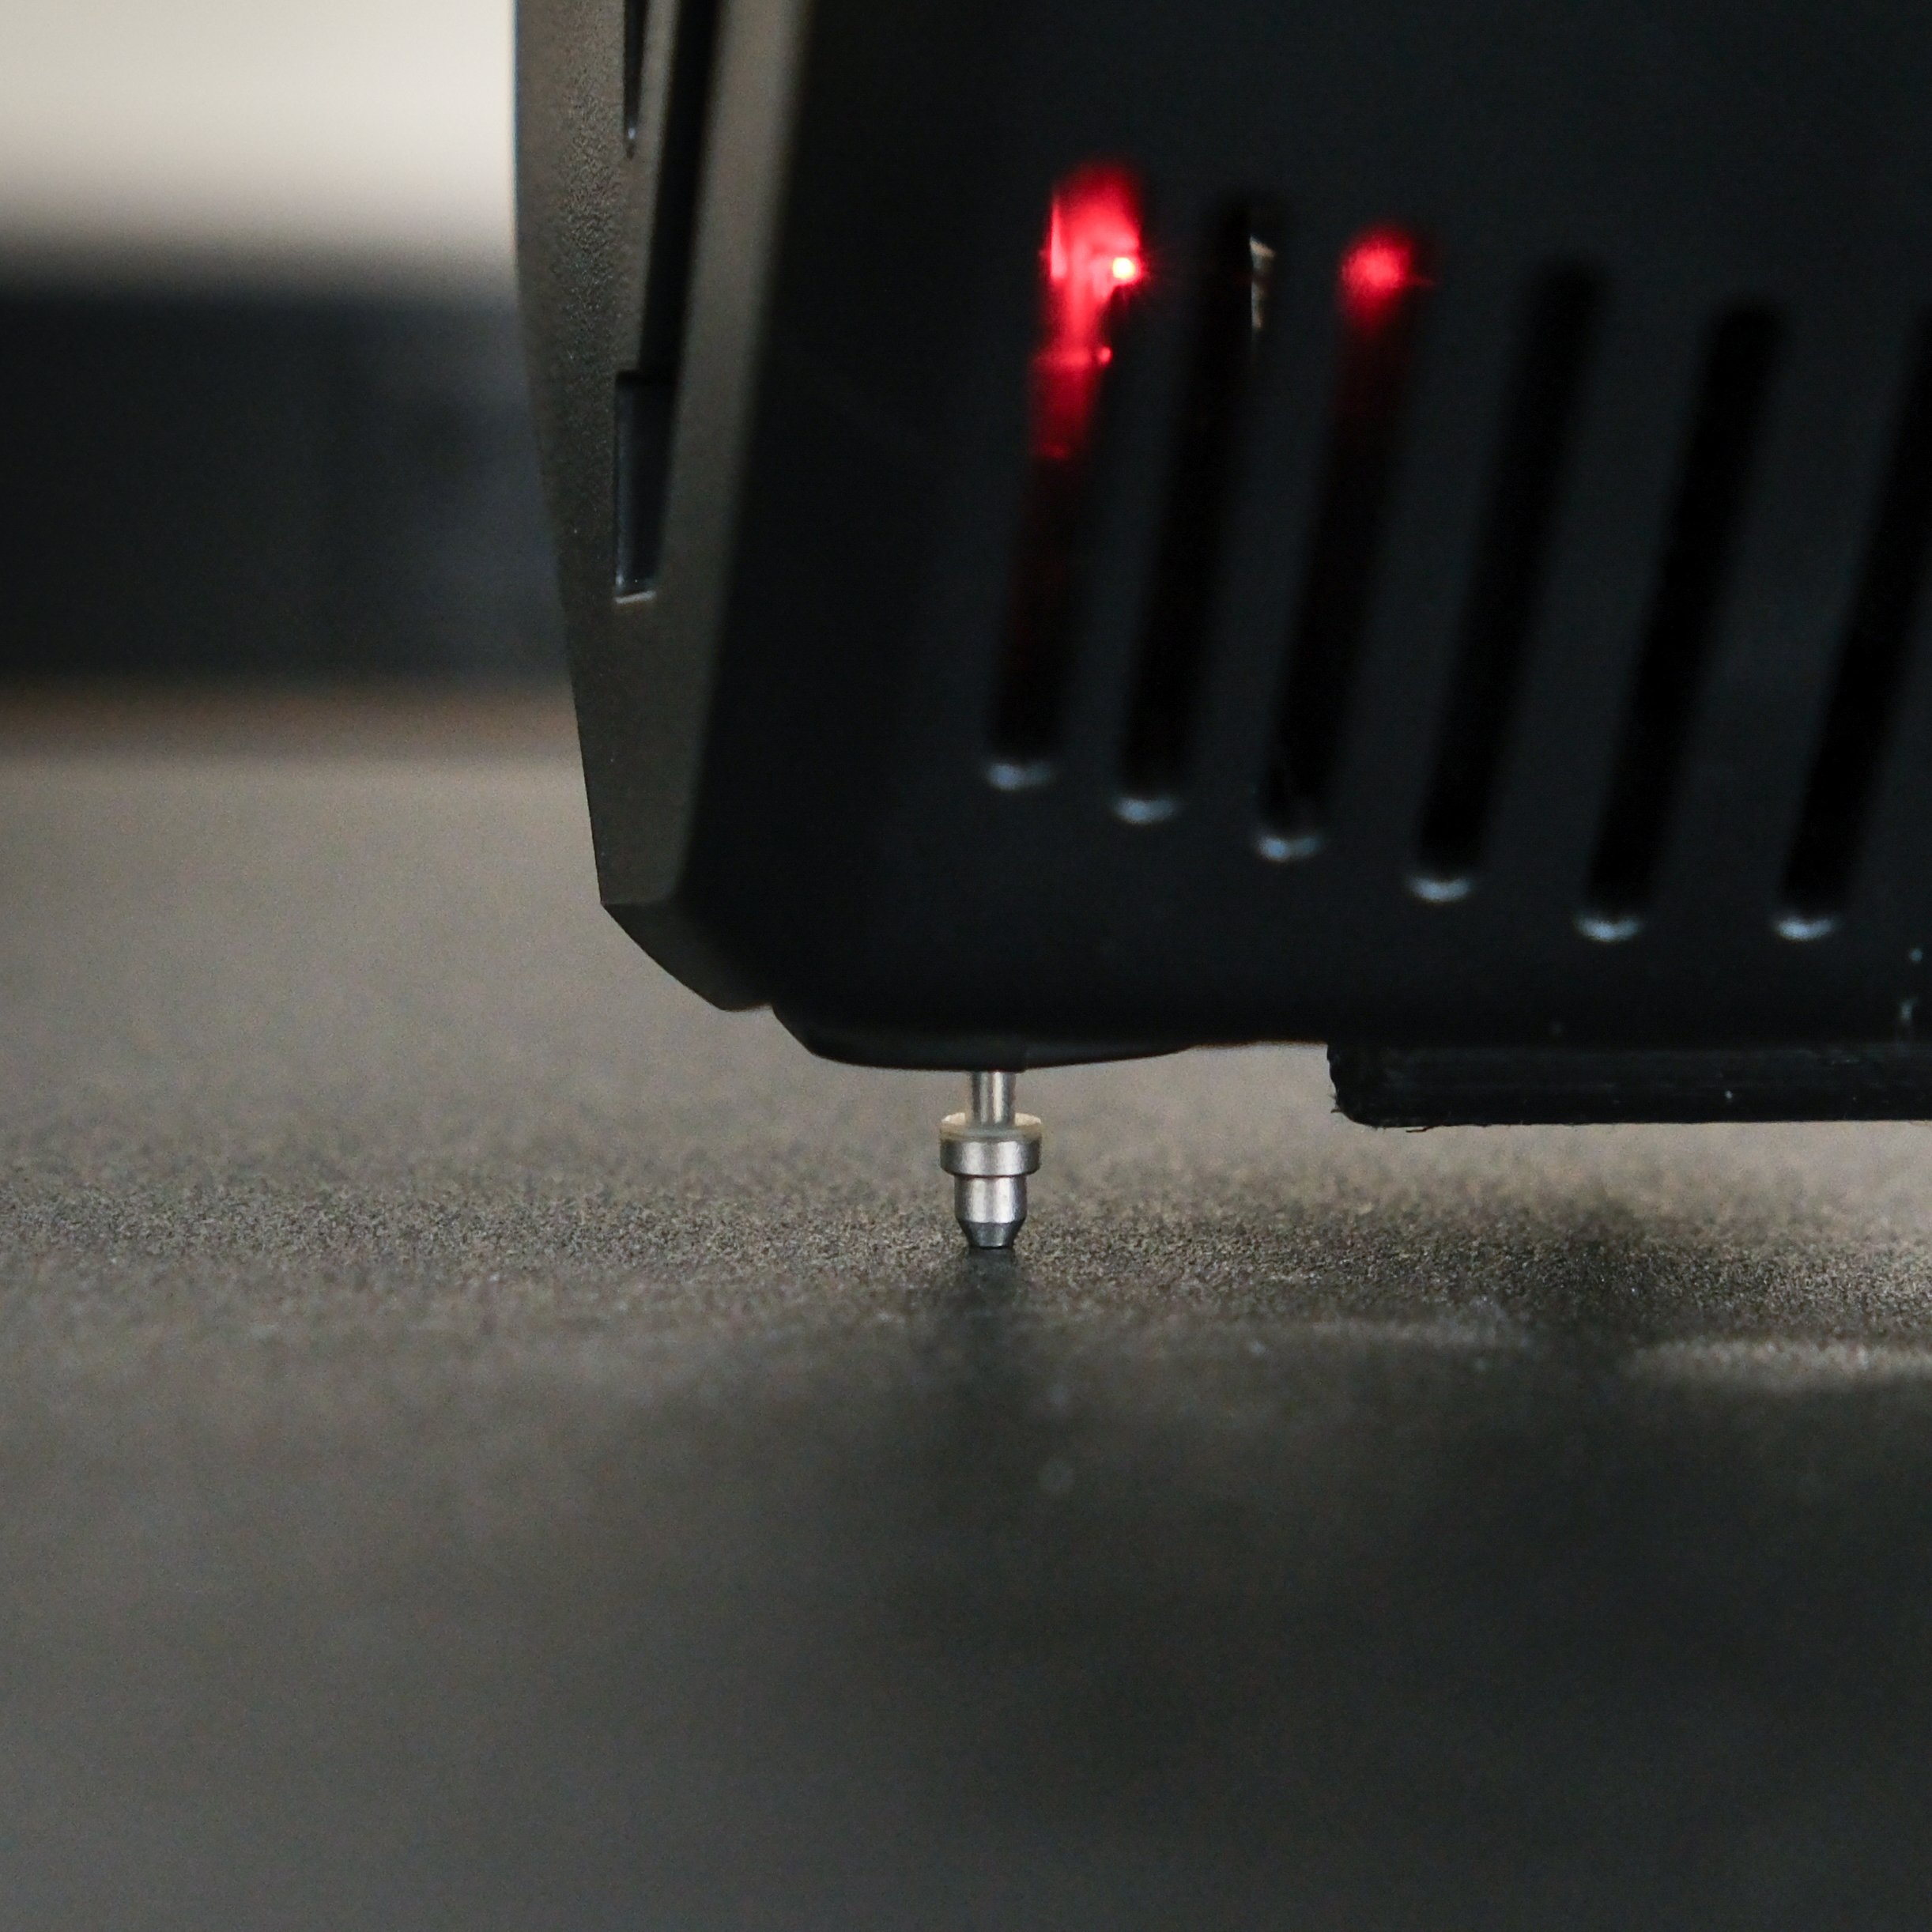
Both printers include automatic bed leveling, although with different methods—the Ender 3 V3 SE (shown here) uses a CR-Touch probe, while the Kobra 2 Neo uses an inductive sensor.
Both printers feature fully automatic bed leveling with no bed level adjustment knobs on either printer. This fully automatic leveling is a first for Creality with the Ender 3 series—the previous generation Neo printers included bed leveling probes, but those printers still had bed leveling knobs for manual adjustments. Anycubic has used this fully automatic bed leveling approach on a few recent models, such as on their Kobra and Vyper series printers.
As far as the bed leveling sensors themselves, Creality uses their well-established CR Touch contact probe on the Ender 3 V3 SE. Anycubic uses an inductive probe system they call LeviQ 2.0 on the Kobra 2 Neo, an update from the system used on the original Kobra printers. This is a non-contact electromagnetic method which detects the metal of the bed material from a short distance. We haven’t used the LeviQ system, but it’s reported to be reliable, and with Anycubic's history of using this type of probe, we have no reason to doubt its performance.
Display
Both the Creality Ender 3 V3 SE and Anycubic Kobra 2 Neo include a full-color LCD display with a knob controller. The Ender 3 V3 SE’s display is a vertically-oriented 3.2” display that is similar to the display Creality has used on some previous Ender models, but with more colors and generally more onscreen information. On the other hand, the Kobra 2 Neo uses a noticeably smaller 2.4” horizontally-oriented display similar to the previous Kobra models. While the Ender 3 V3 SE’s screen is larger, this is a minor difference between the two machines.
Price
The pricing of the two printers is quite similar, with the Anycubic Kobra 2 Neo coming in at around $20 less (MSRP) than the Ender 3 V3 SE. Since both Creality and Anycubic run sales on their printers occasionally, you’re likely to be able to find these printers for approximately the same price, and we wouldn’t consider this to be a notable difference between these machines. This is a competitive price point and the features both printers provide is unprecedented at this price.
We don’t list exact prices on our site because they tend to change due to sales and discounts. You can check the current prices using these links:
Check prices for the Creality Ender 3 V3 SE on Amazon here.
Check prices for the Anycubic Kobra 2 Neo on Amazon here.
Next, we’ll go through the major differences between these two 3D printers.
Differences Between the Creality Ender 3 V3 SE and Anycubic Kobra 2 Neo
The Ender 3 V3 SE includes a lot of “firsts” for Creality’s budget printer line, and in many ways, it seems like Creality learned from Anycubic and added a lot of Anycubic’s features. But despite all the similarities we listed above, there are actually quite a few differences between these printers. Some of them have a large impact on print quality and operation.

Both printers have a flexible bed that aids in part removal, but the Kobra 2 Neo has a textured PEI bed, which we prefer.
Bed Material
Creality Ender 3 V3 SE: PC steel bed
Anycubic Kobra 2 Neo: Textured PEI steel bed
The Creality Ender 3 V3 SE uses a magnetic, flexible PC-coated steel bed. Adhesion with this bed type is good, but sometimes too good, and the coating is easily scratched or damaged if you have to use a scraper to remove a stubborn print. On the other hand, the Anycubic Kobra 2 Neo uses a magnetic, flexible, textured PEI-coated steel bed on the Kobra 2 Neo. In our testing, this material is more durable, has good adhesion, and releases models much more easily when cooled. You can easily buy a PEI bed [Amazon link] as an upgrade for the Ender 3 V3 SE, but the Kobra 2 Neo has the advantage here by providing the PEI bed as a standard feature.
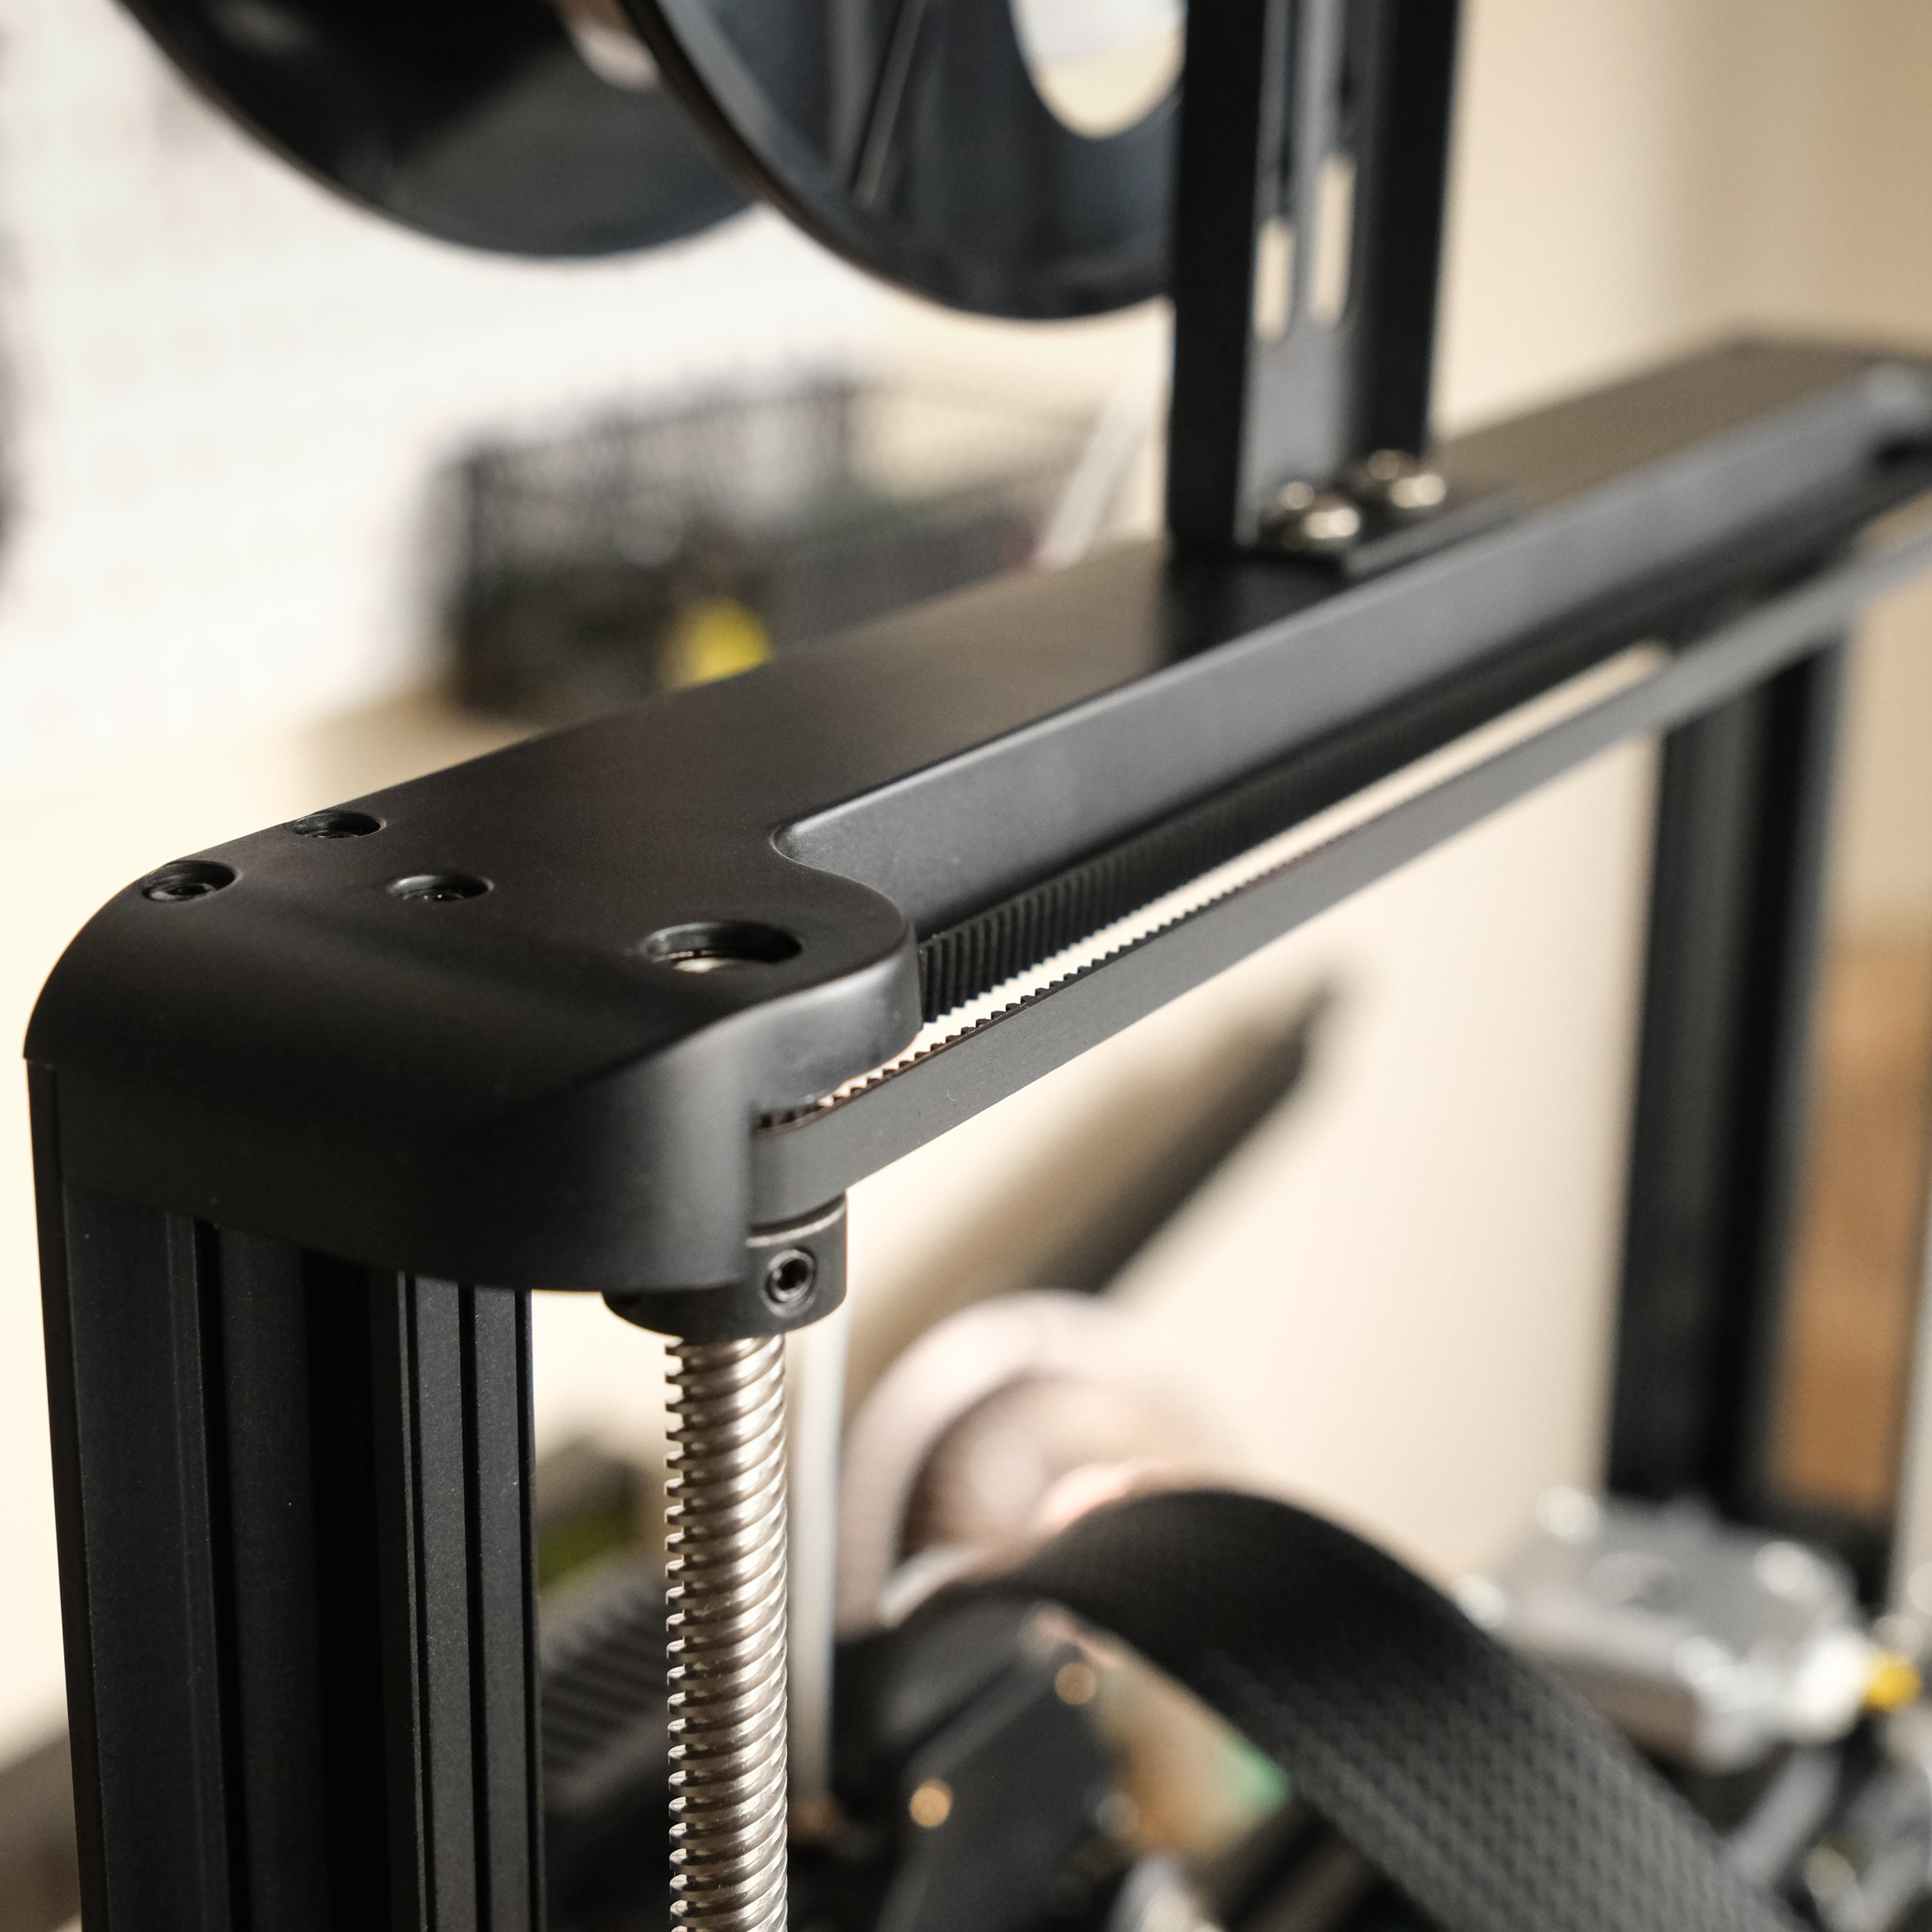
Motion System
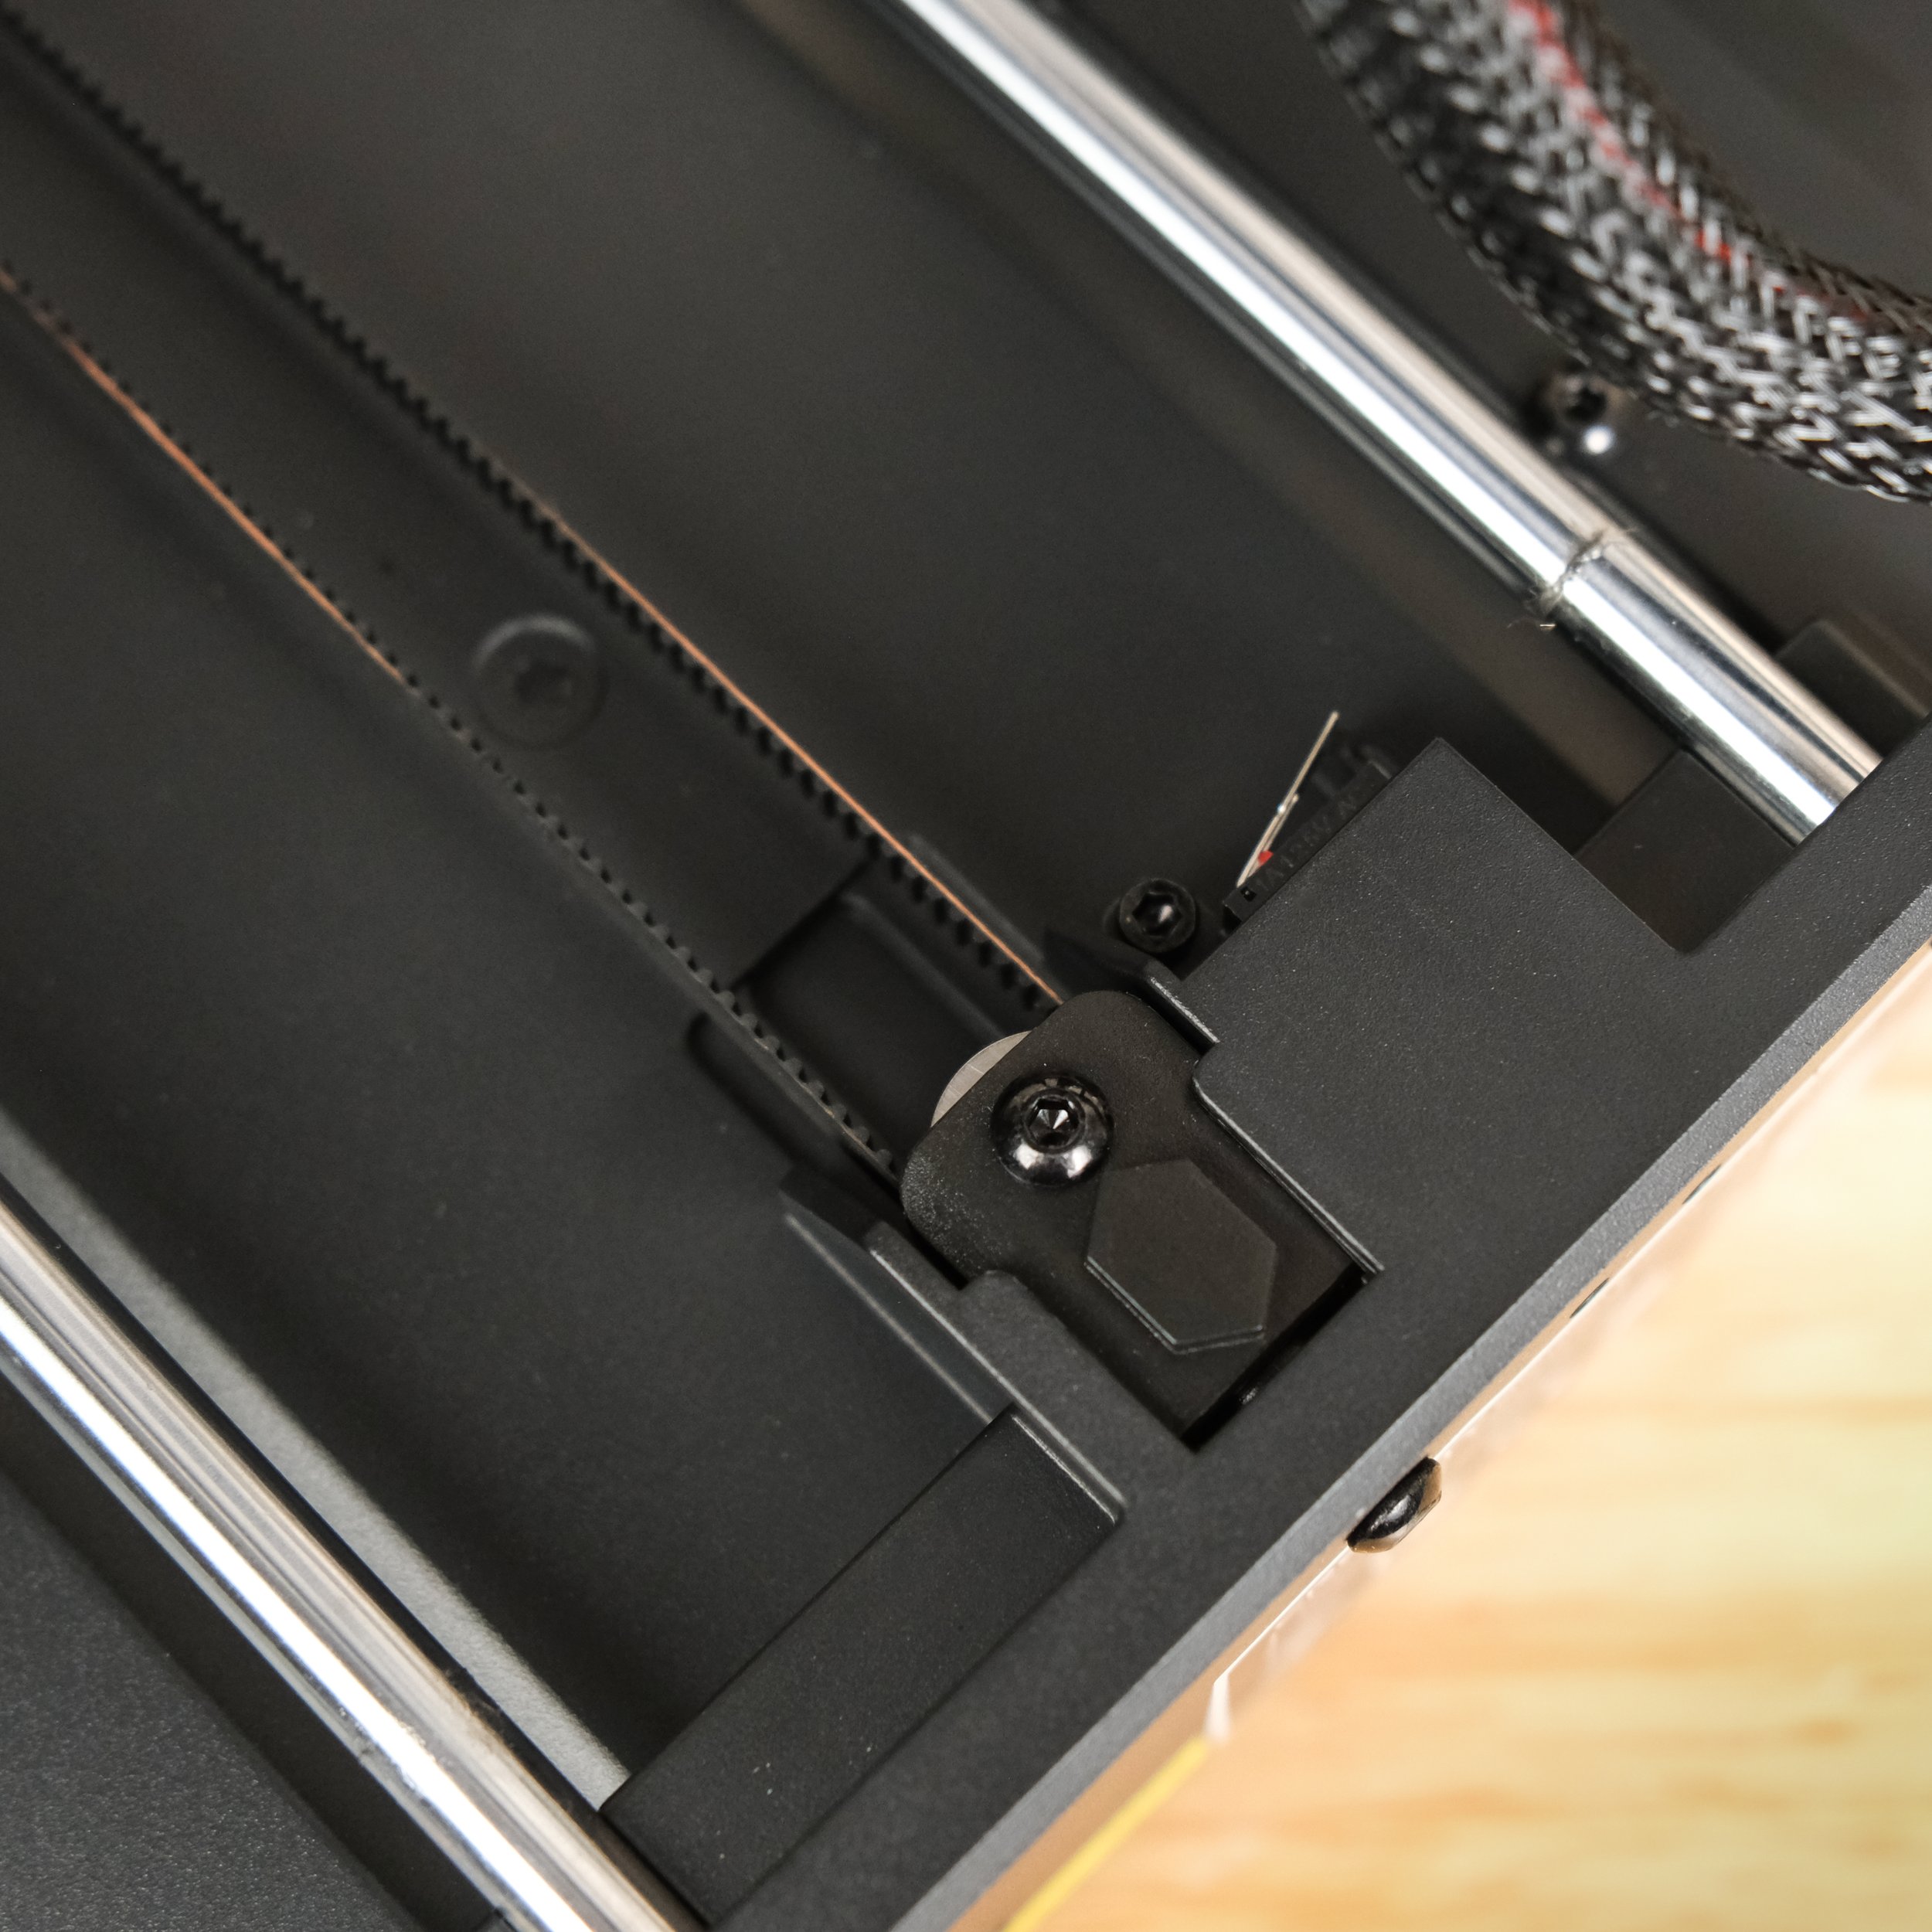
Creality Ender 3 V3 SE: Dual Z axis lead screws and Y axis linear rods
In a first for its entry-level printers, Creality uses dual Z axis lead screws on the Ender 3 V3 SE. Both lead screws are powered by one stepper motor, with a belt linking them together at the top of the printer. This keeps both screws in perfect synchronization and keeps the X axis beam level for the heavier direct extruder. The dual lead screws ensure the X gantry lifts evenly from both sides of the printer, which helps with the added weight of the direct drive extruder. This should improve print quality.
In contrast, the Anycubic Kobra 2 Neo only has a single Z axis lead screw, similar to the previous entry-level Kobra printers. Provided the direct extruder is light enough, it should still be able to keep the X gantry level, but dual Z axis lead screws are becoming more and more common. This isn’t a dealbreaker, but it would have been a welcome addition to the Kobra 2 Neo.
The two printers also differ in the Y axis. Creality prominently shows off dual linear rods supporting the Y axis, which is a new feature. Circular bearings ride along these rods, supporting the bed in multiple places with wide spacing. This increases stability, especially at high print speeds.
The Anycubic Kobra 2 Neo uses the same Y axis system found on previous Kobra models (and older Creality machines such as the Ender 3)—aluminum extrusions with V slot channels and rubber wheels riding in these slots. This arrangement is well-proven but may cause the bed to vibrate when it is being moved back and forth at high speed, especially as the rubber wheels wear. On printers with many print hours, we’ve seen the wheels become loose, which can cause print quality issues. This is unlikely to occur with the Ender 3 V3 SE’s linear rods.
Linear Advance and Input Shaping
Anycubic Kobra 2 Neo: Linear advance and input shaping firmware features
The Anycubic Kobra 2 Neo includes linear advance and input shaping, two firmware features that should improve print quality at higher print speeds.
Linear advance is a technique which detects changes in nozzle direction by looking through the G code. Just ahead of these changes, the extruder will slow down in order to reduce nozzle pressure. This will prevent excess filament “spilling out” and forming blobs at corners as the nozzle leaves it behind. This becomes especially important at high speed in order to maintain print quality since the extruder flow and pressure are high.
Input shaping is another technique which uses mathematics to detect resonance in the various printer components: the “bounce” of the belts as the extruder or bed moves back and forth, and the flex of various components of the frame. It then applies small corrections to the motors in order to minimize this resonance. High speed increases the effect of resonance, so input shaping becomes more important for high-speed printers to produce good quality prints. Otherwise, you may see “ghosting”, which is wavy reflections of surface features extending out into the print on either side of the feature where the nozzle bounces back and forth.
It’s disappointing that the Ender 3 V3 SE doesn’t include these features, although you could use the Creality Sonic Pad to add those capabilities to that printer. The Anycubic Kobra 2 Neo definitely has an edge in this category.
Automatic Z Offset Calibration
Creality Ender 3 V3 SE: Strain gauge sensor for automatic offset calibration
Anycubic Kobra 2 Neo: Offset calibration “module” sensor that is less precise

The strain gauge sensor on the Ender 3 V3 SE is directly mounted to the bed, making it more precise than the separate sensor pad on the Kobra 2 Neo.
Now that almost every printer is equipped with automatic leveling, the next frontier is automatic Z offset calibration. This sets the minimum nozzle height and is critical to a good first layer. It should be set so that the filament has room to leave the nozzle at the set level height without the nozzle scratching the bed, but not so high that the filament pours out in midair and is dropped onto the bed. The filament should be slightly squished into the bed while still molten to ensure good adhesion. Setting this manually by sliding a sheet of paper under the nozzle and adjusting the height is tedious and error-prone, but this is how you calibrate the Z offset on most older 3D printers.
The Creality Ender 3 V3 SE is the first Ender 3 series printer to include automatic Z offset calibration, accomplished by a strain gauge installed under a corner of the bed. When you calibrate the printer, the nozzle will lower until it touches the bed. The pressure will then be detected by the strain gauge. This is a technique that has been in use by many manufacturers in more expensive printers for some time, but is new to lower-cost machines like the Ender 3 V3 SE.
Though the Anycubic Kobra 2 Neo does set the Z offset automatically, it uses an entirely different method that doesn’t appear to be as reliable as the Ender 3 V3 SE’s implementation. Anycubic uses a new module attached to the back of the bed with a switch mounted under a metal disc which the nozzle taps. This disc is intended to be at exactly the same level as the top of the bed, but its height relative to the height of the bed could easily shift. Their website admits this with a mysterious warning: “Z-Offset deviation might occur due to the uncontrollable shipping environment. Please adjust the Z-Offset in accordance with the circumstances.”
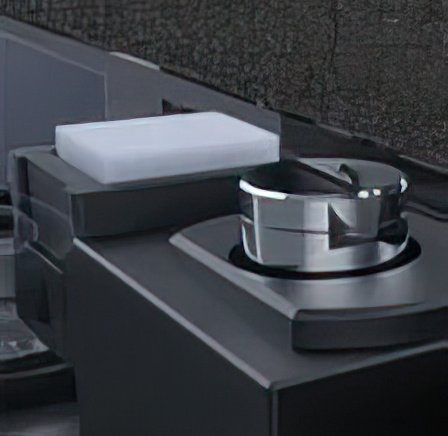
The Kobra 2 Neo includes a nozzle wipe pad (white) next to the Z offset calibration sensor (silver).
This disc can never be perfectly level with the top of the bed and it may shift during shipping as Anycubic themselves admit. Changing the bed material will also affect this reference. If this measurement differs from the bed height by even 0.05mm, the first layer will be affected. So even with this system, the Z offset on the Kobra 2 Neo will have to be manually adjusted in many circumstances. We can say that this is more of a Z offset calibration aid rather than a fully automatic setting, and it’s not as precise as the strain gauge used on the Ender 3 V3 SE.
Nozzle Wiper
Anycubic Kobra 2 Neo: Includes nozzle wiper
One nice perk with Anycubic’s Z offset calibration module on the Kobra 2 Neo is that the module has a silicone pad next to the metal disc. The printer wipes the nozzle on this pad after the nozzle is heated. This ensures a clean nozzle before every print with no user intervention.
This feature has previously only appeared on a few expensive 3D printer models and isn’t found on the Ender 3 V3 SE. It’s a nice convenience feature that we’re glad to see on the Kobra 2 Neo.
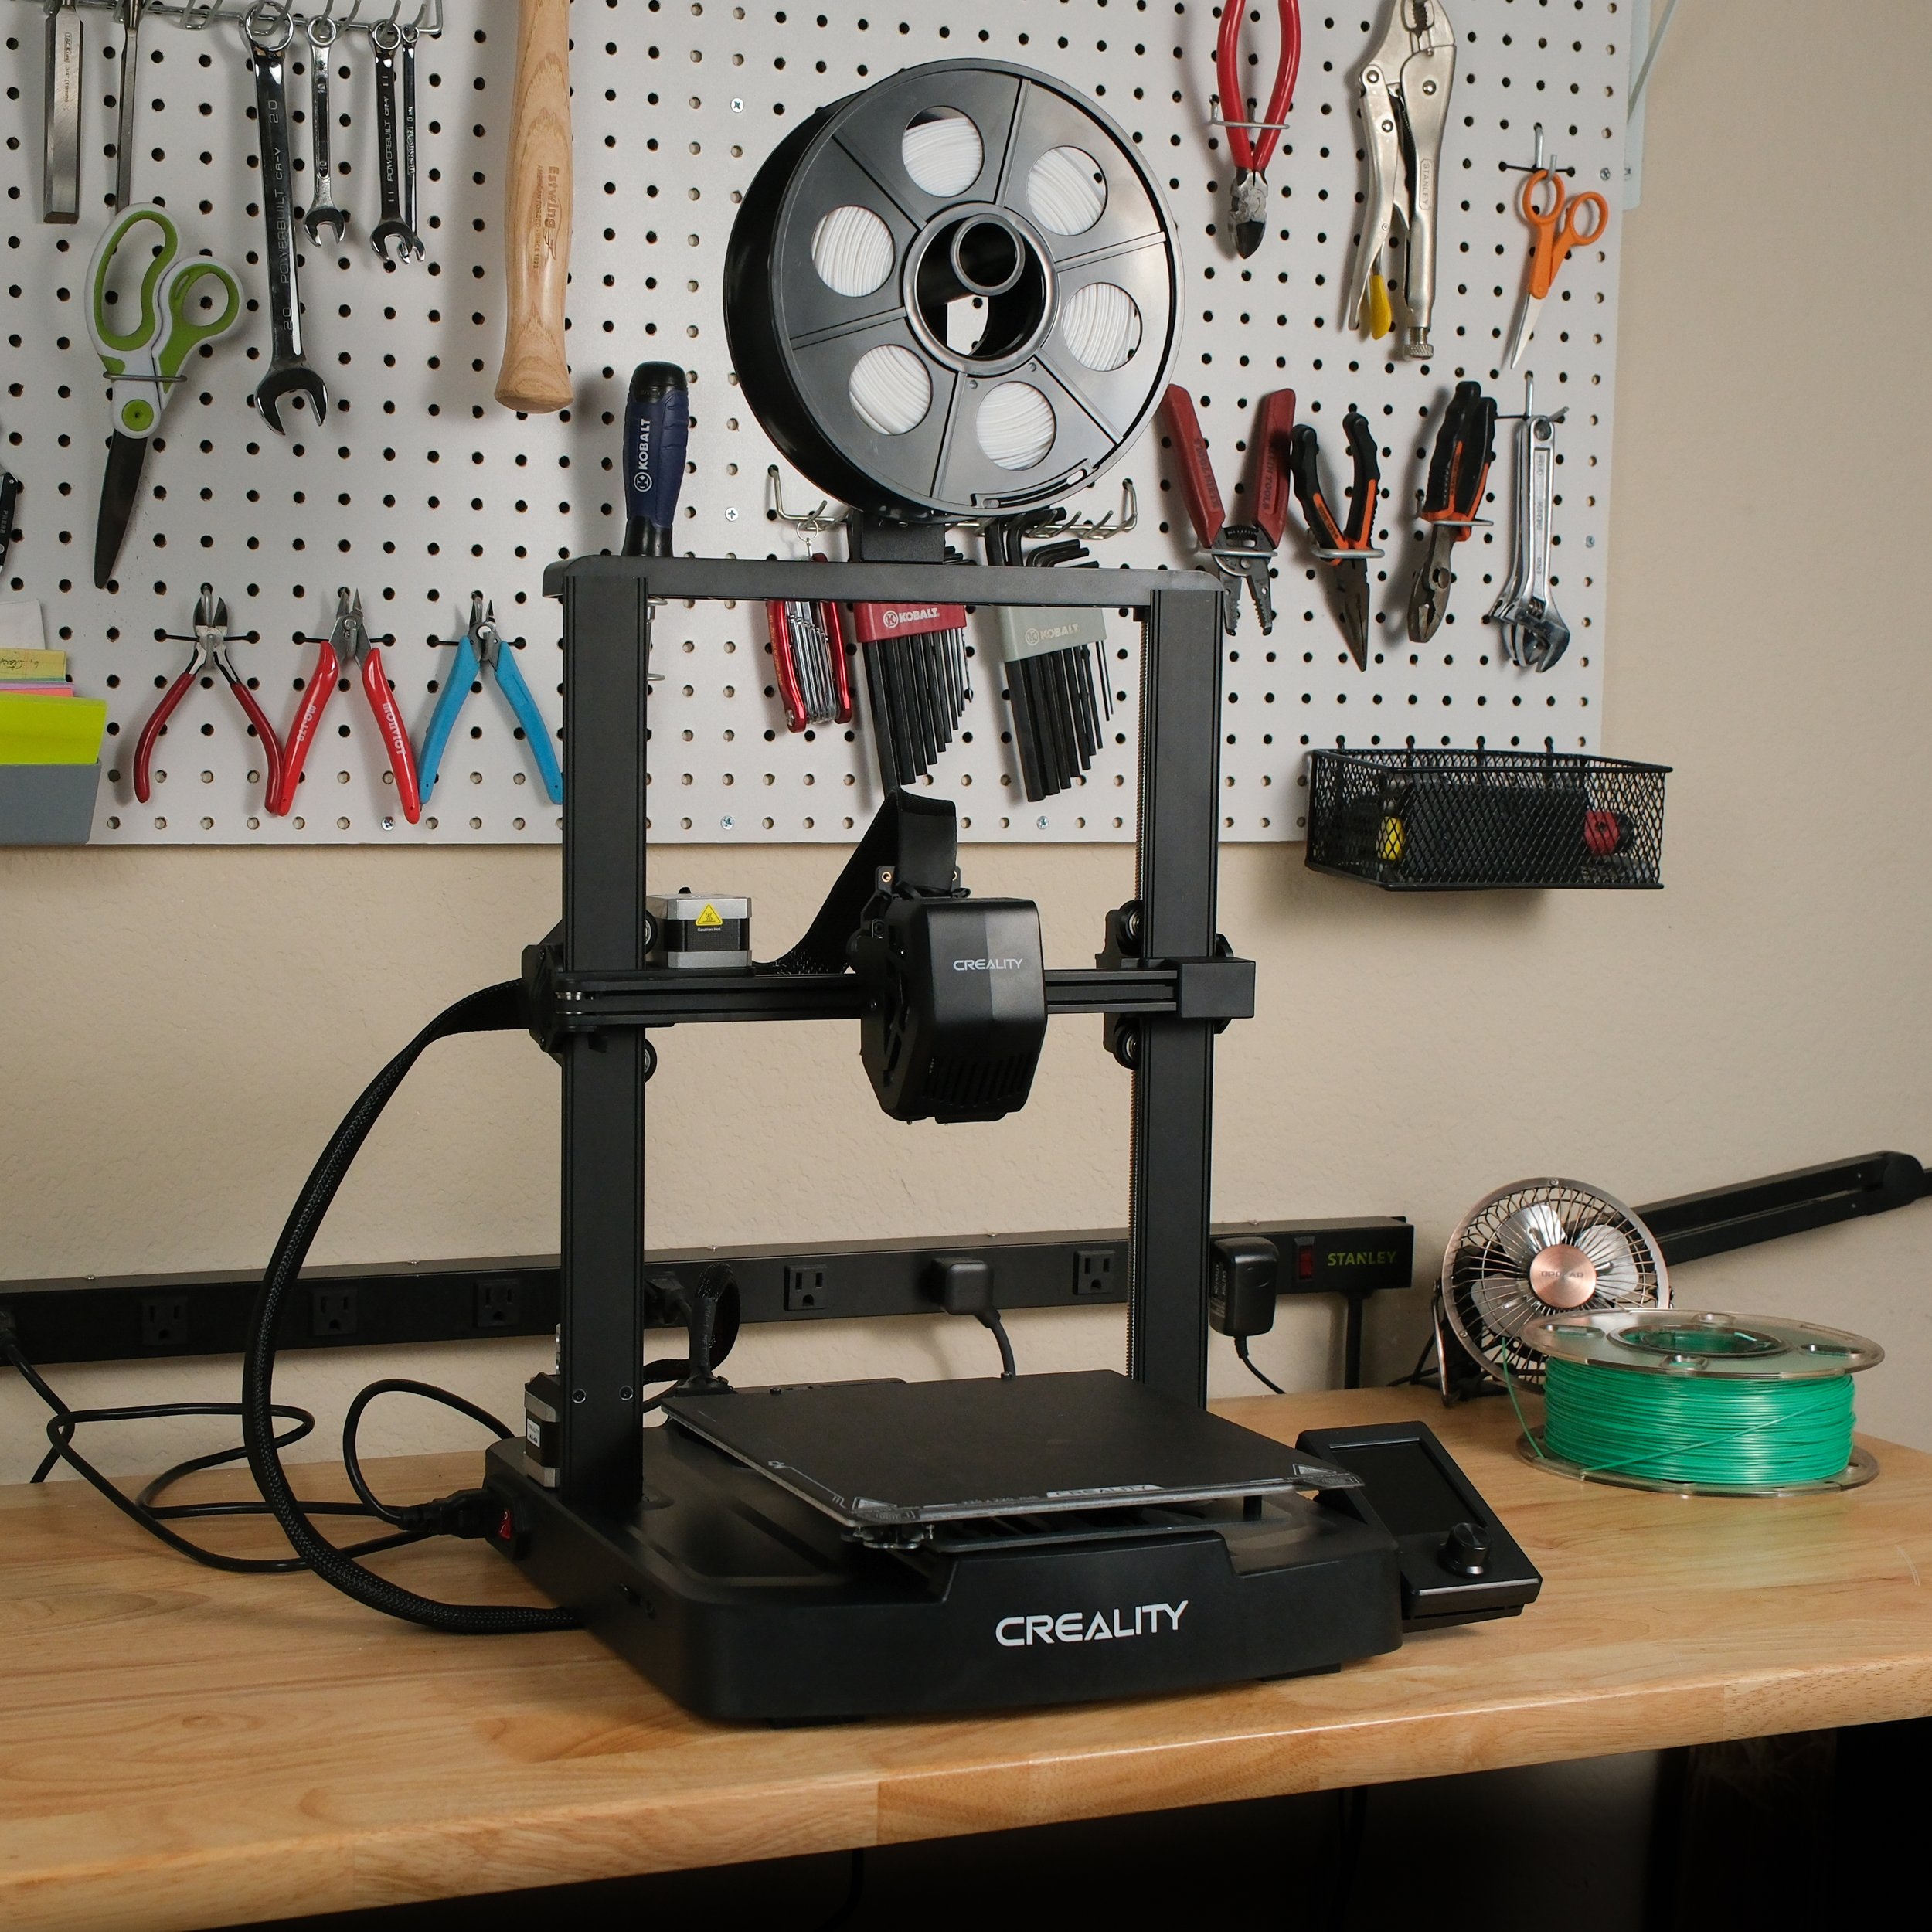
Filament Spool Location
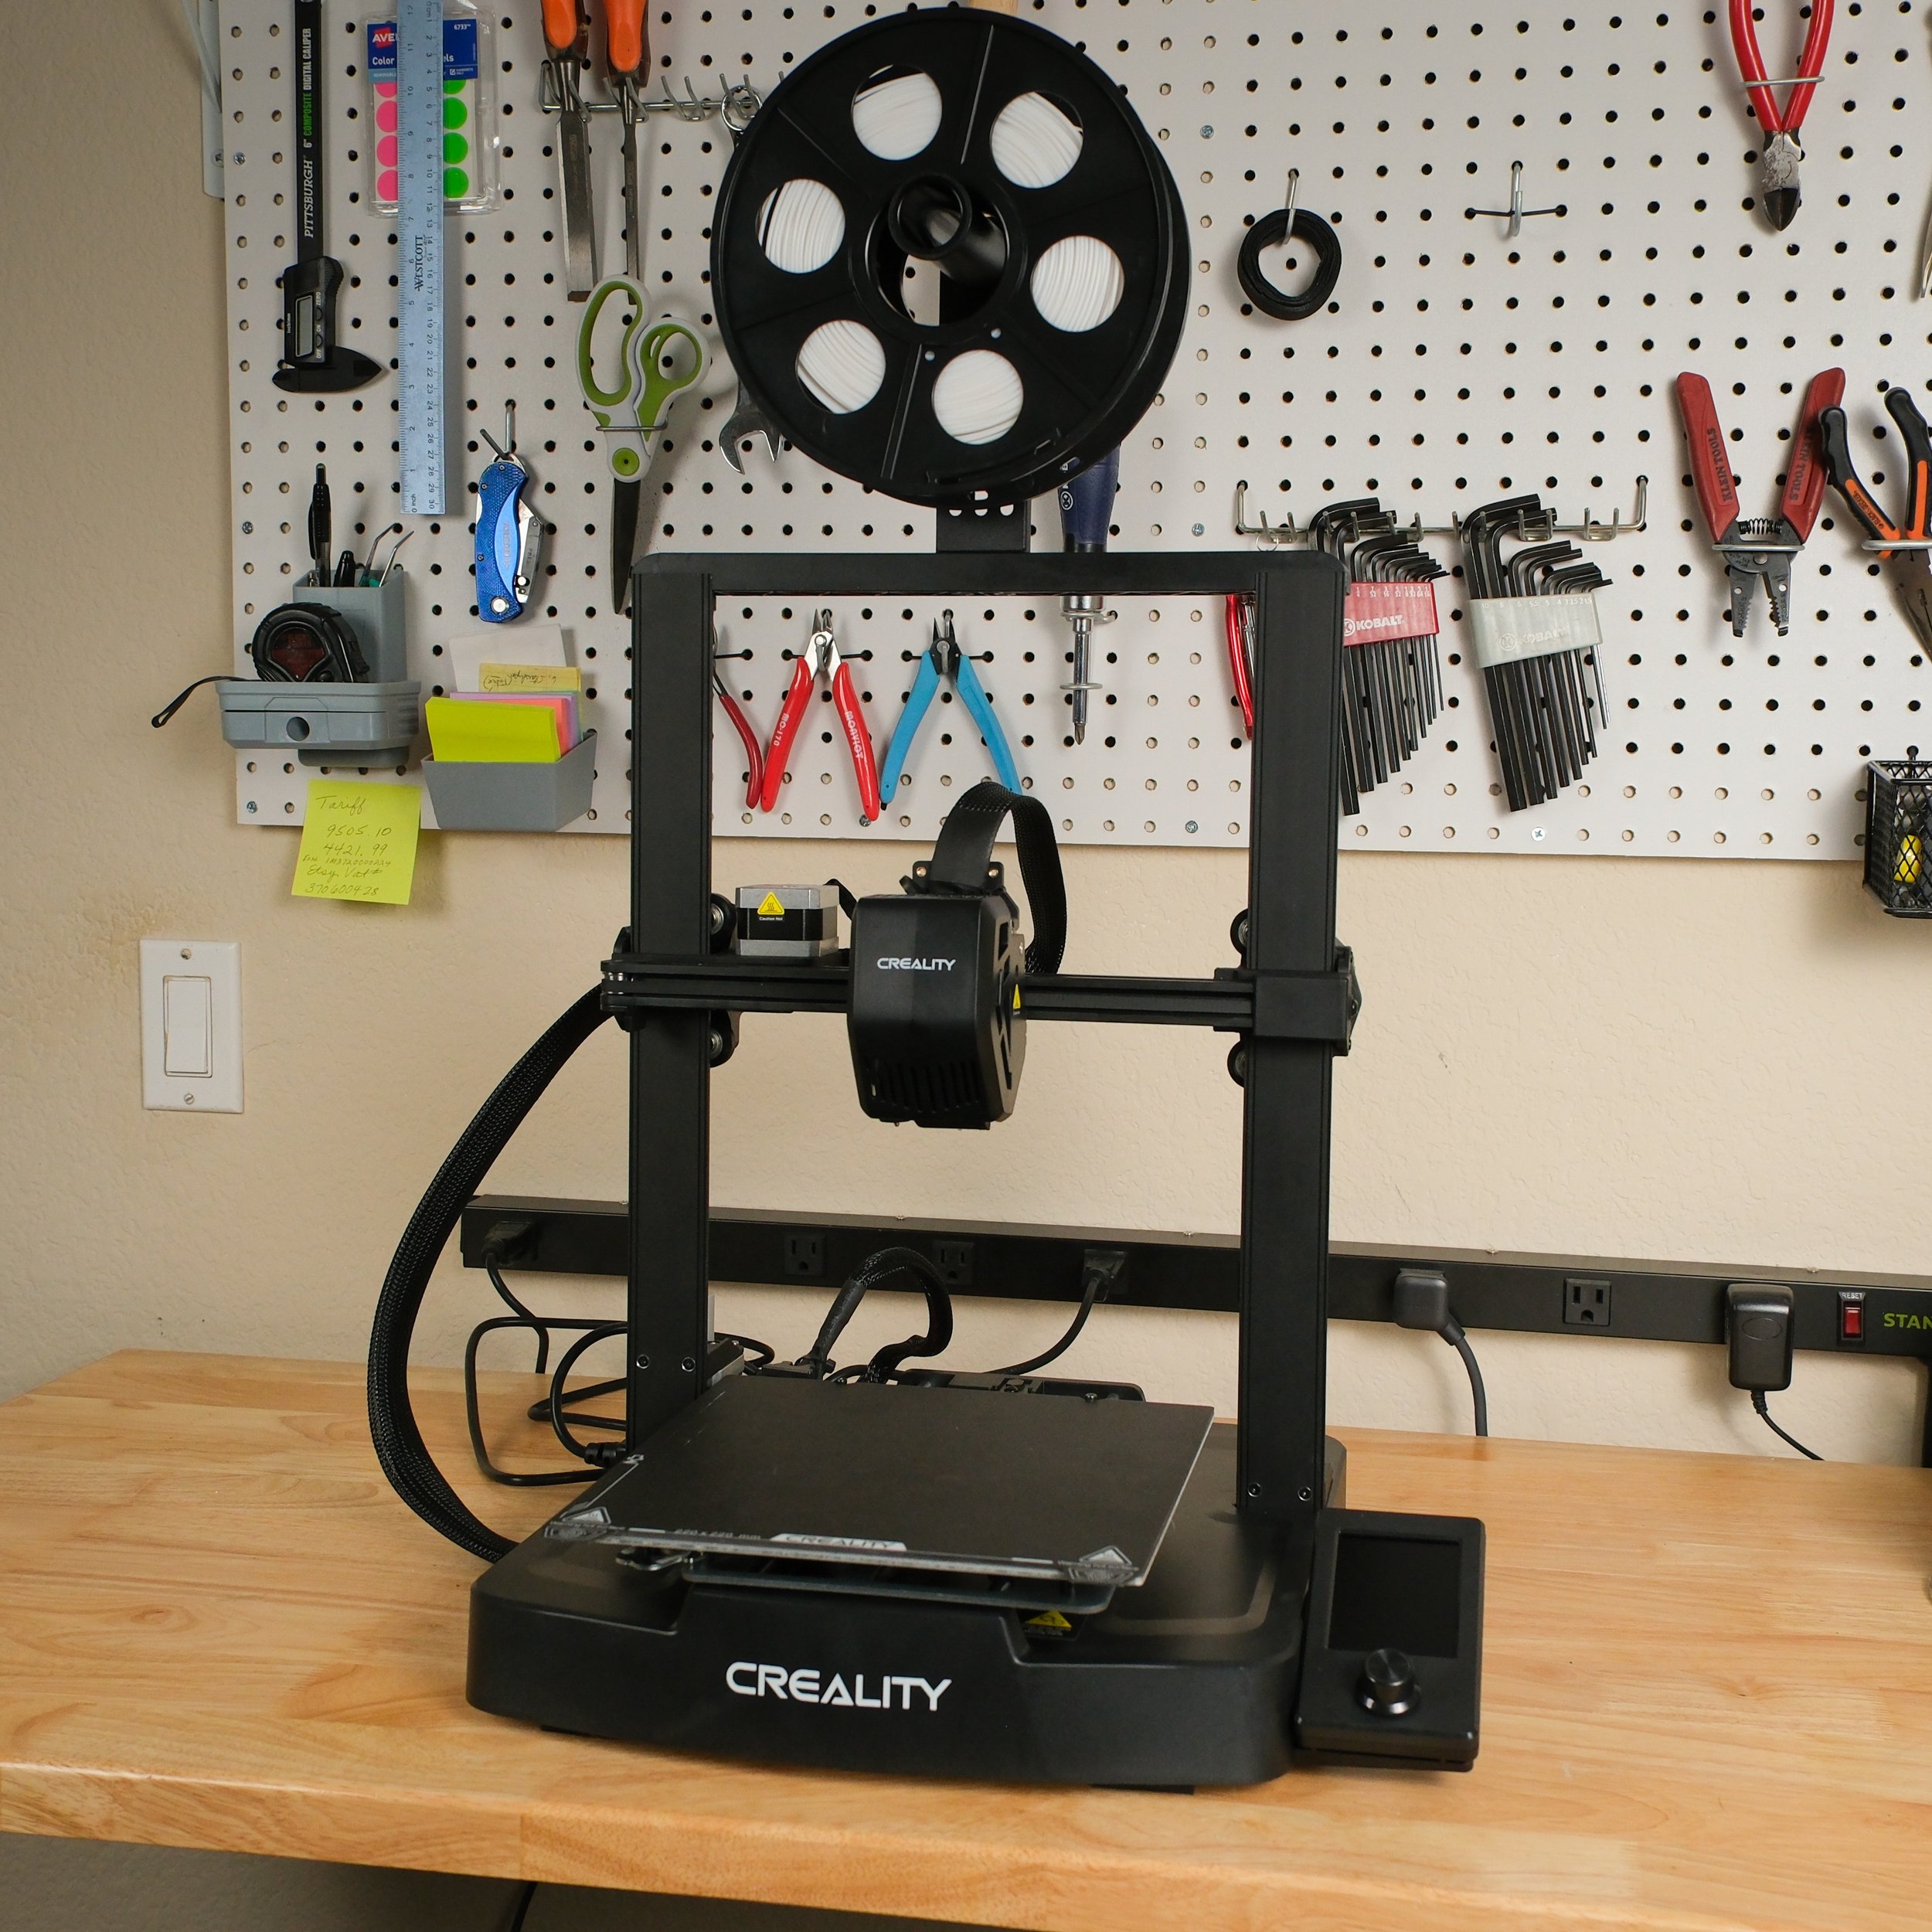
Creality Ender 3 V3 SE: Top-mounted spool holder
Anycubic Kobra 2 Neo: Side-mounted spool holder
The Creality Ender 3 V3 SE has its filament spool holder mounted on the top rail of the gantry, similar to most other 3D printers. The filament feeds directly into the top of the extruder. This design makes the printer seem extremely tall but saves on horizontal desk space.
The Anycubic Kobra 2 Neo has a side-mounted spool holder and a reverse Bowden guide tube which is fed from the side of the printer. A reverse Bowden arrangement still uses Bowden tubing but it is on the intake side of the extruder. It is just a guide for the filament, and the filament is pulled through the tube, not pushed through it as in a normal Bowden extruder setup. So the tendency of Bowden tubes to jam isn’t an issue with a reverse Bowden setup. This side feed design takes up more desk space, but may more easily accommodate use of a filament dryer.
We personally aren’t fans of Kobra 2 Neo’s approach. The Bowden guide tube tends to be more annoying for loading filament because the filament has to be carefully fed into the tube until it reaches the extruder, unlike a standard direct drive extruder where you can insert the filament directly into the intake port. We’d probably end up removing the guide tube if we were using the Kobra 2 Neo.
As far as the top mount vs side mount for the filament spool, you may prefer one option over the other depending on how your workspace is configured. We’ve optimized our workspace to accommodate multiple 3D printers side-by-side with plenty of vertical space for the filament spools, but if your workspace has less vertical room, you might prefer the side-mounted spool holder.
Belt Tensioning Knobs
Creality Ender 3 V3 SE: Allen wrench required for adjusting belt tension
Anycubic Kobra 2 Neo: Hand-turn knobs for adjusting belt tension
The Anycubic Kobra 2 Neo includes hand-turn tension knobs, allowing you to adjust the belt tension on the X and Y axes. This is a modification that users of older machines would frequently add to their printers, and it’s convenient to have it included as a standard feature. On the other hand, adjusting the belt tension on the Ender 3 V3 SE requires a small Allen wrench, which is included with the printer. This is slightly less convenient than the hand-turn knobs on the Kobra 2 Neo, but since belt tensioning isn’t a common task, this isn’t a major differentiator between the machines.
Part Cooling
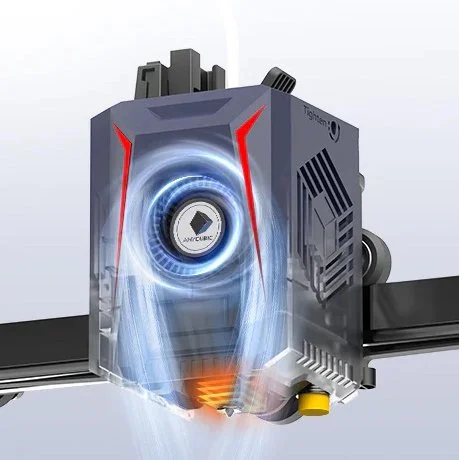
The Kobra 2 Neo has superior part cooling, with ducts on both sides of the nozzle.
Creality Ender 3 V3 SE: Single part cooling fan duct
Anycubic Kobra 2 Neo: Dual part cooling fan ducts
As speed increases, part cooling requirements also increase. A high molten filament flow deposited at high speed needs to solidify and cool before more filament is laid on top. Creality has improved their part cooling over previous models with a slightly larger part cooling fan mounted closer to the nozzle on the Ender 3 V3 SE, but it still only cools on one side of the nozzle as noted in our review of that printer.
Anycubic has made major improvements to part cooling with the Kobra 2 Neo and uses a centrally mounted powerful 7000 RPM fan with outlet ducts on both sides of the nozzle. This is far more effective and cools the deposited filament from both sides equally and quickly.
Printer Dimensions
Creality Ender 3 V3 SE: 349 X 364 X 490 mm (13.74” x 14.33” x 19.29”)
Anycubic Kobra 2 Neo: 440 X 440 X 485 mm (17.32” x 17.32” x 19.09”)
The Kobra 2 Neo is both longer and wider by a considerable margin, meaning it will take up more desk space than the Ender 3 V3 SE. Consider, too, that neither of these dimensions include the spool holder, so the Ender 3 V3 SE will be notably taller than this measurement and the Kobra 2 Neo will be notably wider. You can expect the spool holder to add 200-215 mm (8-8.5”) of height to the Ender 3 V3 SE or width to the Kobra 2 Neo.
Cosmetics
Creality Ender 3 V3 SE: Smooth, simple appearance
Anycubic Kobra 2 Neo: Angular, “high tech” appearance
The two printers have different design styles. Similar to previous Anycubic printers, the Anycubic Kobra 2 Neo has many plastic accent pieces, with “tech” embellishments like fake vents and angled edges cast into these parts.
The Creality Ender 3 V3 SE, on the other hand, is remarkably sleek, and is the cleanest looking Ender 3 they’ve ever made. The entire base is a smooth plastic shell, and the usual extrusions and parts visible on the bases of the older Ender 3 series printers are all covered.
The Ender 3 V3 SE has cleaner, smooth lines that may look more polished, while the Kobra 2 Neo has a sharper, angular design. This simply comes down to your preference and which design style you prefer, but it is a difference in the physical appearance of the machines.
Verdict
This is one of the closest printer comparisons we’ve seen to date. Although the Creality Ender 3 V3 SE and Anycubic Kobra 2 Neo are matched on many key specs, each printer offers a slightly different feature set that makes it difficult to identify a clear winner between them.
The Ender 3 V3 SE offers better features in most ways. With linear rods on the Y axis and dual Z lead screws, it has a more robust motion system than the Kobra 2 Neo that should translate to improved print quality, especially at high speeds. It uses a more precise automatic Z offset calibration sensor and includes a larger display. Additionally, the Ender 3 V3 SE is physically smaller than the Kobra 2 Neo (except in height), while maintaining the same build volume.
However, the Kobra 2 Neo has a few standout features. It provides improved part cooling over the Ender 3 V3 SE, which is meaningful for improving overhang print quality, as well as a nozzle wipe pad that is a rare feature for 3D printer models in this price range. It comes with a textured PEI bed, which we prefer over the PC bed on the Ender 3 V3 SE. The Kobra 2 Neo also offers a few firmware features to improve print quality when printing at higher speeds. Whether the Kobra 2 Neo’s firmware features make more or less of a difference than the improved motion system on the Ender 3 V3 SE is likely dependent on the filament you’re using as well as the specific models you’re printing, so it’s hard to make a general statement about which approach is superior.
If you’re interested in upgrading your 3D printer in the future, the Ender 3 V3 SE is likely to be a better choice. Its motion system improvements aren’t something you can typically upgrade yourself later, and you can match the firmware features on the Kobra 2 Neo with a custom firmware upgrade or the Creality Sonic Pad. Some parts from previous Ender 3 models are compatible with the Ender 3 V3 SE, and Creality has often released their own hardware upgrades for older printer models.
On the other hand, if you aren’t interested in doing your own upgrades and want to buy a printer that will perform well out of the box, it’s hard to go wrong with either of these machines. Both the Ender 3 V3 SE and Kobra 2 Neo offer a strong set of features that is far beyond entry-level 3D printers from a few years ago. Either of these printers should be easy to get started with, and both are capable of producing high-quality prints. Since we focus on Creality printers, we’re personally more inclined to lean toward the Ender 3 V3 SE, but Anycubic has brought strong competition to the game with the Kobra 2 Neo.
If you’d like to compare other printers, take a look at our 3D Printer Comparison Tool. This tool lets you view multiple 3D printers side by side to easily compare features.