Comparing the Creality Ender 3 V3 SE vs. AnkerMake M5C
Note: Creality Experts receives a commission for items you purchase from this page, at no additional cost to you. For more information, please see our affiliate link policy.
We’re continually testing 3D printers from a variety of manufacturers to stay up-to-date on the latest products and advancements in 3D printing. The AnkerMake M5C caught our eye recently as a competitor to the Creality Ender 3 V3 SE, and we decided to compare these two machines head-to-head. We’ve purchased, assembled, and tested both of these printers.
The AnkerMake M5C caught our eye as a competitor to the Creality Ender 3 V3 SE.
You may have heard of Anker—they’re widely known for phone chargers, power banks, and cables—but you might not know that they make 3D printers. They entered the 3D printing market in April 2022 with the AnkerMake M5, which offered unprecedented print speeds for a Cartesian printer at up to 500 mm/s. More recently, they announced the M5C in August 2023, bringing many of the core features from the M5 down to a lower price point and giving Creality’s Ender 3 printers strong competition.
However, Creality released the Ender 3 V3 SE in the same month, fighting back with a machine that we’ve found to be an impressive 3D printer. With these two printers offering several of the same headlining features, but also having a few major differences, we were curious to test them side by side to see how they compare. After testing both machines, we think they serve different purposes, and you will probably want to choose one over the other depending on what you are looking for in a 3D printer. We’ll cover our findings in this article, and help you determine which of these 3D printers is the best choice for you.
Vs.
Similarities Between the Creality Ender 3 V3 SE and AnkerMake M5C
The Ender 3 V3 SE and M5C are similar in many ways, including the motion system, build volume, and extruder type. Lets take a closer look at each of these.
Physical Design
The two printers share similar design characteristics. They each consist of a gantry attached to a base, a design established by the original Creality Ender 3 and used on a wide range of 3D printer models. The extruder moves side-to-side on the X axis beam, which is moved up and down by the Z axis lead screws. The print bed moves back and forth in the Y axis (sometimes referred to as a “bedslinger”).
Both printer have a sleek design, with an enclosed base and an overall minimalist appearance with few exposed wires. Between the two, we’d give a slight edge to the AnkerMake M5C—its base and frame have a smooth, modern appearance that make it feel more polished than the Ender 3 V3 SE.
Build Volume

Both printers feature direct drive extruders.
Both the Creality Ender 3 V3 SE and AnkerMake M5C have a 220 x 220 x 250 mm (8.6” x 8.6” x 9.84”) build volume. This is rapidly becoming the standard build volume for consumer 3D printers, and it’s large enough to print many common models without making the printer itself too bulky.
Direct Drive Extruder
Both printers use direct extruders with dual steel gears for maximum grip with minimal wear. This feature used to be present only in high-end 3D printers but is increasingly appearing in lower-cost machines, which we’re happy to see. Direct drive extruders are more reliable than Bowden extruders, and they tend to generate cleaner prints. Additionally, direct drive extruders are highly beneficial when printing with flexible filament, such as TPU. This is a great feature to see on both the Ender 3 V3 SE and M5C.
Dual Z Axis Drive
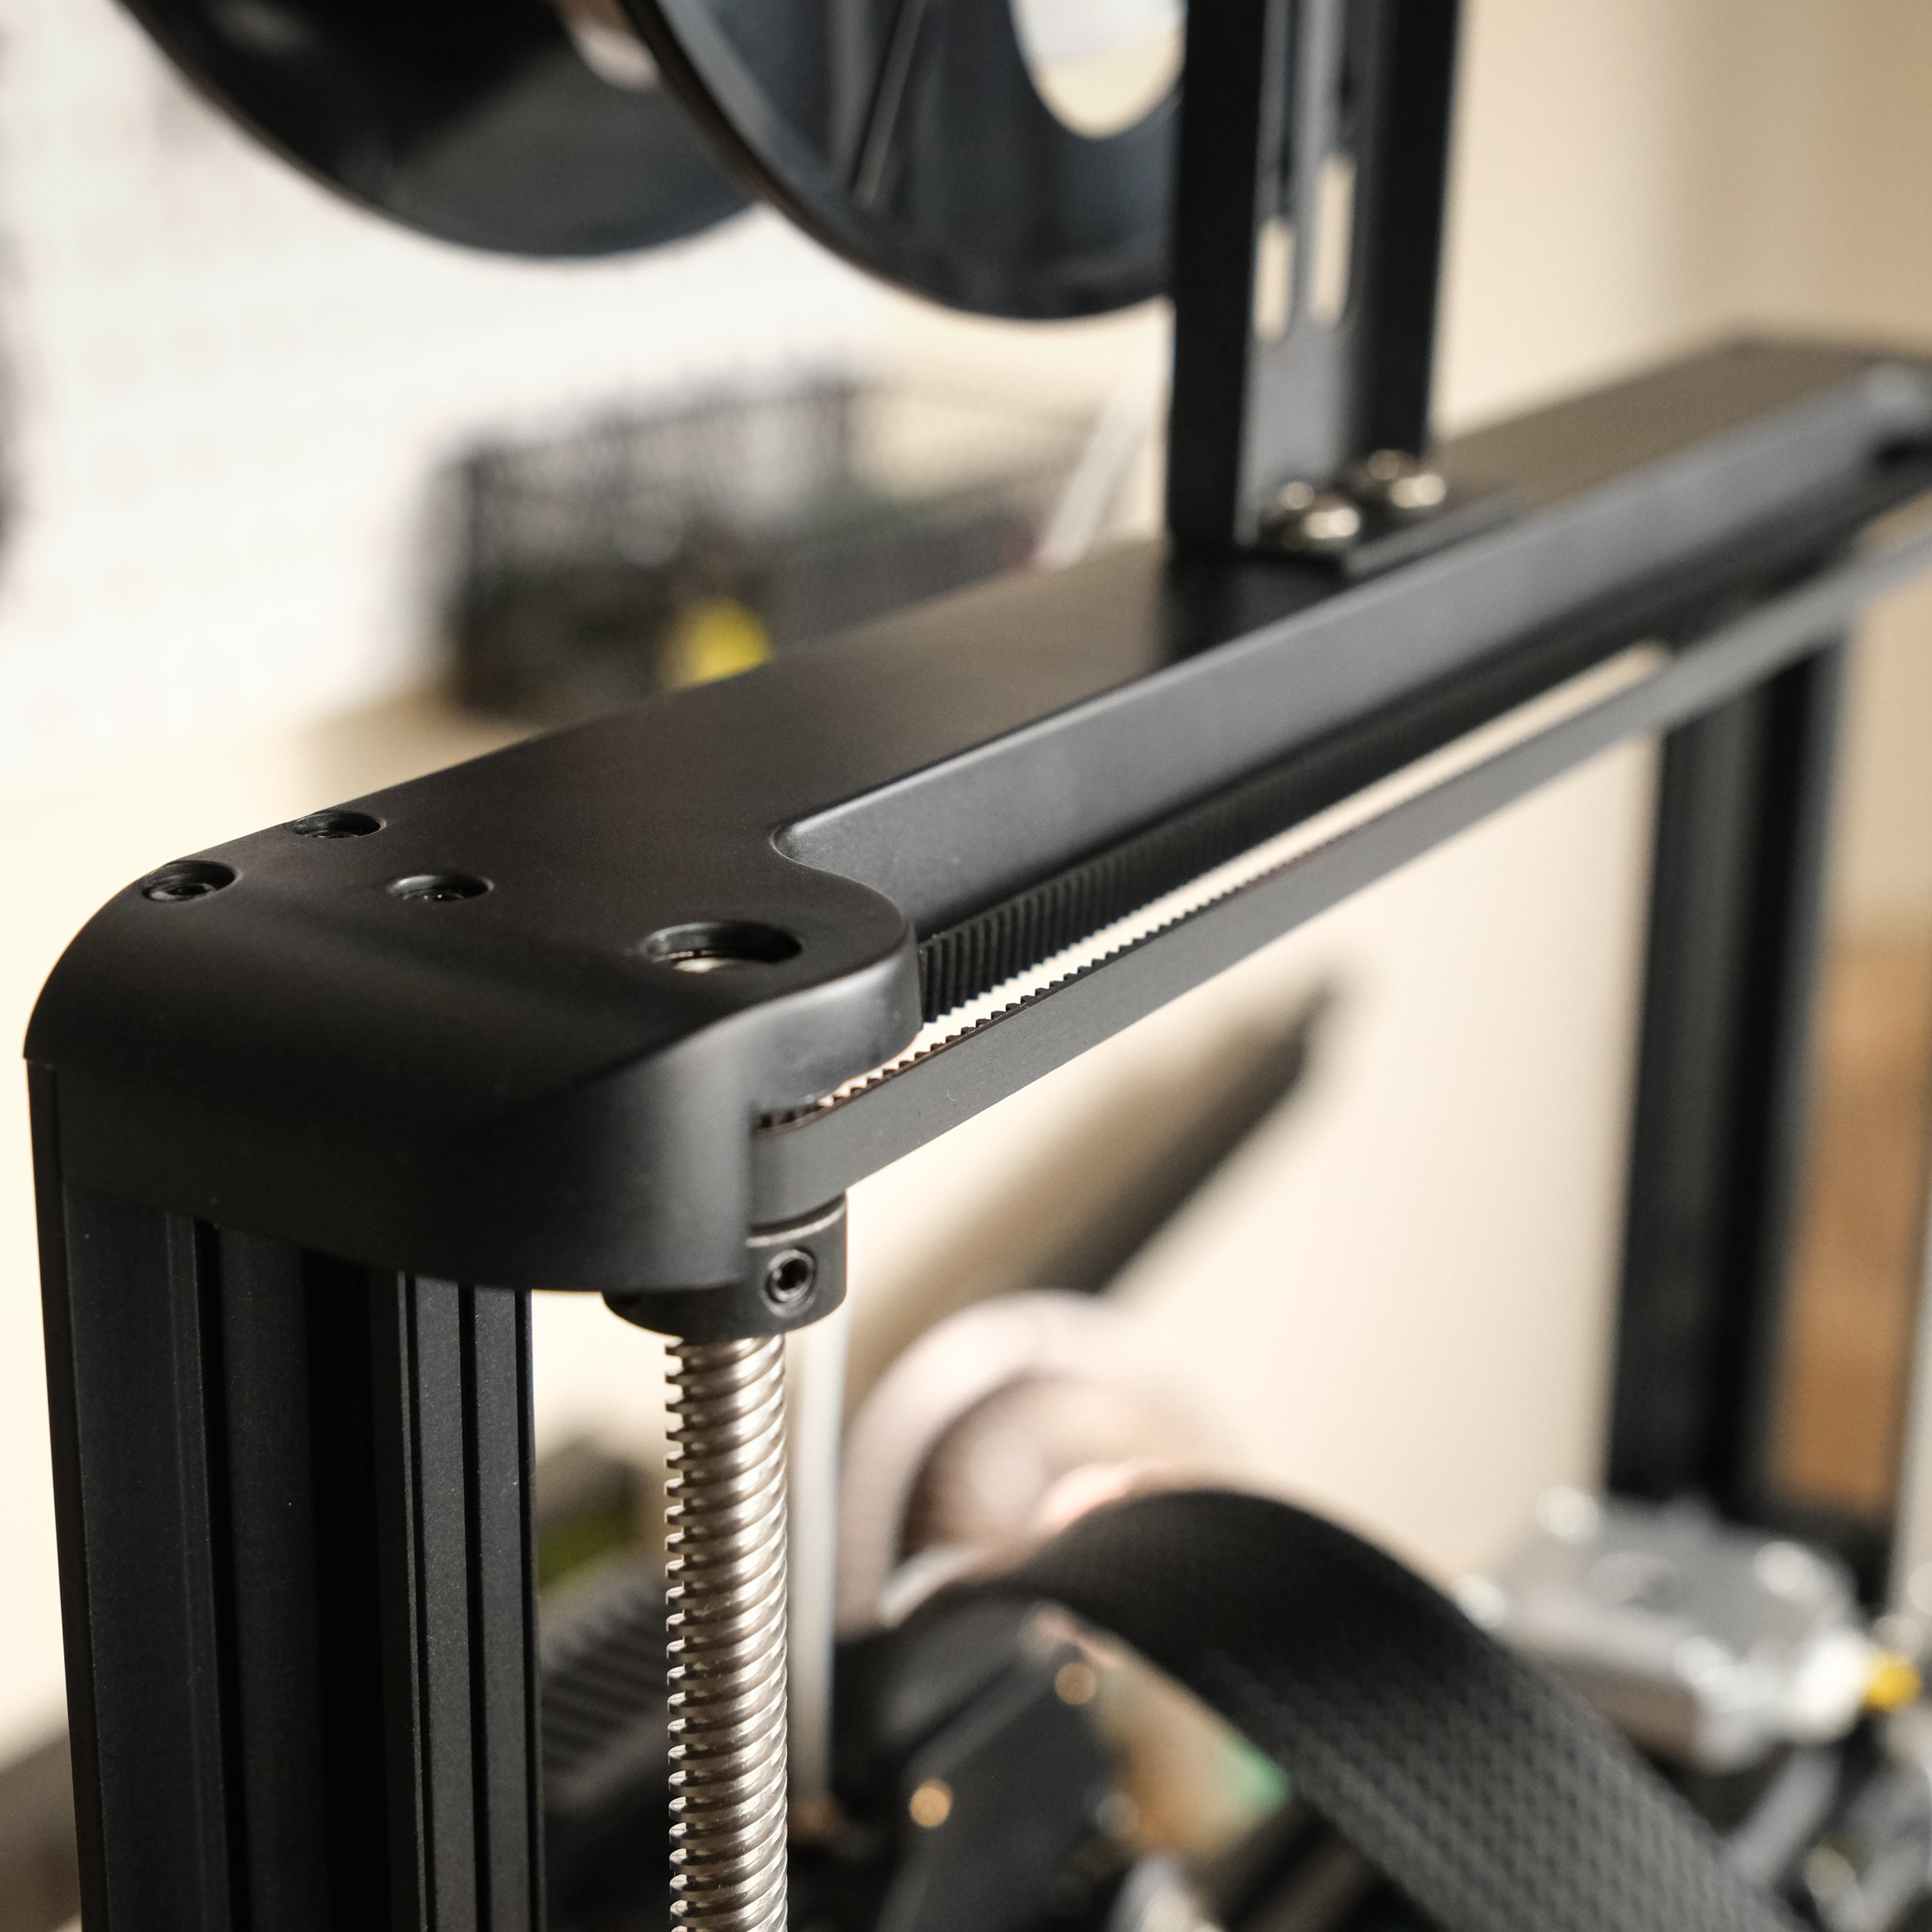
The Ender 3 V3 SE only has one Z motor, but uses it to drive two Z axis rods.
Dual Z axis lead screws stabilize and exert fine control over the positioning of the Z axis, which adds stability for printers with direct drive extruders. Both printers include this feature, although they implement it slightly differently.
The AnkerMake M5C uses two Z axis stepper motors while the Creality Ender 3 V3 SE uses one Z axis stepper motor, with the second Z axis lead screw driven by the first using a belt. At a glance, the single motor may seem inferior, but Creality’s design does have an advantage in that both lead screws remain perfectly synced. We haven’t seen any issues with the Z axis on the Ender 3 V3 SE and neither printer exhibited any signs of the two Z axis lead screws getting out of sync, so we consider this feature to be similar between the two machines.
Automatic Bed Leveling and Z Offset Calibration
Both the Ender 3 V3 SE and M5C include automatic bed leveling, which significantly reduces the effort required to calibrate the printer and results in more consistent, reliable prints. The Ender 3 V3 SE uses a CR-Touch probe to sense the bed height, while the M5C touches the nozzle itself to the bed and uses a strain gauge to detect the bed height. Both designs seem to auto-level effectively, and we haven’t had first-layer adhesion issues on either printer.
As a related convenience feature, both printers are able to set the Z offset automatically. With older automatic bed leveling designs, it was necessary to manually set the Z offset, which is the distance between the tip of the probe and the nozzle. The Ender 3 V3 SE and M5C both include a strain gauge sensor that allows them to set the Z offset automatically by detecting when the nozzle itself touches the bed.
Neither printer includes manual bed leveling knobs, which shows the trust that both manufacturers have in their automatic leveling systems. We’re happy to not have to adjust bed leveling manually, and we’ve had great results on both printers with consistent leveling.
Differences Between the Creality Ender 3 V3 SE and AnkerMake M5C
Although the printers share some similarities, there are some critical differences between the Ender 3 V3 SE and M5C. We’ll discuss each difference here, and point out where you might want to choose one of these machines over the other based on these features.
We’re going to begin this section with a few features that are often afterthoughts in these comparisons. In the case of these two printers, we think their most important differences are in how you interact with each printer, and how easy each one is to approach for a new user.
Display and Controls
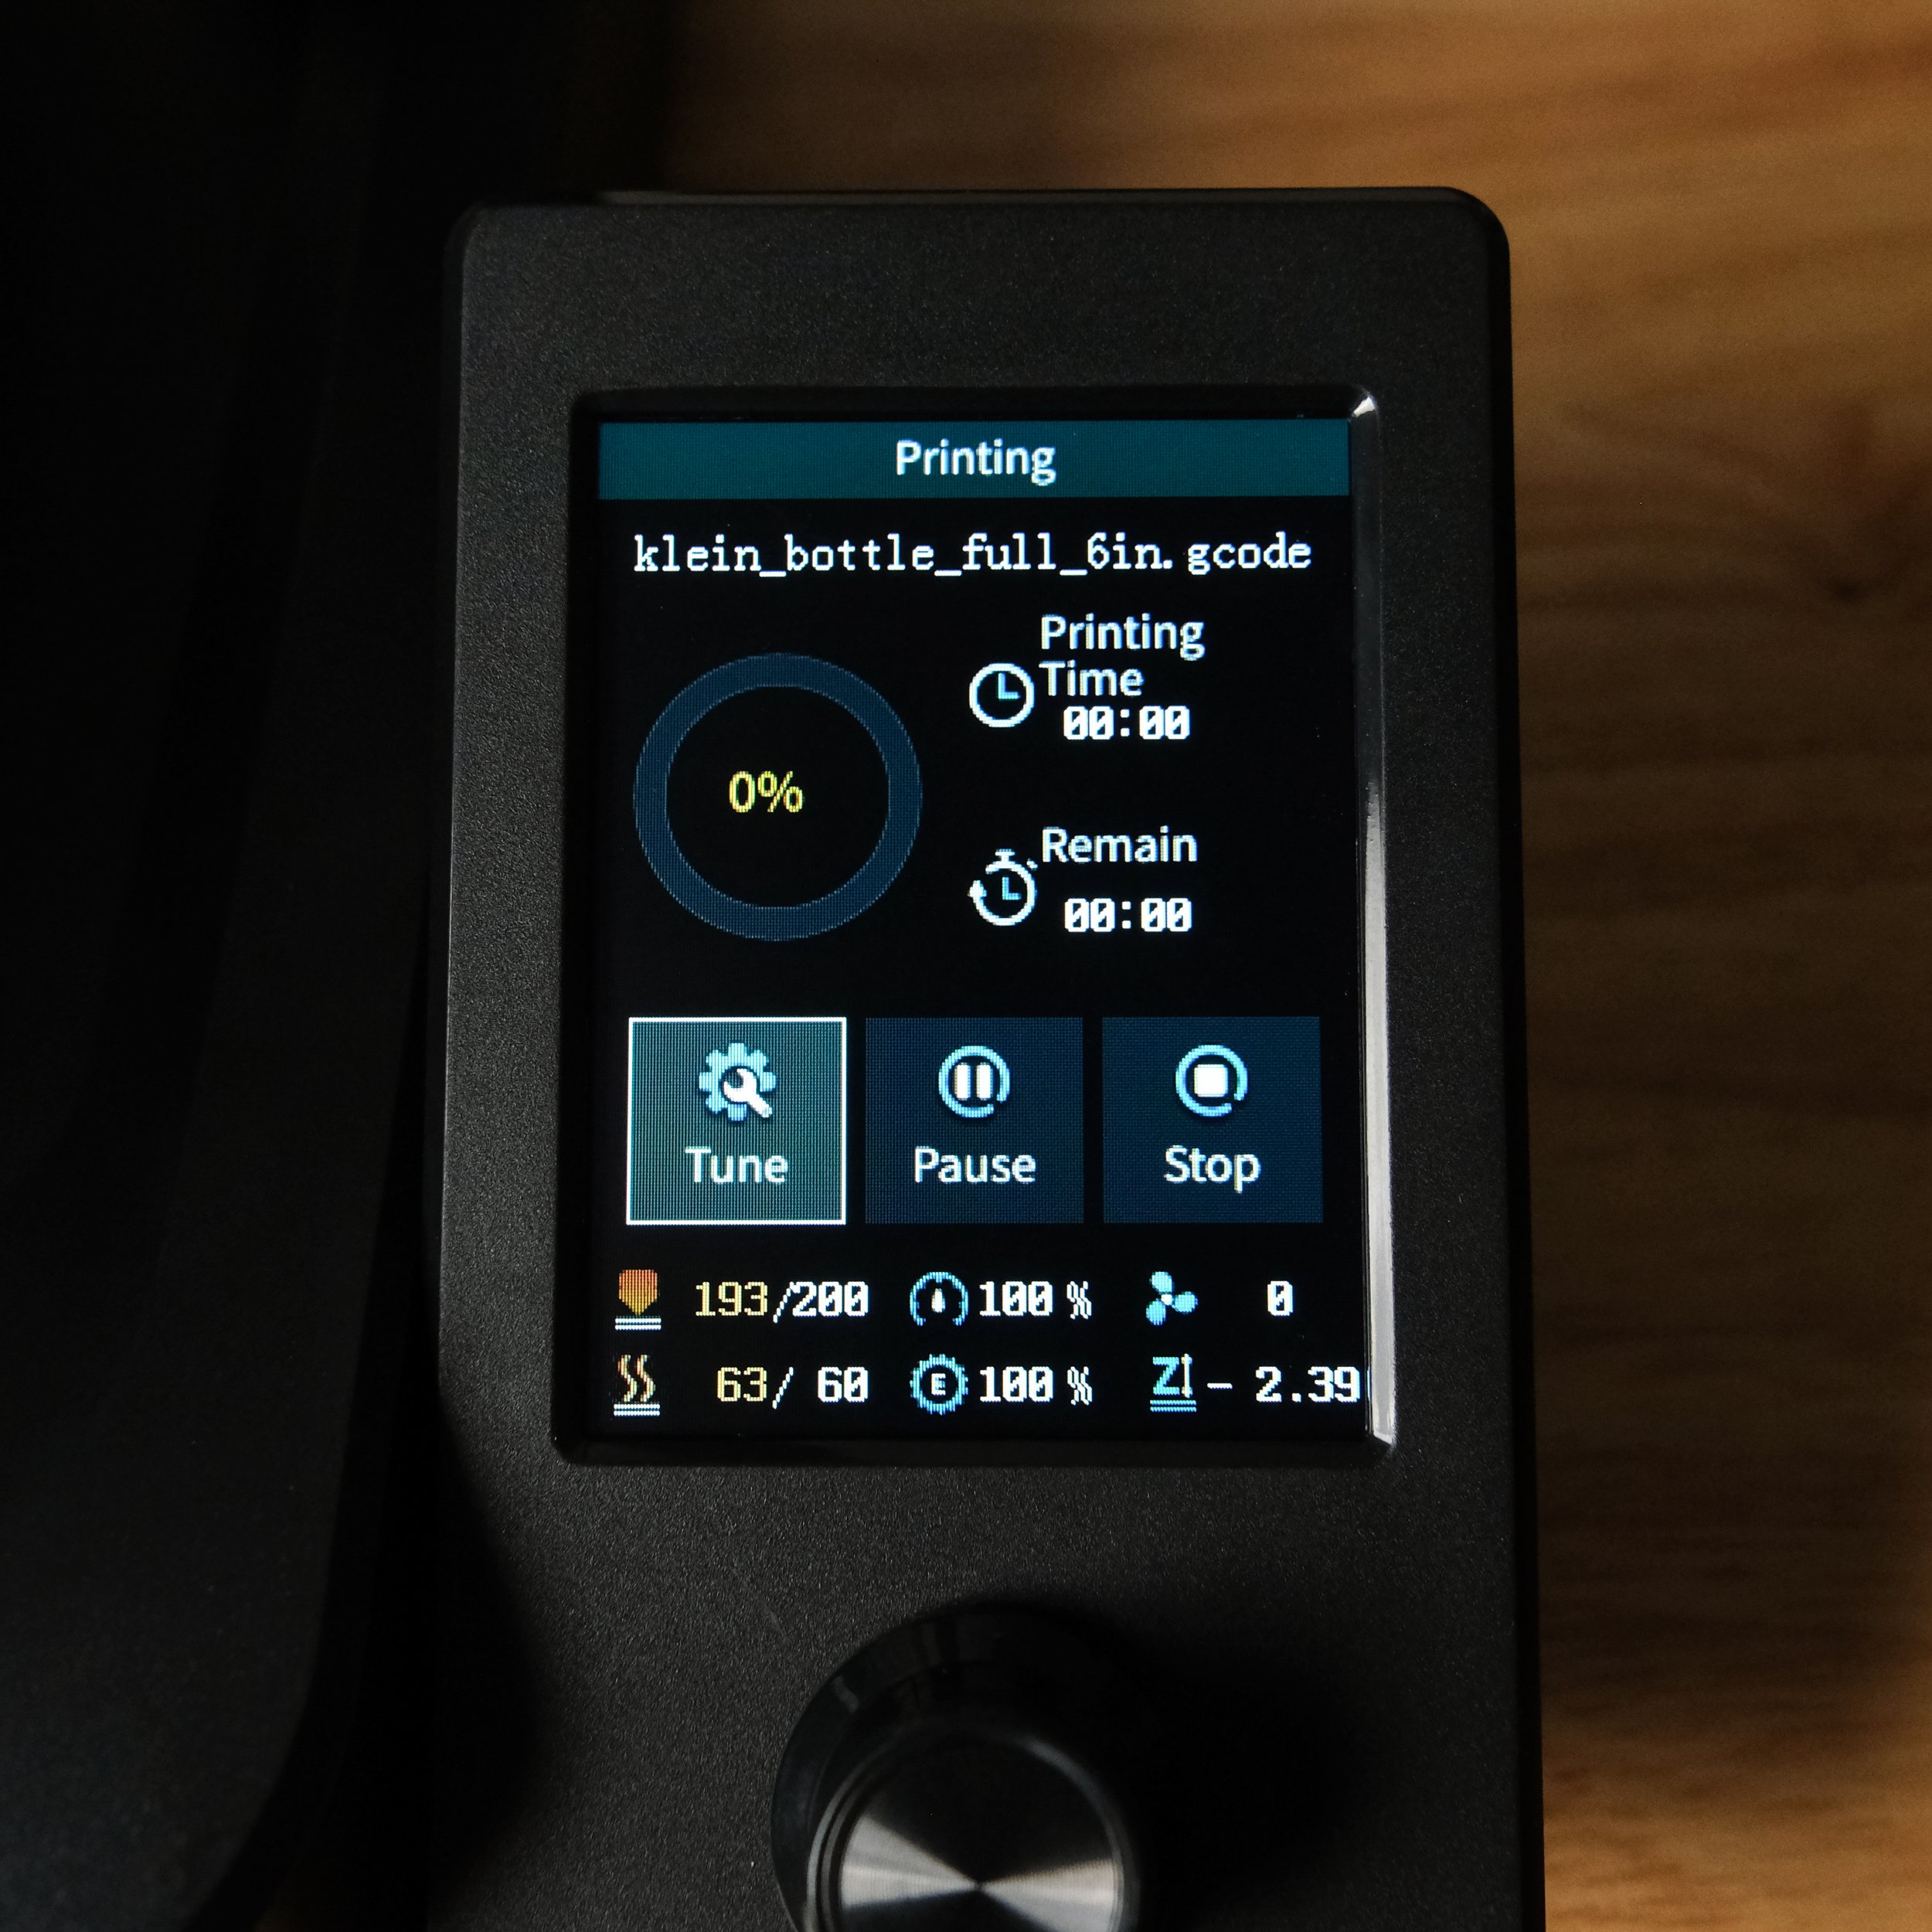
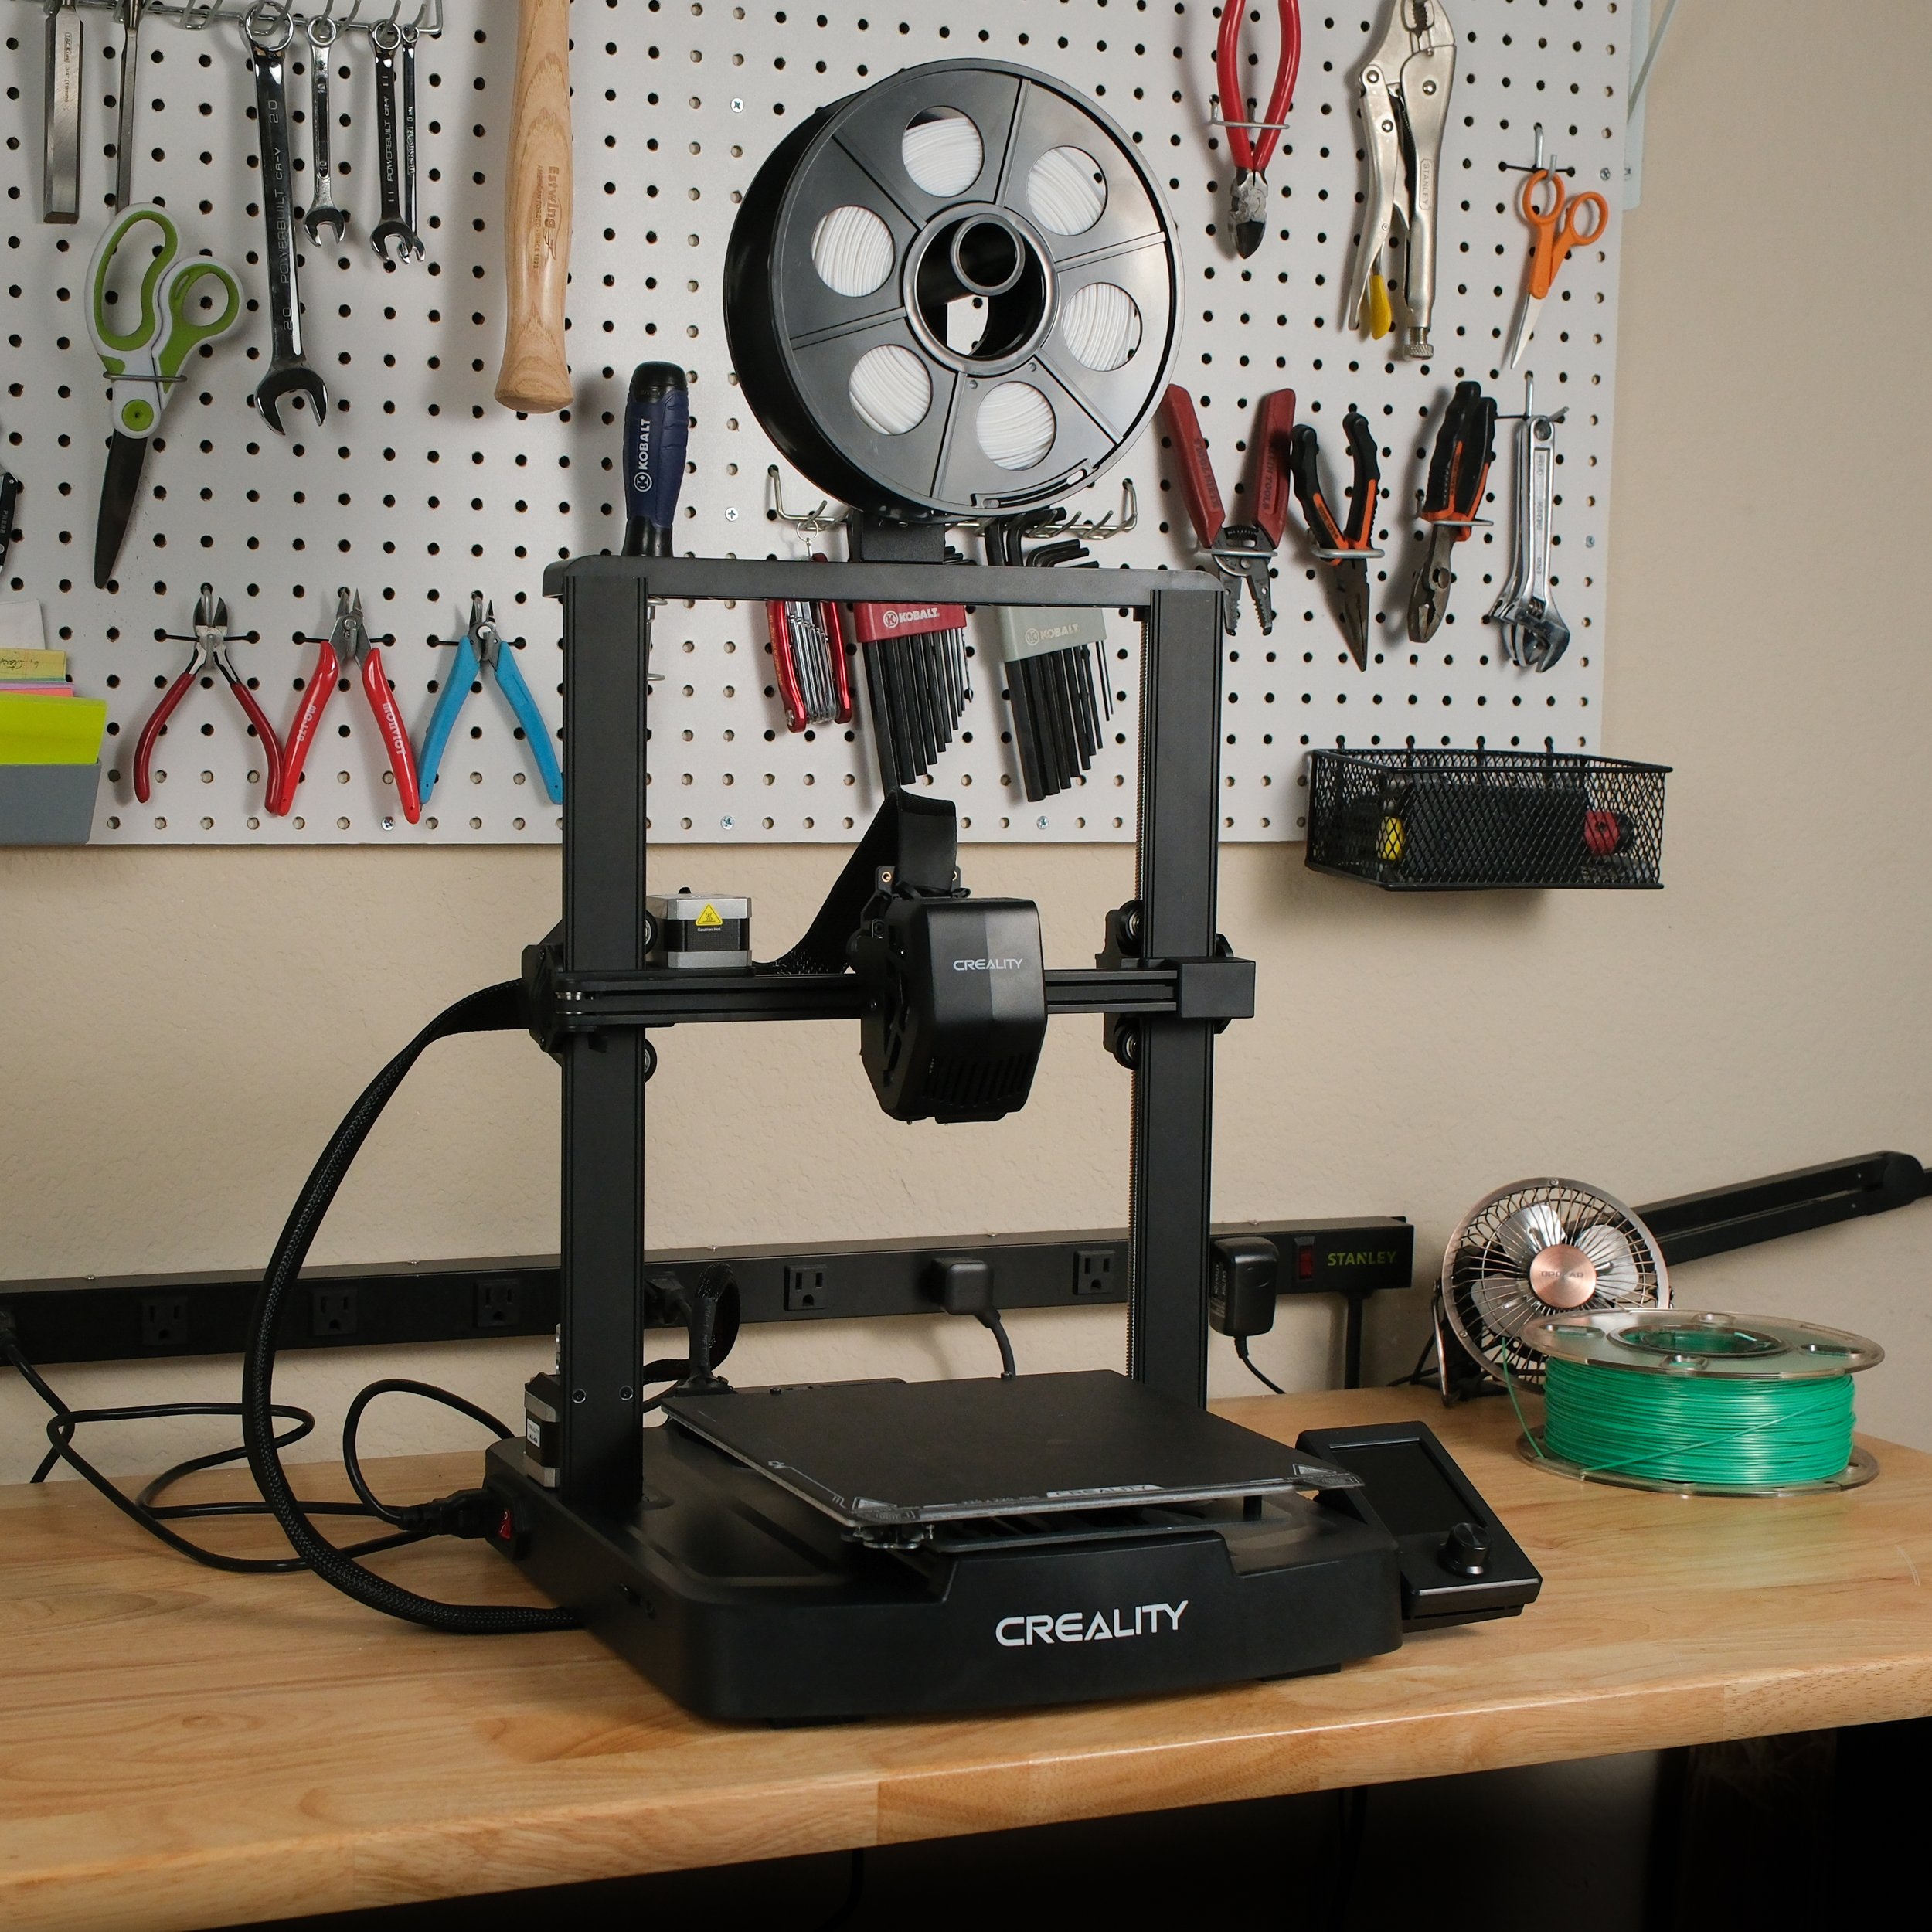
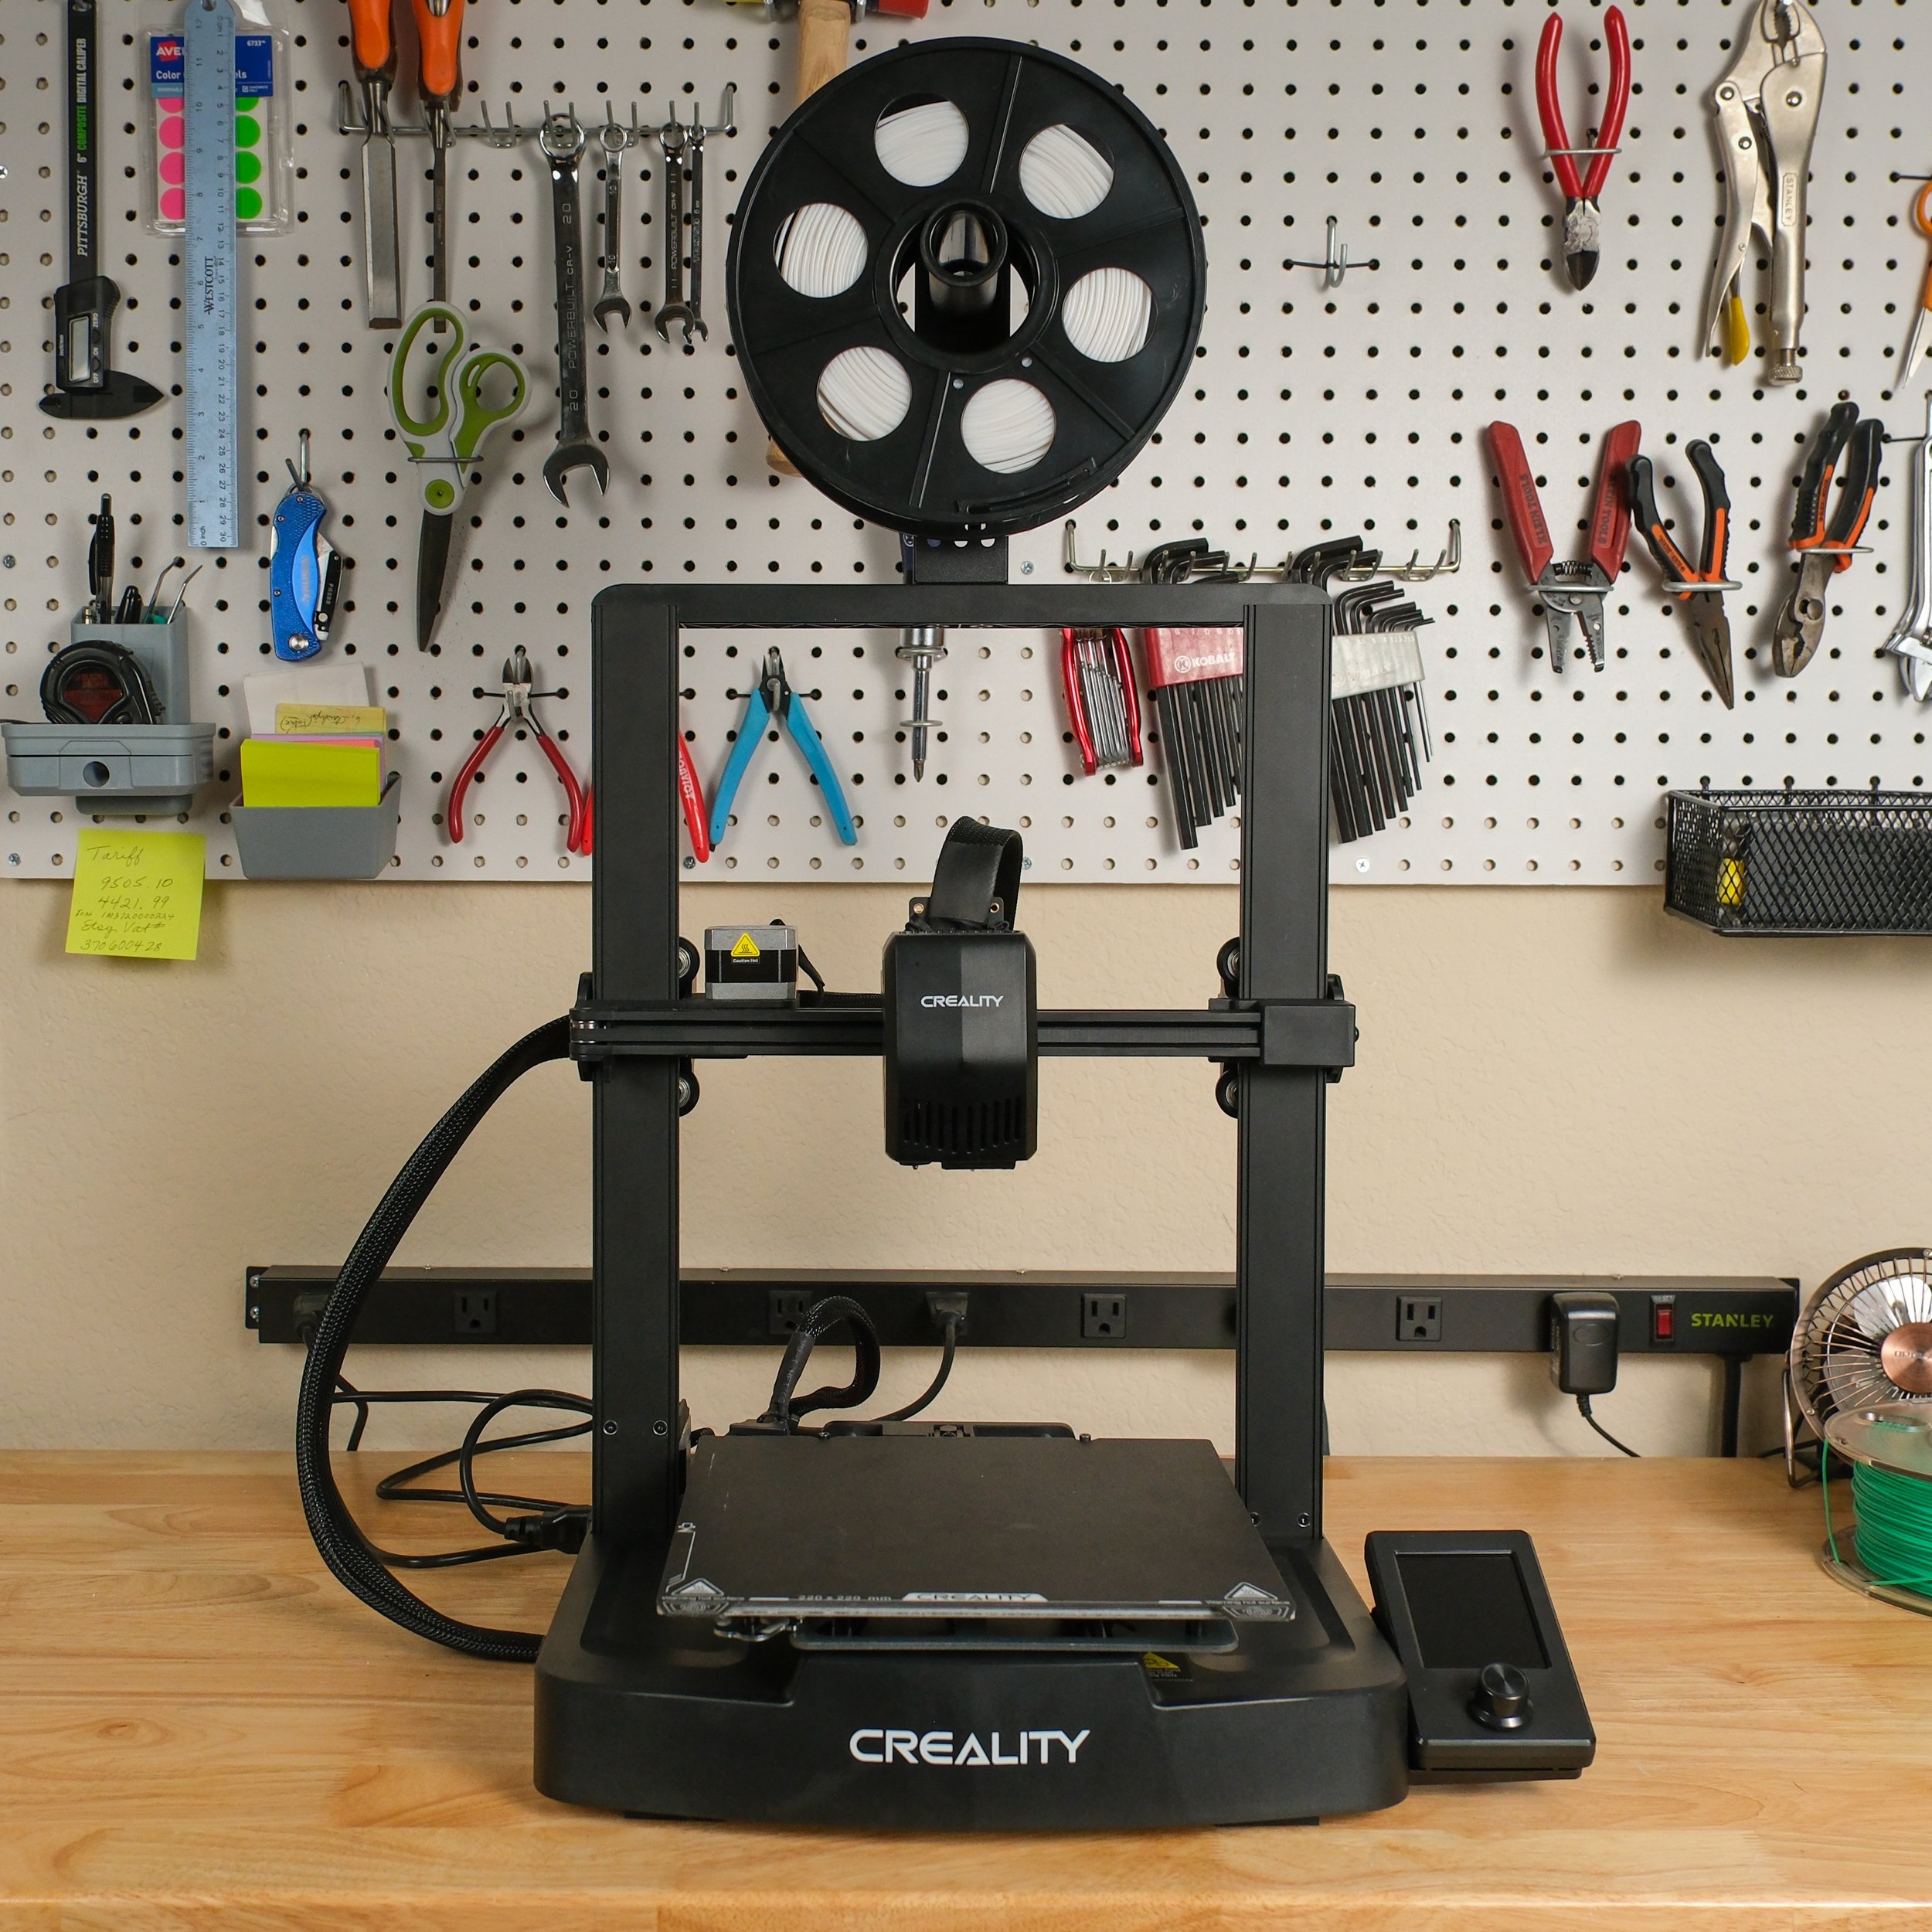
The Creality Ender 3 V3 SE uses a traditional controller with a 3.2” display.
The Creality Ender 3 V3 SE has a built-in 3.2” display and control knob, similar to many other 3D printers. The display isn’t a touchscreen, but the control knob is simple to use. You can use the controller to change settings, move and preheat the printer, and start or stop prints. During printing, the display allows you to view the status of the print, including some additional information that isn’t shown on older Creality 3D printers, such as a temperature graph.
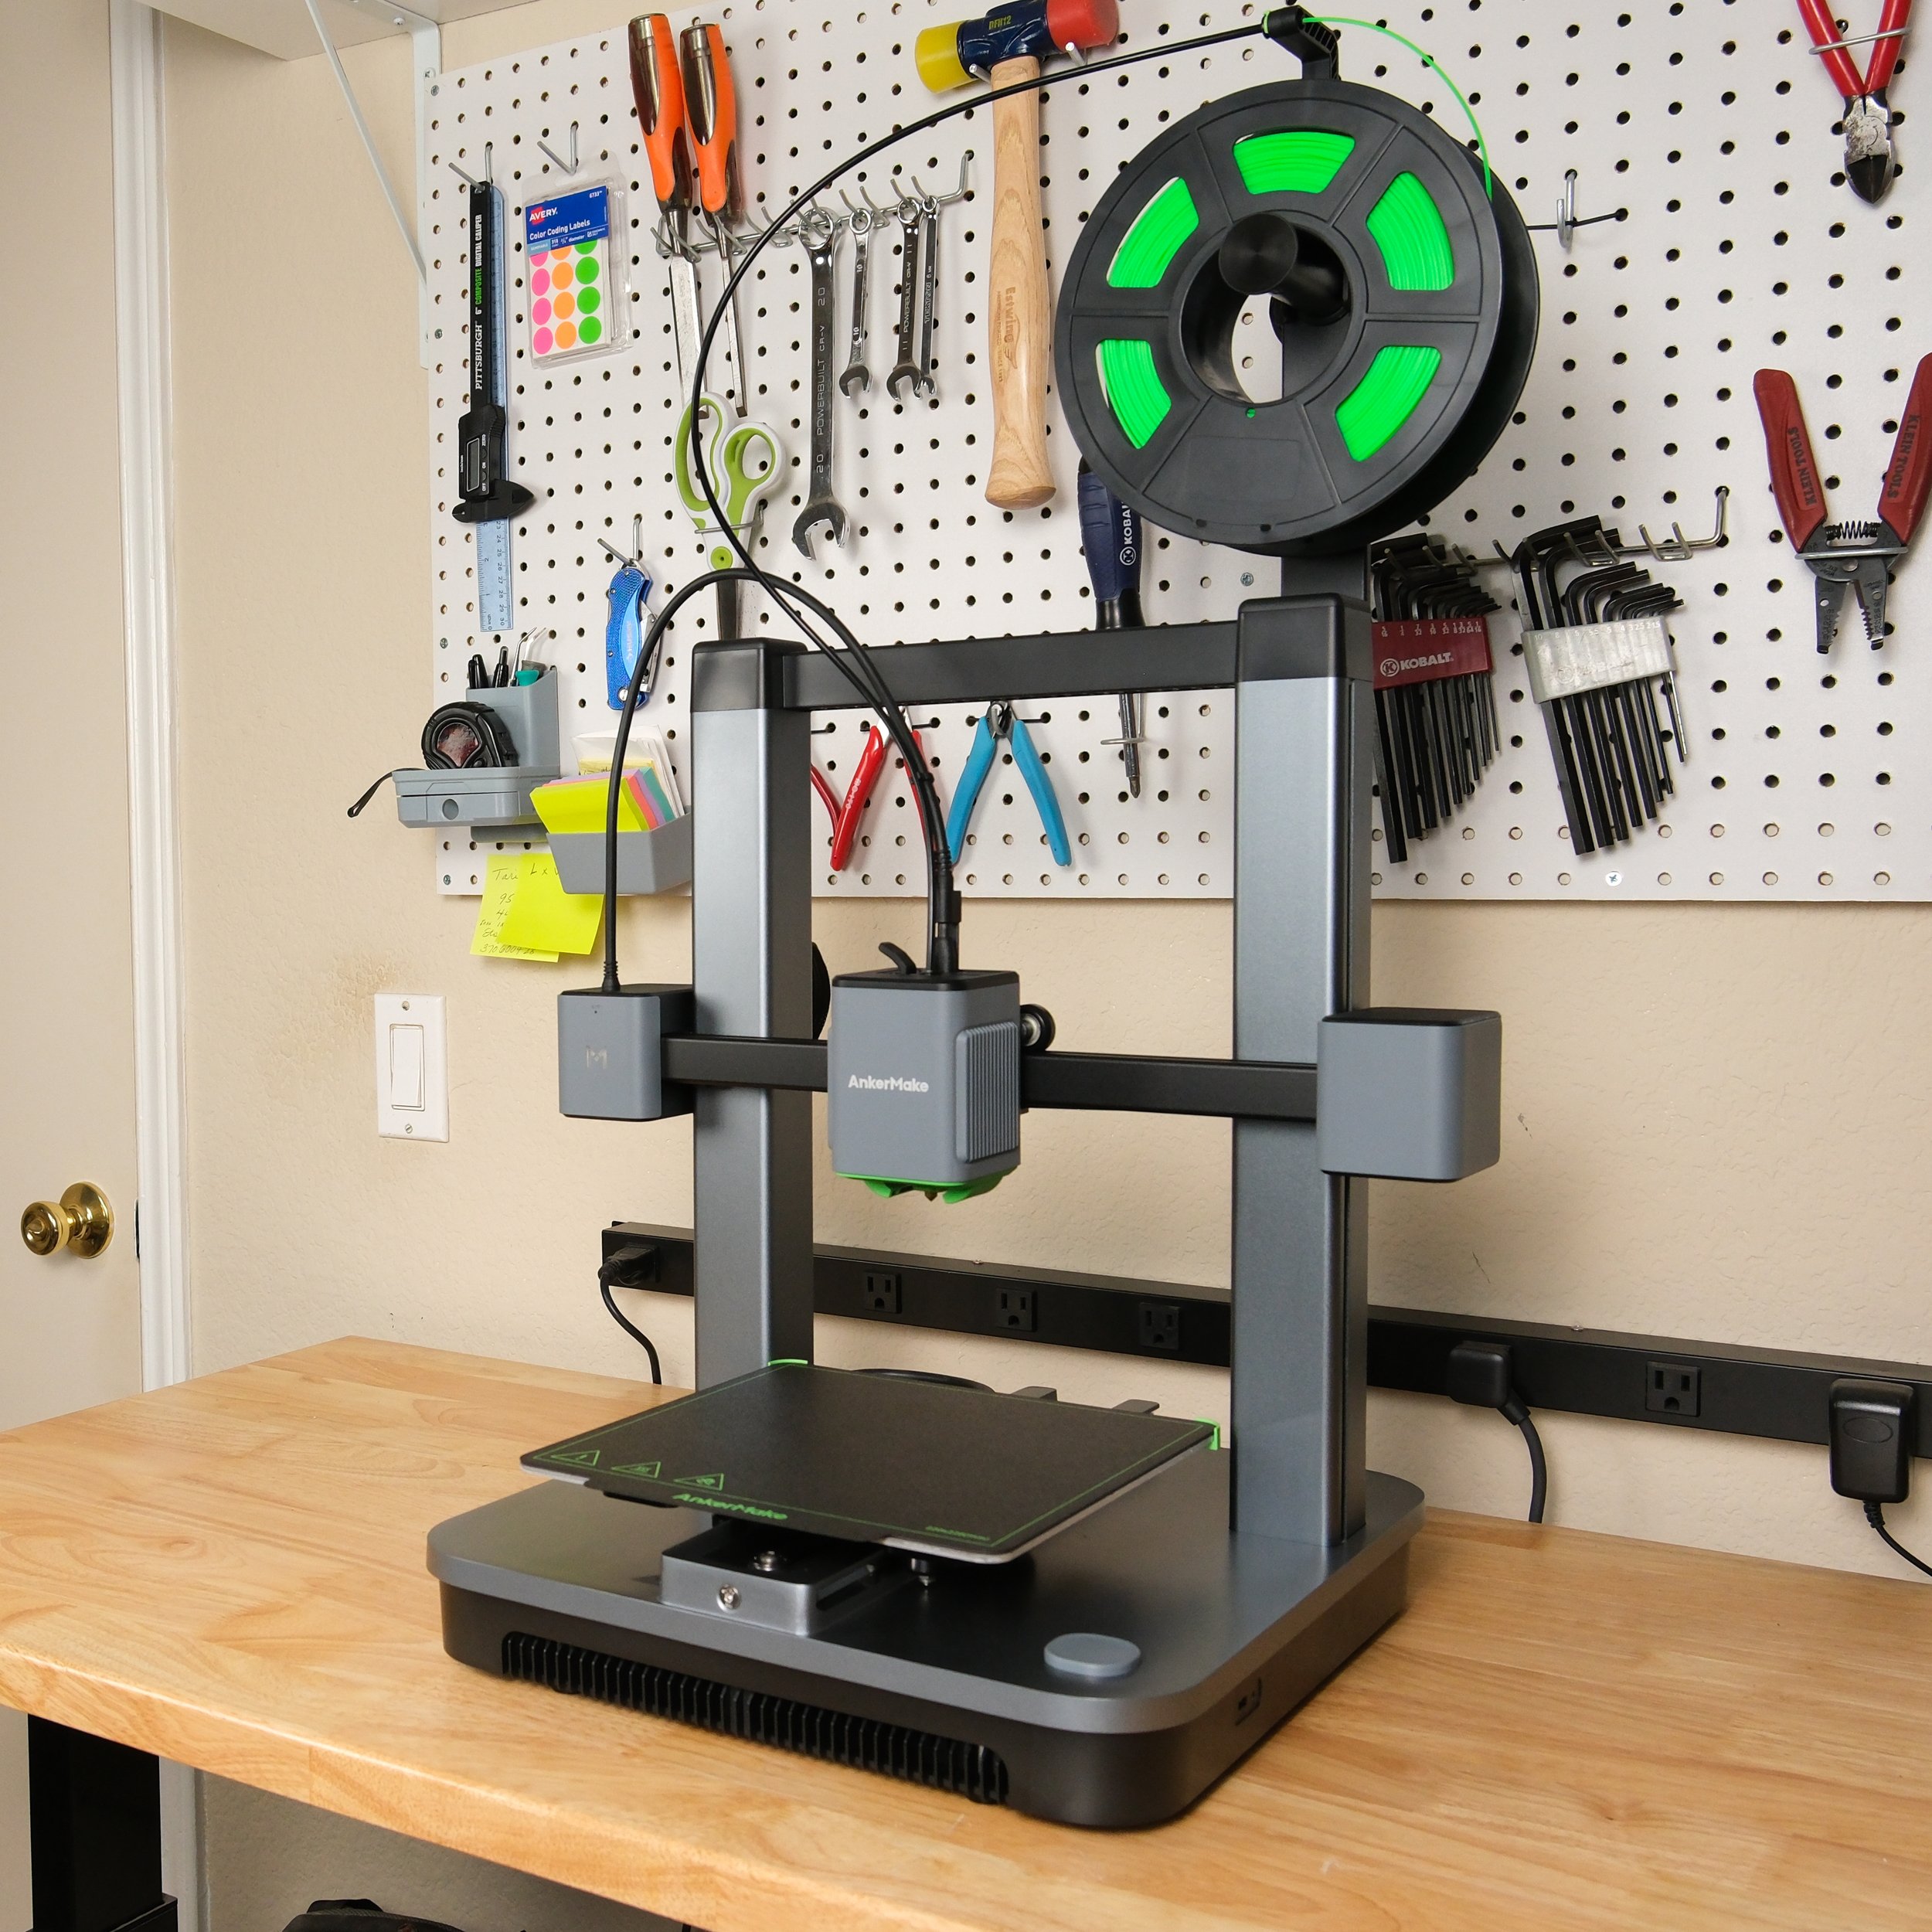
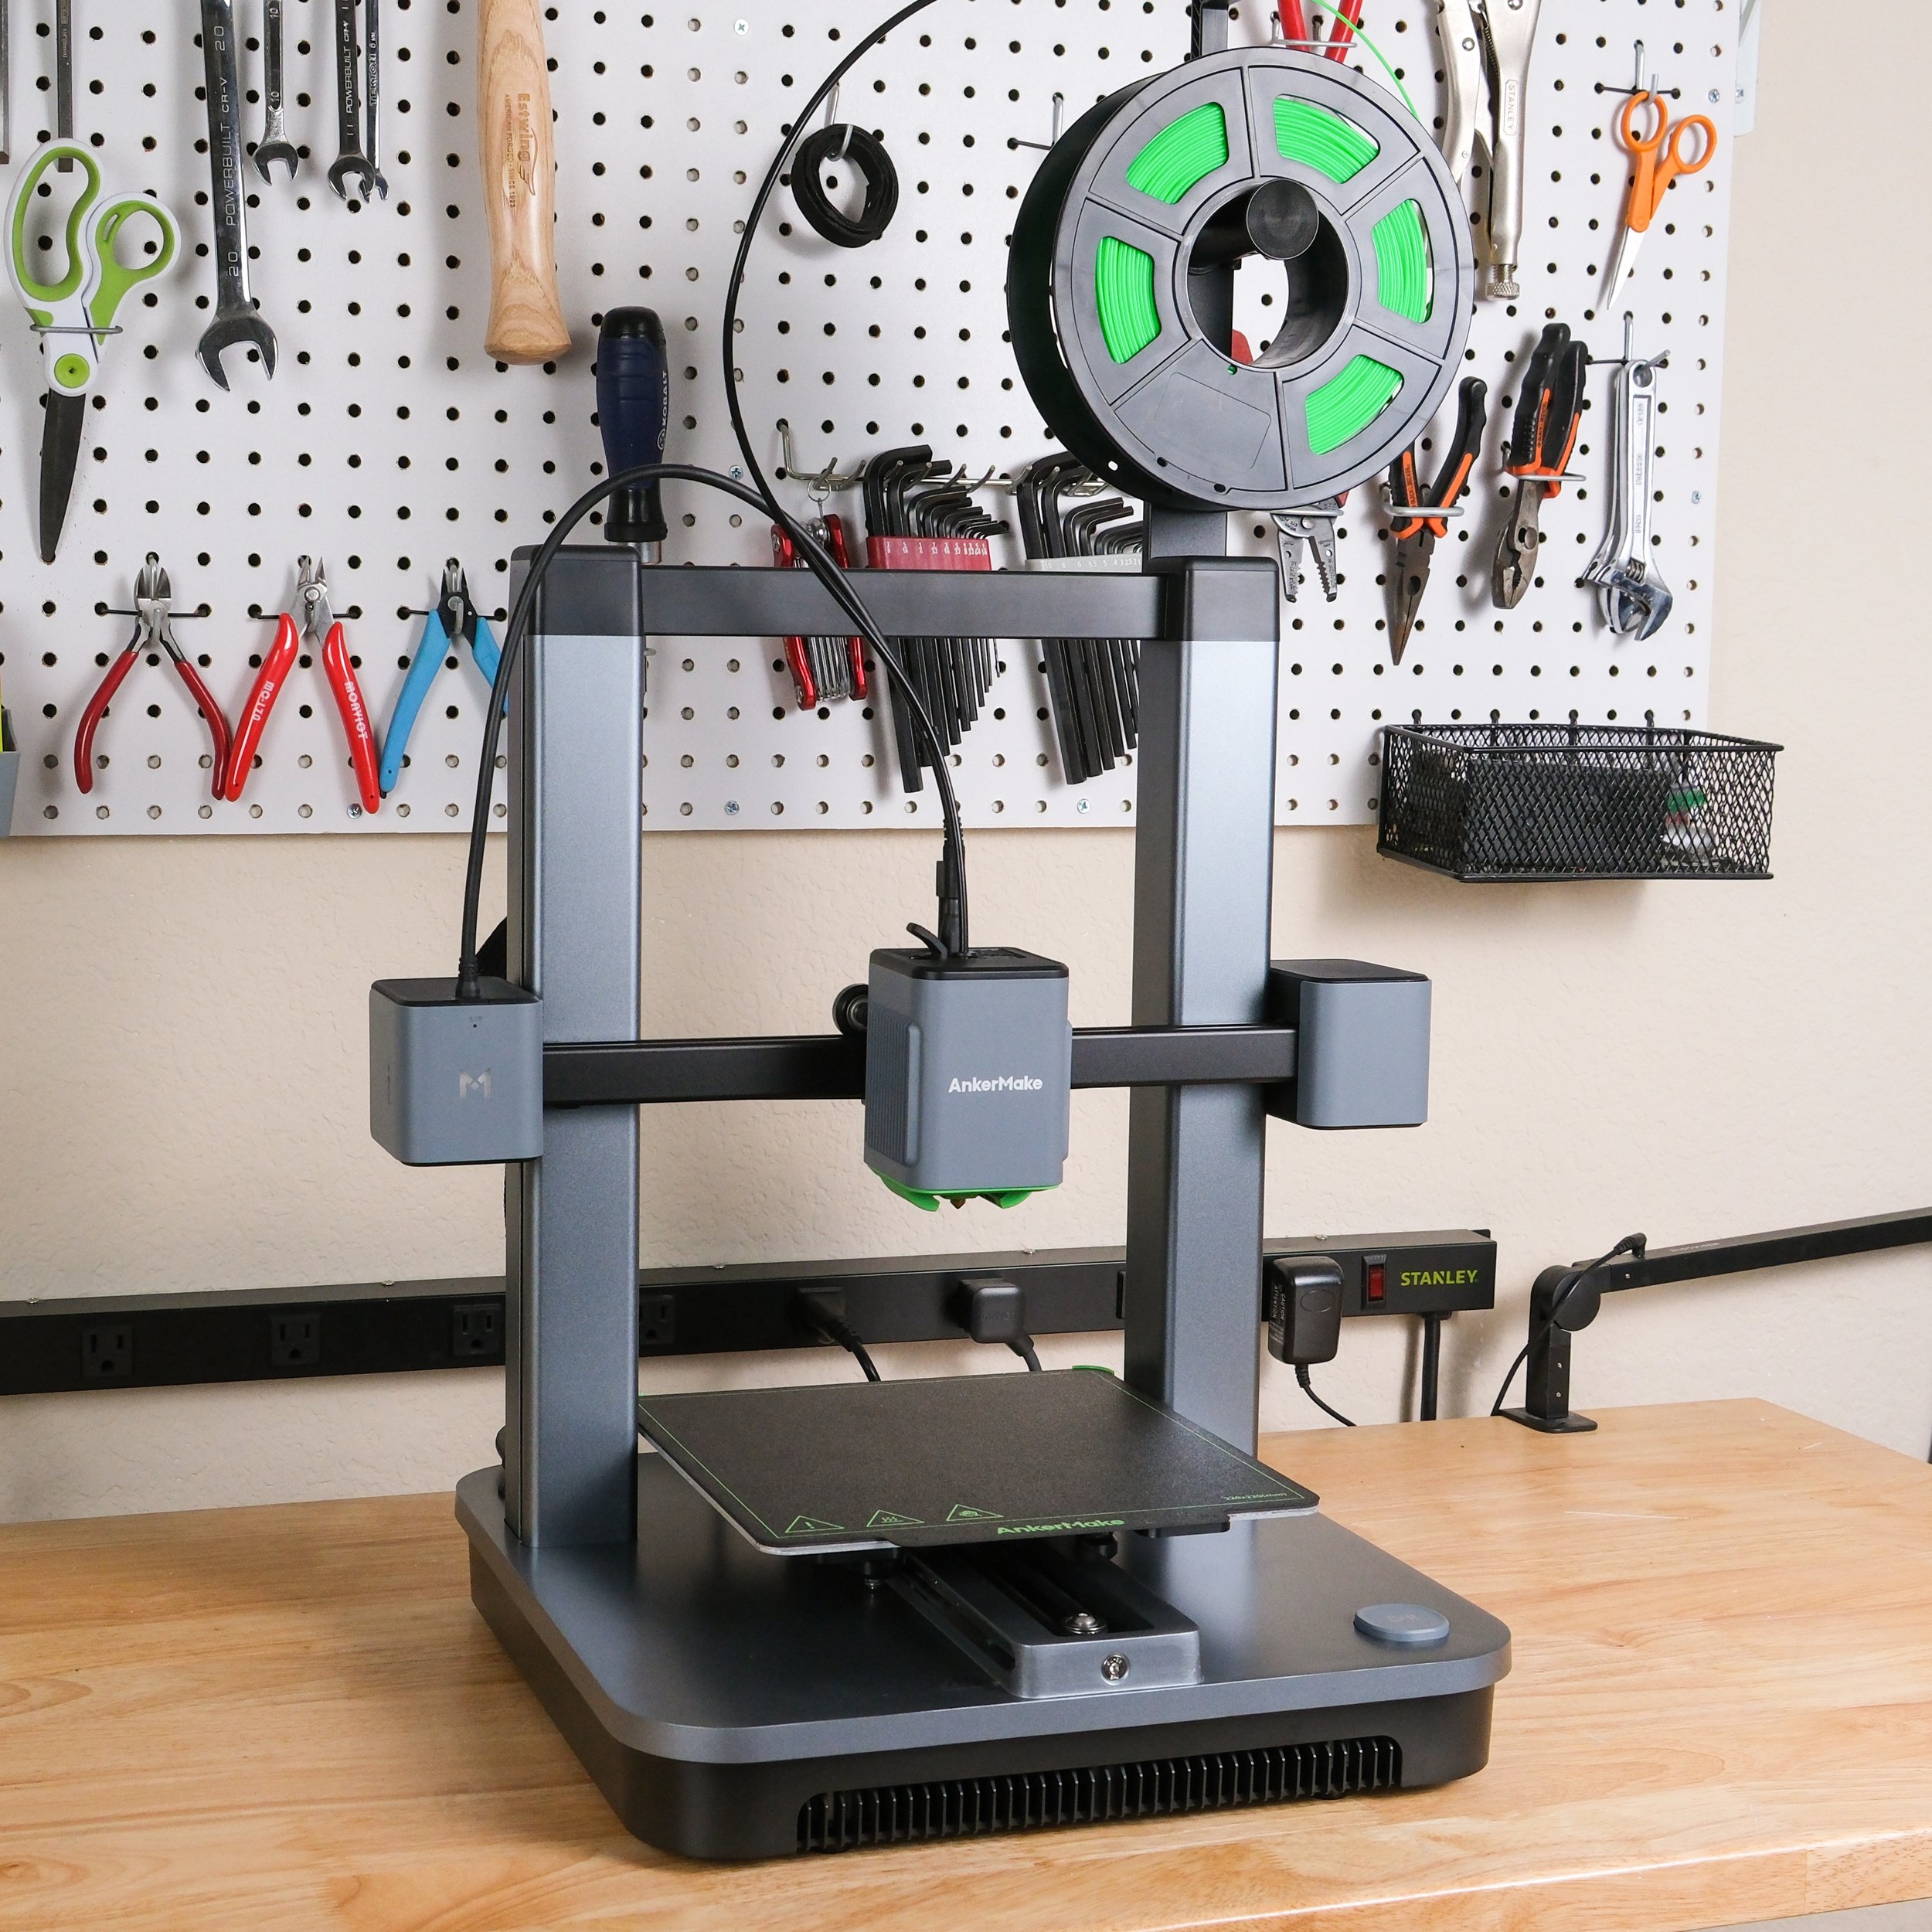
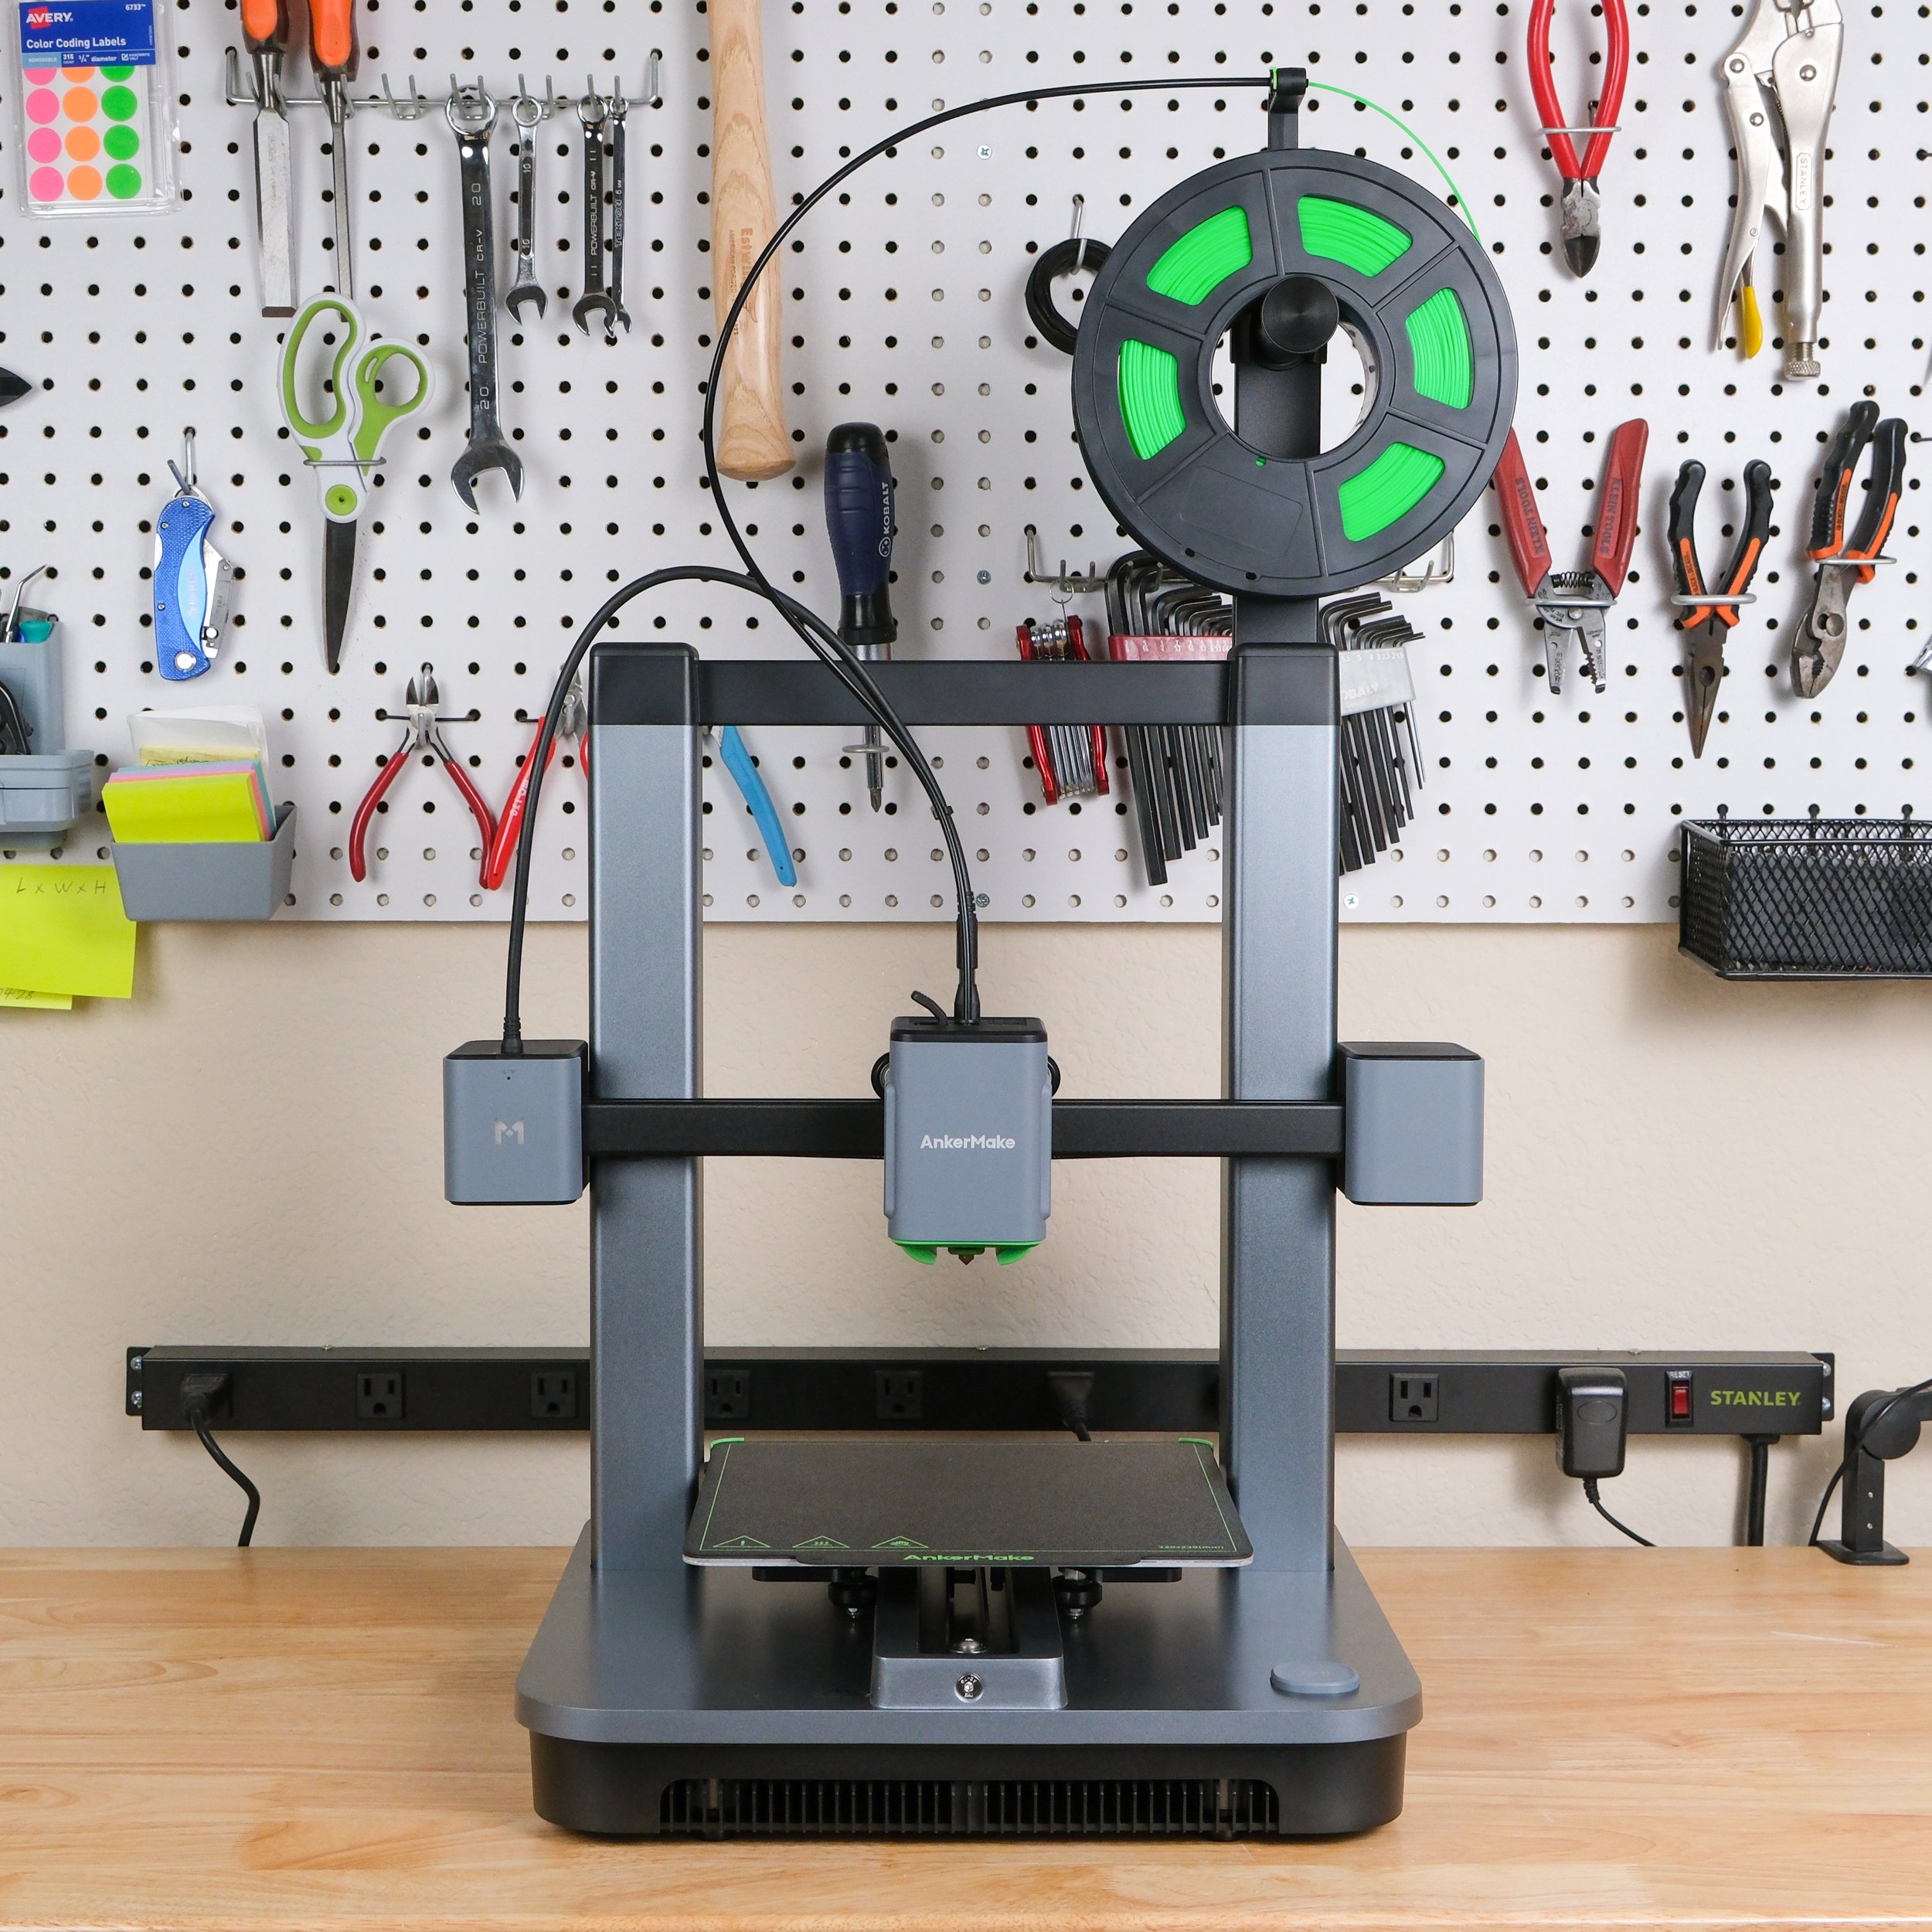
On the other hand, the AnkerMake M5C interestingly does not have a built-in display at all - the only control on the printer is a large Start/Pause button. Instead, the M5C has a companion app that runs on a smartphone or computer, and all of the printer functions are controlled using that app. This is an unusual approach that we haven’t seen on any other modern 3D printers, and as you might imagine, it has pros and cons.

The AnkerMake M5C is controlled almost completely using a smartphone app, and doesn’t have a built-in display.
The advantage to the M5C’s approach is that the smartphone app is more attractive and easy to understand than the built-in controller on printers such as the Ender 3 V3 SE. It feels natural to navigate the options in the app because the user interface behaves similarly to other phone apps, and the screen on most smartphones is larger and higher quality than most 3D printer displays. The app also allows you to monitor the status of prints even when you aren’t near the printer. The app does connect to the printer quickly and reliably, taking at most a few seconds to connect and update the printer status display.
The downside is that you cannot interact with the printer without using your phone or computer. We’ve gotten used to being able to quickly check on the status of a print by glancing at the built-in display on our 3D printers, and it can be less convenient to have to pull out your phone and open the app to see how much time is remaining on a print or whether the nozzle and bed are heating. You also won’t be able to select a file to print without using the app.
The M5C does have a single button, which is labeled with start/pause symbols but can be configured for multiple functions. The app allows you to configure the behavior of a single press, double press, or long press, and you can set each of these to options to predefined functions, including “Reprint last file” or “Auto level”. The button could be convenient for certain uses, but there are limited options for what the button can do, and it’s not equivalent to a full built-in controller.
We have more thoughts on the AnkerMake M5C’s app-centric design, which we’ll be covering in the next few sections. But speaking only about the display and controls, we prefer to have a built-in display and controller similar to the Ender 3 V3 SE’s. The app certainly enables some nice features, and is easy to use, but we appreciate the convenience of being able to walk up to the 3D printer and immediately see its status and control it. This is an area where Anker reduced the cost of the M5C, because the more expensive AnkerMake M5 does have a screen, in addition to the app. We wish they had been able to incorporate a screen for ease of use.
Connectivity
As we mentioned in the previous section, the Anker M5C is controlled almost completely through an app that runs on your smartphone or computer. The printer supports both Bluetooth and WiFi, so you can communicate with the printer if your device is on the same wireless network, or use Bluetooth if you don’t want to connect the printer to WiFi. This allows you to monitor and control the printer remotely.

In contrast to the wireless connectivity of the M5C, the Ender 3 V3 SE requires you to transfer gcode files to the printer using an SD card or direct USB-C connection.
The computer app allows you to transfer .gcode files to the printer wirelessly as well. Both the phone and computer apps allow you to slice and print objects, which we will cover in the following section, but you can also use .gcode generated by another slicer. If you don’t want to transfer .gcode files wirelessly, you can load files onto a USB flash drive and plug the drive into the printer’s USB-C port.
On the other hand, the Creality Ender 3 V3 SE doesn’t include wireless connectivity, so you must load .gcode files onto a SD card and insert it into the printer. Alternately, you can use the printer’s USB-C port to connect it directly to many modern slicer applications running on a computer. If you want to connect to the Ender 3 V3 SE wirelessly, you’d need to add something like the Creality Sonic Pad to your printing setup.
In this category, we think the AnkerMake M5C wins for most users due to its wireless connectivity, but printing via USB can be easier with standard slicers which typically have a “print” button that supports printing via USB, but no equivalent feature for WiFi, requiring the extra step of moving the sliced gcode file to the Anker software to transfer to the printer, or using Anker’s proprietary slicer, which is currently in beta and is not as full featured as standard slicers like Cura or PrusaSlicer.
New User Experience
For a new user, the Creality Ender 3 V3 SE makes many of the physical aspects of building and calibrating the printer easier than older 3D printers, but still requires a fair bit of learning on the software side. The printer is very easy to assemble, and largely calibrates itself using the automatic bed leveling feature. But on the software side, beyond a few .gcode files pre-loaded on the SD card, you will need to know how to find models online, prepare them with slicer software, and transfer them to the printer. We cover that process in a guide, but there is a definitely a learning curve to this process.

We sliced and printed this Benchy model using the AnkerMake smartphone app—no computer required.
The physical assembly on the AnkerMake M5C is approximately the same as the Ender 3 V3 SE, and the M5C is similarly able to calibrate itself using its automatic bed leveling system. But when you’re ready to print your first model, it’s immediately obvious that AnkerMake has taken major steps to make things simple for someone new to 3D printing.
Within the AnkerMake app, you can browse for 3D models from a search tool which pulls from a list of curated models from Anker, as well as popular 3D model sites such as Thingiverse and Printables. Once you find a model you like, you can download the STL and slice it directly from the app with a few simple settings presets. Once the model is sliced, you can tap the Print button to transfer it to the printer and begin printing. Without leaving the AnkerMake app, you can find any 3D model from a site such as Thingiverse and be printing it on the M5C moments later.
For a new user, this in-app slicing capability and overall ease of use is a dramatic improvement over other 3D printers we’ve used. It’s hard to overstate how much more approachable this is. Even as highly experienced users, we’ve been enjoying the freedom of quickly selecting a cool-looking model from Thingiverse and being able to immediately print it on the M5C without worrying much about slicer settings or transferring .gcode files.


Of course, the slicer in the AnkerMake app doesn’t allow you to change many settings, and most users will eventually want to have more control over the slicer settings for their prints. Fortunately, the M5C does support .gcode from all modern slicers, as we discussed previously.
There’s no question in our mind that a new user will have an easier getting-started experience with the AnkerMake M5C. This isn’t to say that the Creality Ender 3 V3 SE is particularly hard to learn, and we think a new user would be able to have a good experience with that machine as well, but the M5C makes things much simpler.
Print Speed

This intricate model took approximately 9 hours to print on the AnkerMake M5C.
The AnkerMake M5C advertises an impressive top printing speed of 500mm/s, making it one of the fastest filament 3D printers available. On the other hand, the Creality Ender 3 V3 SE has a nominal top speed of 250 mm/s and a typical speed of 180 mm/s. This means that in ideal conditions, the M5C can print twice as fast as the Ender 3 V3 SE.
Print speed is an important consideration because a faster print speed results in shorter prints, but it’s important to put some context around these numbers. For one thing, both of these printers are much faster than older 3D printers from Creality and other brands, which typically print at 60 mm/s. In addition, you’ll only be able to use the highest print speeds on certain types of parts. This is why the Ender 3 V3 SE advertises a “typical” print speed in addition to the top speed. The AnkerMake M5C doesn’t advertise a typical print speed, but in our testing, it rarely printed at the full 500 mm/s top speed. Our impression is that while the M5C is likely a bit faster than the Ender 3 V3 SE, the difference is less than the numbers suggest.
However, if you’re printing simple parts that can take advantage of the highest possible print speed, the M5C will result in faster prints than the Ender 3 V3 SE.
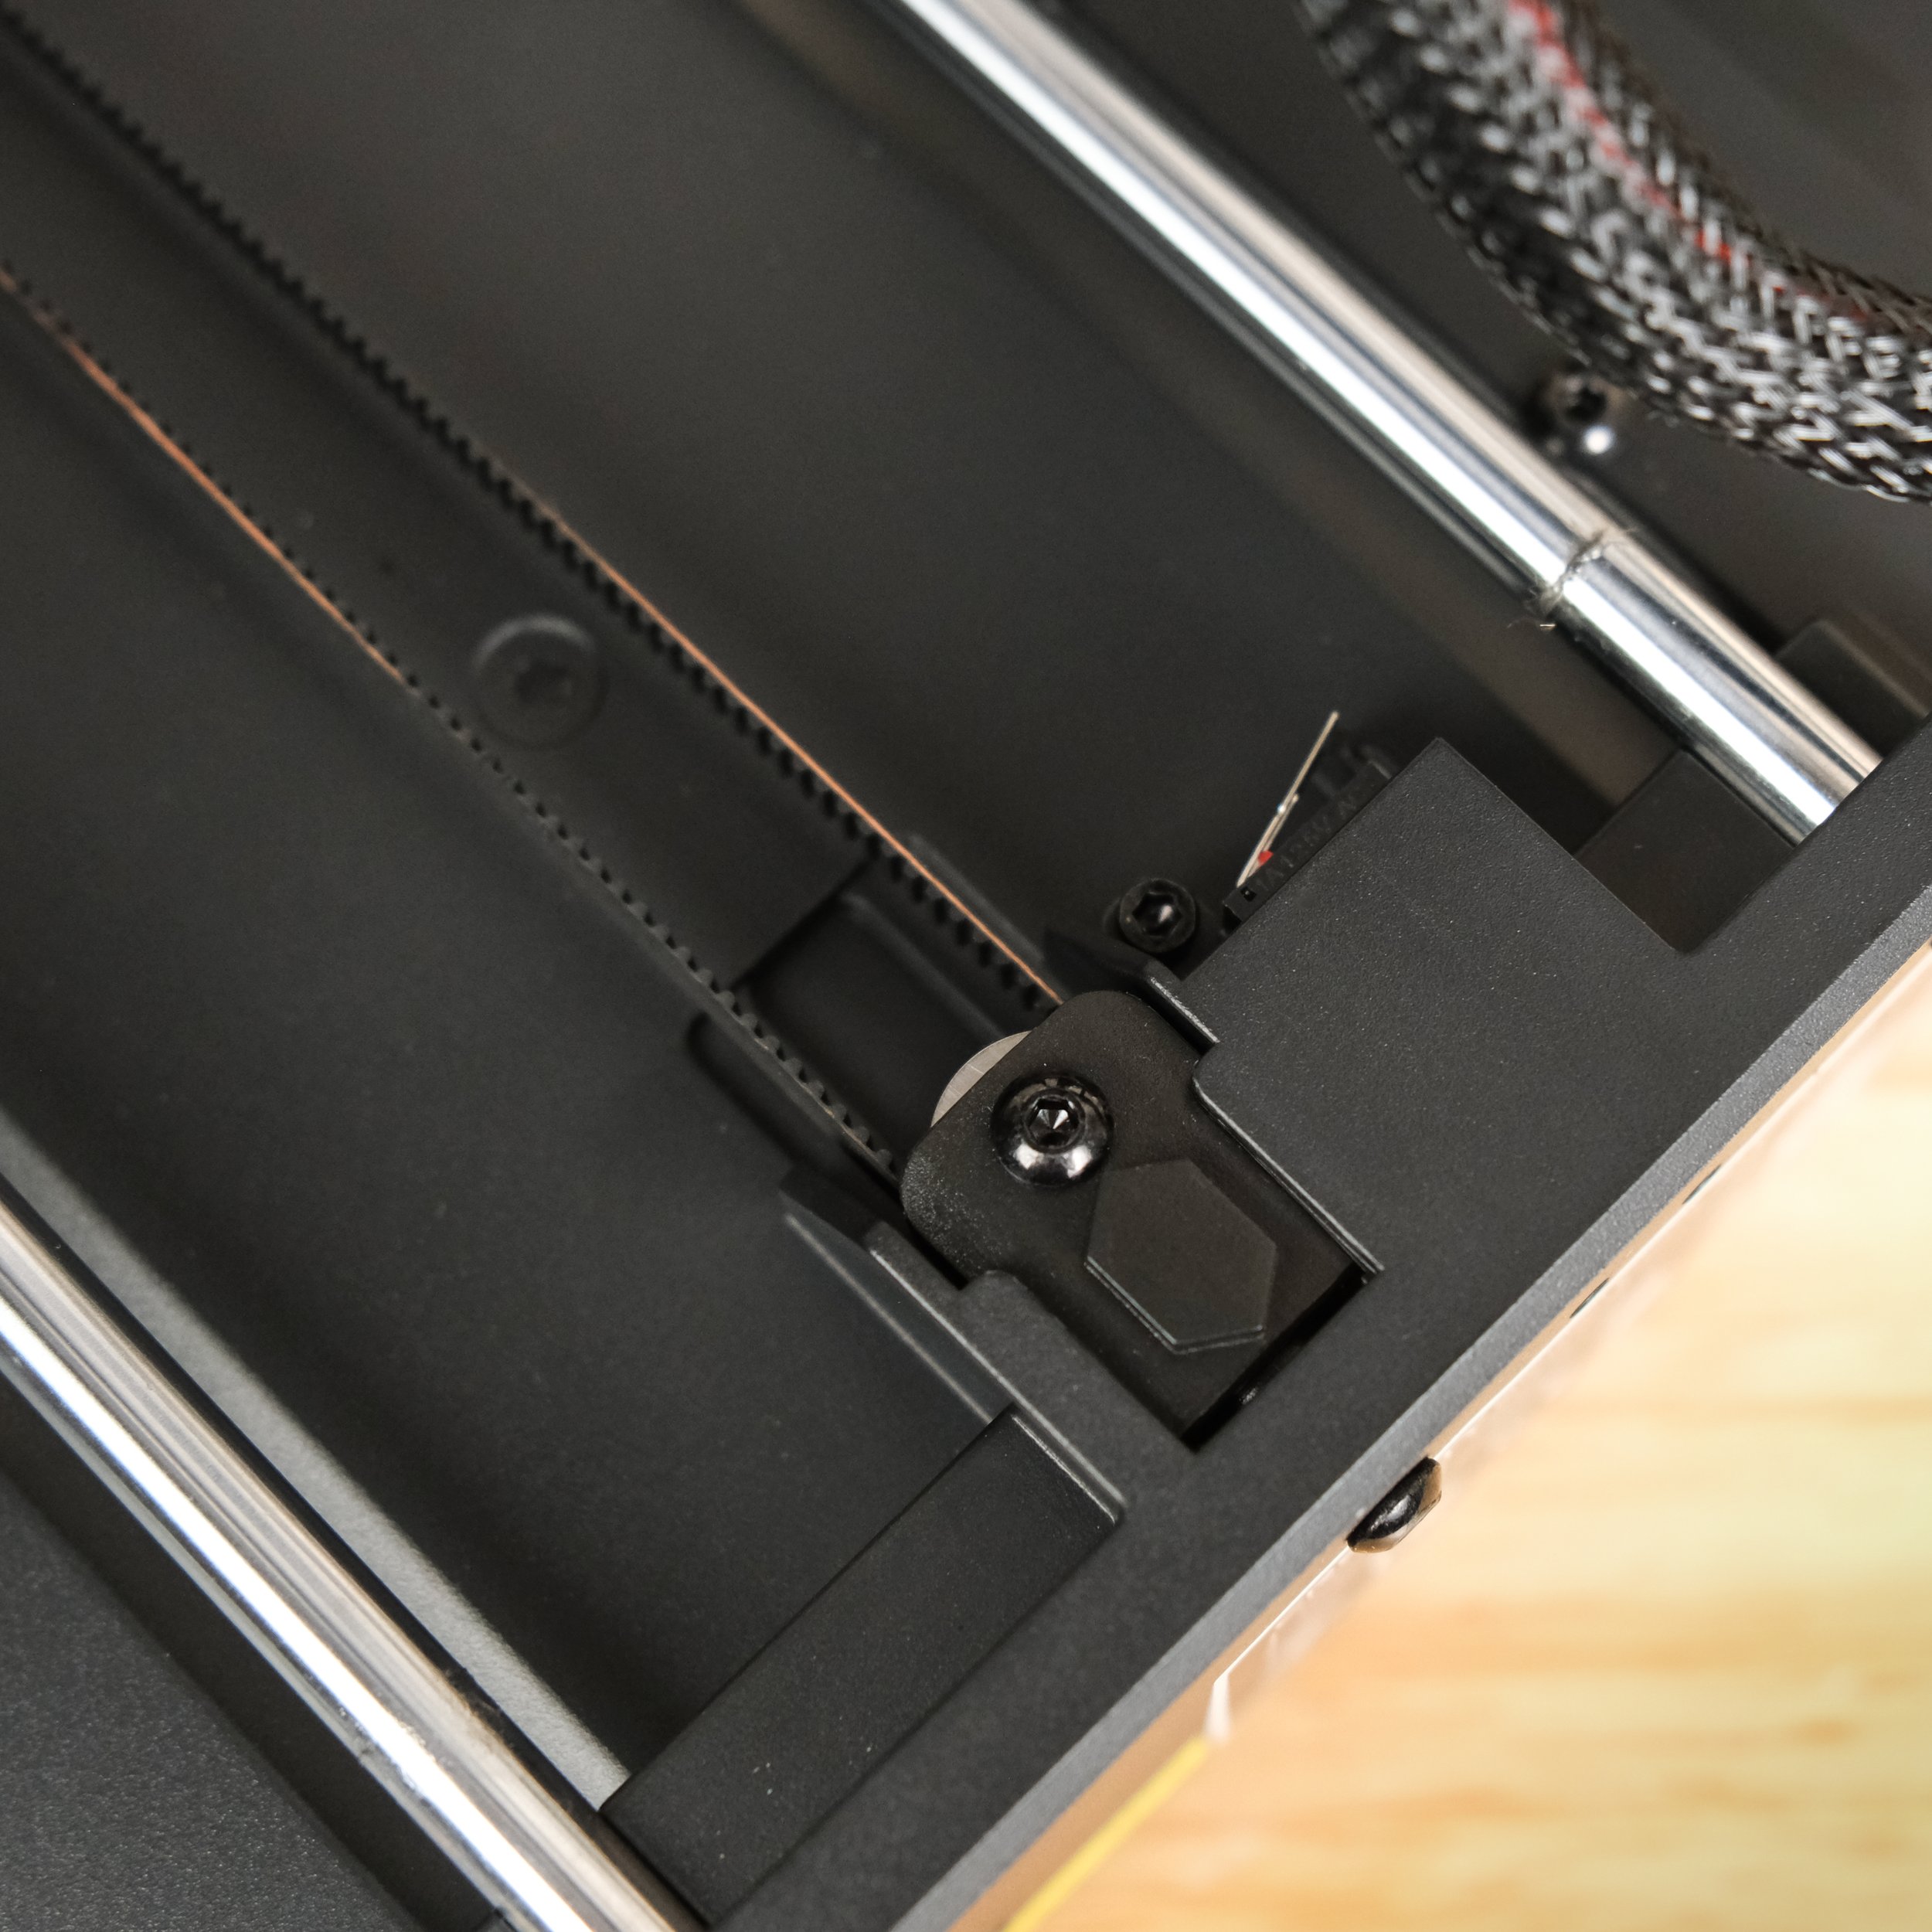
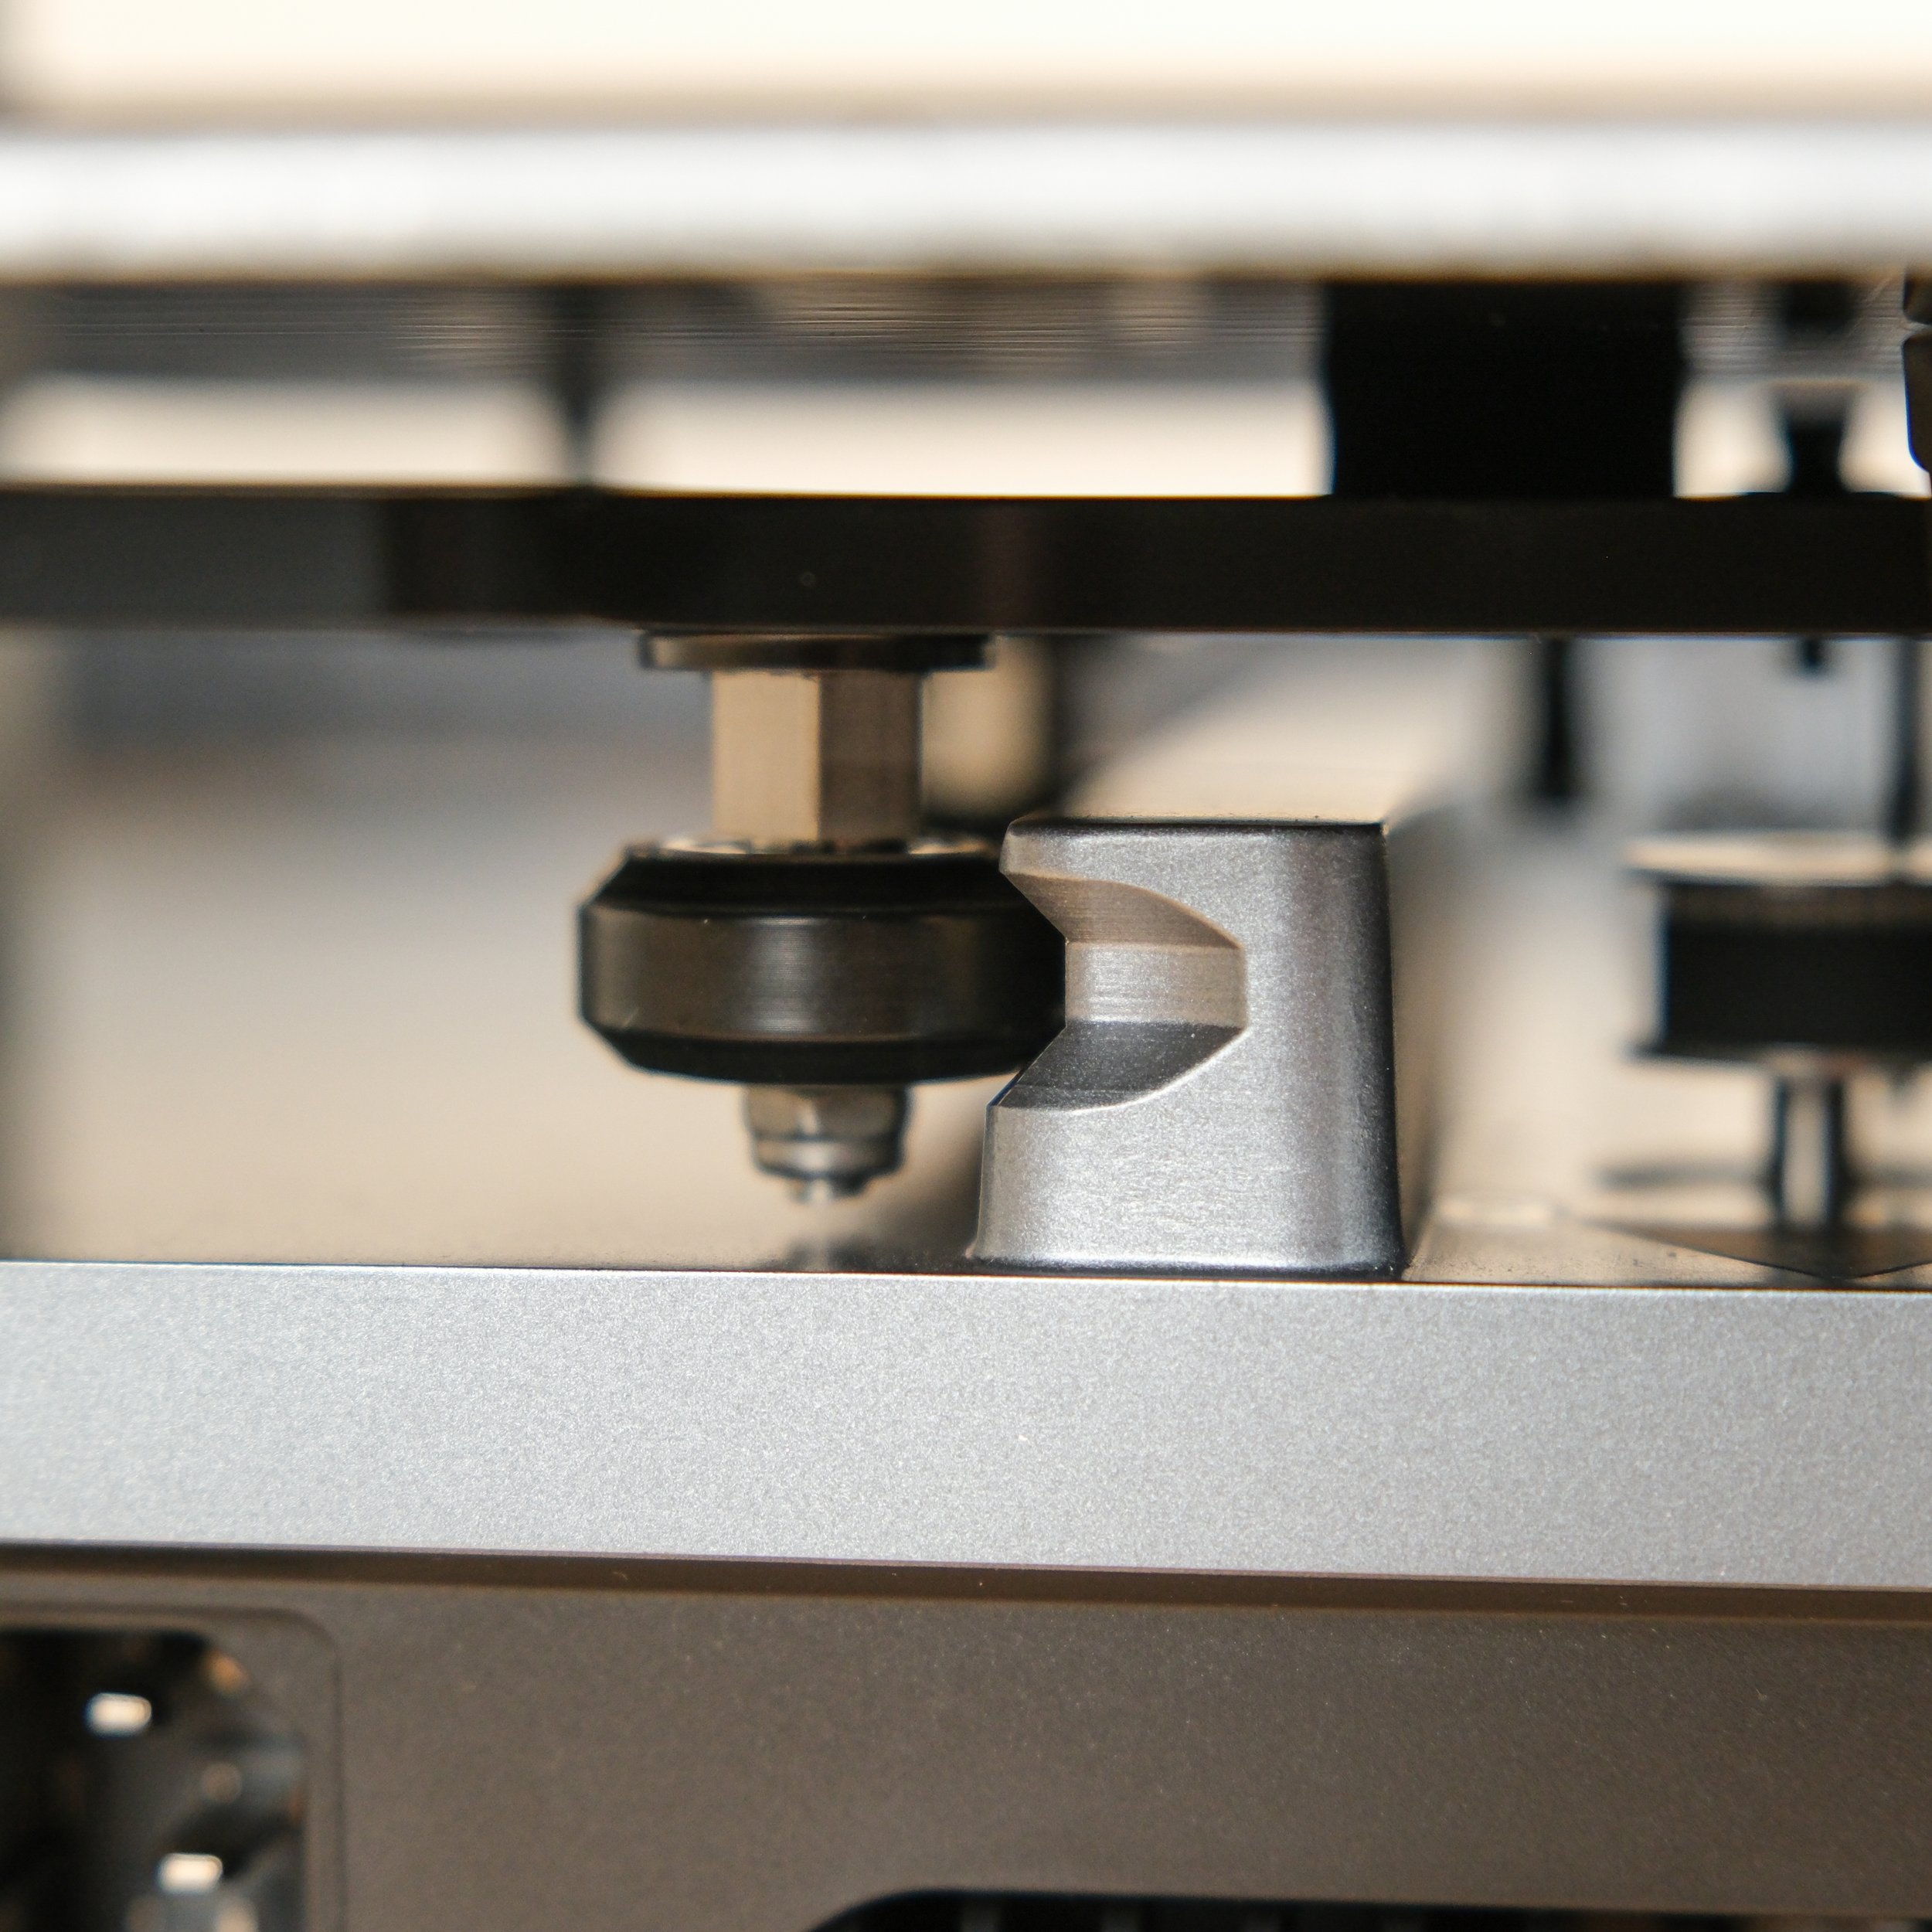
Y-Axis Linear Rods
In a first for Creality, the Ender 3 V3 SE’s Y axis, which moves the print bed backward and forward, rides on dual linear rods rather than rubber wheels running on a V-slot aluminum extrusion. At high print speeds, the X and Y axes will move back and forth very quickly. The Y axis has a lot more weight on it—the bed, the bed heater and the printed part—so stabilizing it with linear rods enables higher speeds without introducing additional vibration. This is part of what enables the Ender 3 V3 SE to attain a higher top print speed than older Creality printers.
On the other hand, the AnkerMake M5C uses rubber wheels on an aluminum extrusion track for both the X and Y axes. While this is a proven design, we have noted some minor print quality issues when printing tall objects that could be attributed to vibration. We’ll be curious to see if a future version of the M5C incorporates linear rails, but the Ender 3 V3 SE gains an edge here in motion system stability.
Print Bed Material

Both printers have a magnetic, flexible bed which can be removed from the machine to aid in part removal.
The AnkerMake M5C has a magnetic, flexible, PEI-coated steel bed with a rough surface texture. We really like this type of bed—in our bed material testing, PEI proved to be one of the best materials for bed adhesion, while still easily releasing prints once it cools. Because the bed is magnetic, it can be easily removed from the printer and flexed to help remove stubborn prints. This is a great bed material and can be cleaned easily with rubbing alcohol.
The Creality Ender 3 V3 SE uses a PC-coated magnetic flexible steel bed like its Ender 3 V2 Neo predecessors. The adhesion on these beds is very good—often too good, requiring a scraper to pry parts off the bed, which may damage the coating. Similar to the M5C’s bed, you can remove the bed from the printer and flex it to help remove parts, but even with that, parts will be slightly more difficult to remove from this type of bed. The Ender 3 V3 SE does have an improvement over previous models: the bed now has alignment notches which make reinstalling it in its proper position much easier. It’s worth noting, too, that you can easily purchase a PEI bed (Amazon link) as an optional upgrade for the Ender 3 V3 SE.
The AnkerMake M5C wins in this category because we prefer its bed material over the Ender 3 V3 SE for durability and ease of removing prints.

The textured PEI bed surface on the AnkerMake M5C is superior to the textured PC bed surface on the Ender 3 V3 SE.
Physical Size
While the Ender 3 V3 SE and M5C have the same build volume, they do differ in physical size:
Creality Ender 3 V3 SE: 349 x 364 x 490 mm (13.74 x 14.33 x 19.29 in)
AnkerMake M5C: 466 x 374 x 480 mm (18.35 x 14.72 x 18.89 in)
The M5C is a few inches wider than the Ender 3 V3 SE, which may matter to you if you’re tight on desk space. In the other dimensions, the two printers are very similar in size. Both machines typically mount the filament spool on the top of the printer, so you’ll need additional vertical space to accommodate the spool.

The all-metal hot end on the AnkerMake M5C allows you to print high-temperature materials.
Filament Compatibility
The Creality Ender 3 V3 SE has a PTFE-lined hot end that reaches a maximum temperature of 260°C, so it is compatible with PLA, ABS, PETG, and most types of TPU.
The AnkerMake M5C has an all-metal hot end capable of reaching a maximum temperature of 300°C, so in addition to standard materials such as PLA, ABS, PETG, and TPU, it can also print high-temperature materials, such as nylon.
In our experience, the standard materials such as PLA and PETG are the best choice for most 3D prints, but if you do think you’ll want to experiment with printing high-temperature materials, the M5C is more capable than the Ender 3 V3 SE.
Which Printer Should You Choose?
The Creality Ender 3 V3 SE and AnkerMake M5C are both polished, modern 3D printers that are reliable, easier to use than their predecessors, and capable of producing high-quality prints. We think the most fundamental difference between these printers is in how you interact with them.
The Creality Ender 3 V3 SE (Amazon) is a highly refined version of the classic 3D printers we’re used to. It packs an impressive set of features into an affordable price point, and with features such as automatic Z offset calibration, it’s simpler to use than previous Creality 3D printers. It’s also capable of much higher print speeds than those older machines. For a user who is interested in modifying their machine and who isn’t afraid to learn the ins and outs of slicing software, we think the Ender 3 V3 SE is a great choice. As experienced 3D printer users, we’re more likely to gravitate toward this option—it’s easy to repair, works similarly to other 3D printers we’ve used, and is a substantial upgrade over many of Creality’s older machines.
The AnkerMake M5C (Amazon) takes a different approach that we think is much friendlier to users who are new to 3D printing. With the printer being completely controlled through an app, it feels different to interact with than almost every other 3D printer we’ve used. But AnkerMake has designed their app and printer in a way that makes 3D printing simpler than we thought possible. This makes everything much more approachable for a new user, and even as experienced users we appreciate some of these ease-of-use aspects. It’s worth noting, too, that the M5C isn’t just a toy, and has an impressive set of hardware specs—it’s capable of printing faster than the Ender 3 V3 SE, and supports high-temperature materials.
As far as which of these printers is a better choice for you, we feel that it largely comes down to whether you want a more traditional 3D printer, or a newer design that is easier to use, but less upgradeable and less familiar. The price of these machines also differentiates them, with the M5C often coming out at $100-150 more than the Ender 3 V3 SE, so the Ender is a better choice if you are looking for a low cost printer and are willing to learn a bit more to get good results.
If you’d like to compare other printers, take a look at our 3D Printer Comparison Tool. This tool lets you view multiple 3D printers side by side to easily compare features.